
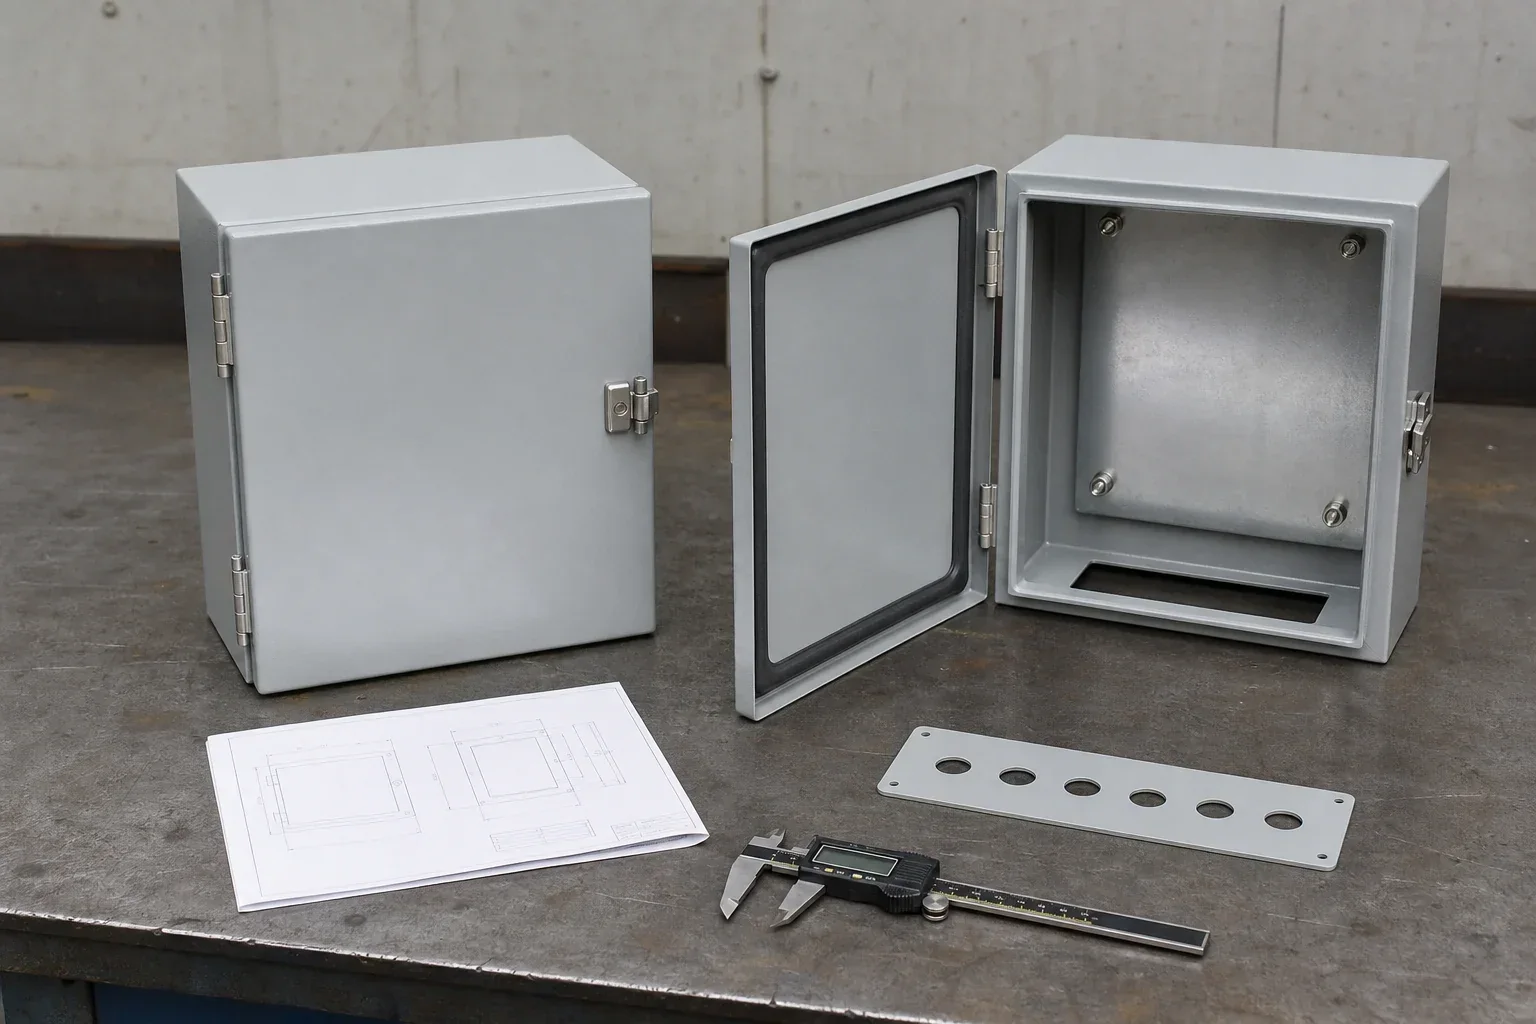

When you compare standard vs custom electrical enclosures, start with one simple question: where do you want the work done?
If a standard box fits the equipment, cables, wall, and service space, buy the standard box. It is often the safer choice.
If the site team must drill the same holes, make the same brackets, move the same cable entries, or fix the same access problem on every unit, move that work into an approved custom design.
Quick answer: Use standard stock while the design is still changing. Use a factory-modified standard box when the shell fits but a few holes or parts need control. Use a modular system when future changes matter. Use full custom only after the key details are fixed and the same fit problem will repeat.
For an electrical enclosure RFQ, do not submit only outside dimensions. Include the component layout, usable depth, door devices, cable-entry plan, heat load, mounting interface, protection target, material and finish, quantity, packaging, and drawing revision. Those inputs determine whether standard, modified, modular, or full custom is the lower-risk path.
Custom is the lower-risk choice only when all three points are true:
- A bad fit would cause real field work, delay, leaks, hard lifting, or poor service access.
- The key sizes, parts, cable routes, and site details are ready to approve.
- The factory can turn repeated site work into one drawing, one build method, and clear checks.
An interface is where the box meets something else: equipment, cables, a wall, a base, a lifting point, a door device, or service space.
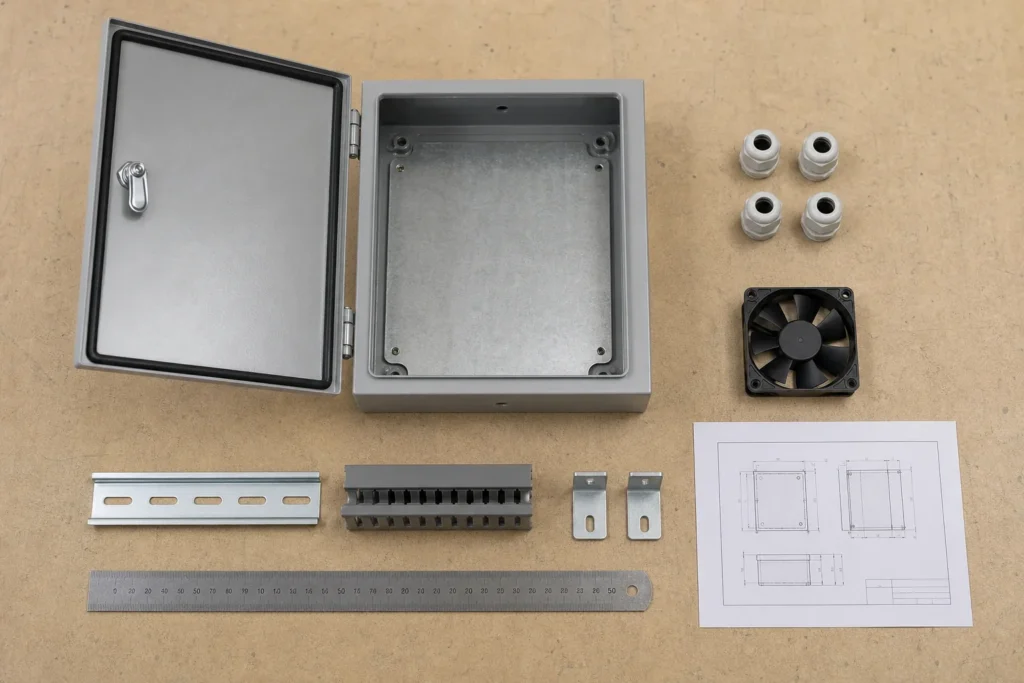
The workshop images outside the case section illustrate design decisions. The IoT case section uses supplied project materials.
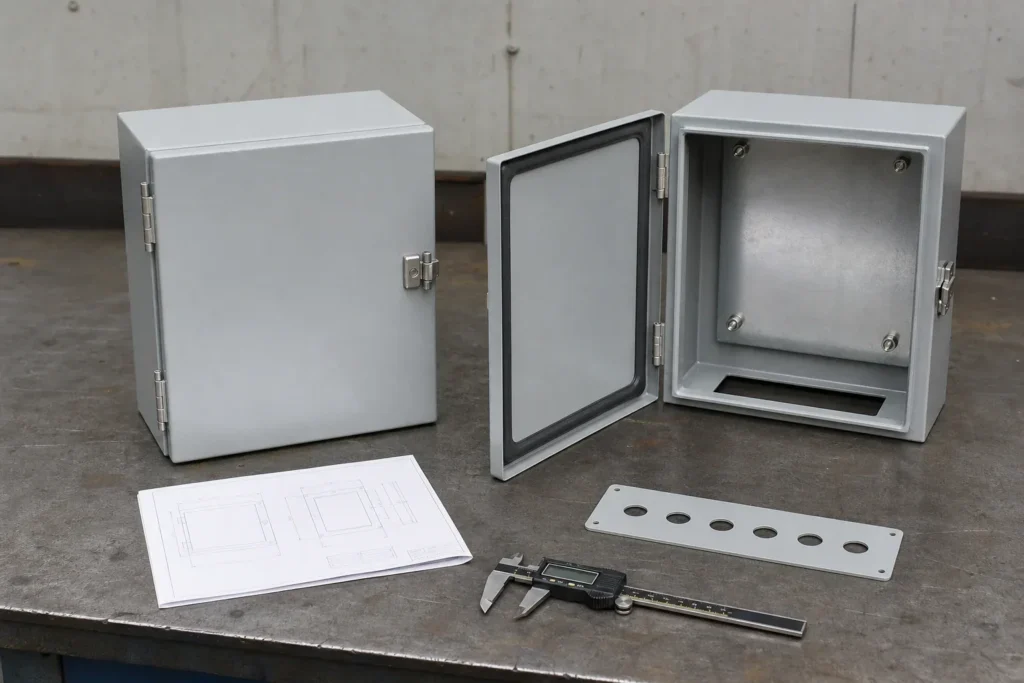
Start With Four Choices, Not Two
Most projects have four paths, not two.
- Standard stock: A catalog enclosure used almost as supplied.
- Factory-modified standard: A standard shell with approved holes, gland plates, studs, mounting plates, labels, or accessories.
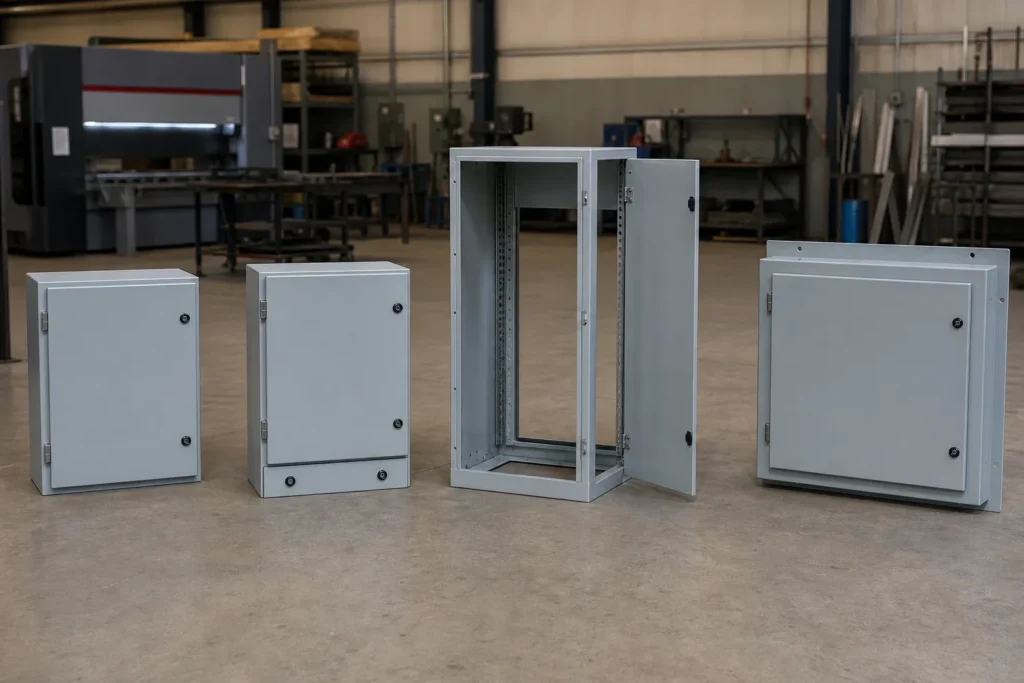
- Modular: Standard frames, doors, panels, bases, and parts that can be joined or changed.
- Full custom: A new enclosure built around fixed equipment, cable, mounting, thermal, sealing, and service needs.
| Project condition | Safer path | What you must confirm | Main limit |
|---|---|---|---|
| Common size, low quantity, layout still changing | Standard stock | Environment, usable space, mounting, accessories | May need spare space or simple adapters |
| Standard shell fits, but holes or mounting details repeat | Factory-modified standard | Approved cutout drawing, part data, direction, revision | A late change can waste a modified part |
| Expansion or later changes are expected | Modular | Module joints, loads, cable routes, sealing | You must stay inside the system’s size range |
| Several fixed details clash with catalog sizes | Full custom | Size, tolerance, door swing, cable entry, heat, sealing, revision | More design work and tighter change control |
| Site date is close, but the design is not fixed | Standard or modular prototype | Minimum layout and environment needed for a test | Final optimization waits |
A standard product gives known sizes and parts. A custom product can remove fit problems.
Factory modification and modular electrical enclosures sit between those two ends. They can solve the problem without a new shell.
Write down why you chose the path. Also write down what change would make that choice wrong. This one step stops custom from becoming the answer to a question no one has defined.
When Standard, Modified, or Modular Is the Safer Choice
Use standard stock while the layout is moving
Use standard stock for a prototype, an urgent replacement, a low-volume build, or a common component layout. It gives the team room to move parts without changing a unique shell.
But do not choose from catalog size alone. A box may have enough volume and still fail the fit check. The disconnect handle can hit the backplate. A terminal row can sit too close to the door. The cable may enter, but it may not have room to turn.
Check usable depth, wire space, door devices, heat sources, mounting, tool space, and access. The electrical enclosure sizing and clearance guide gives you a fuller list.
Use factory modification when the shell already works
Choose factory modification when the outer size, door, material, and basic build are right, but the site team would otherwise repeat the same drilling or mounting work.
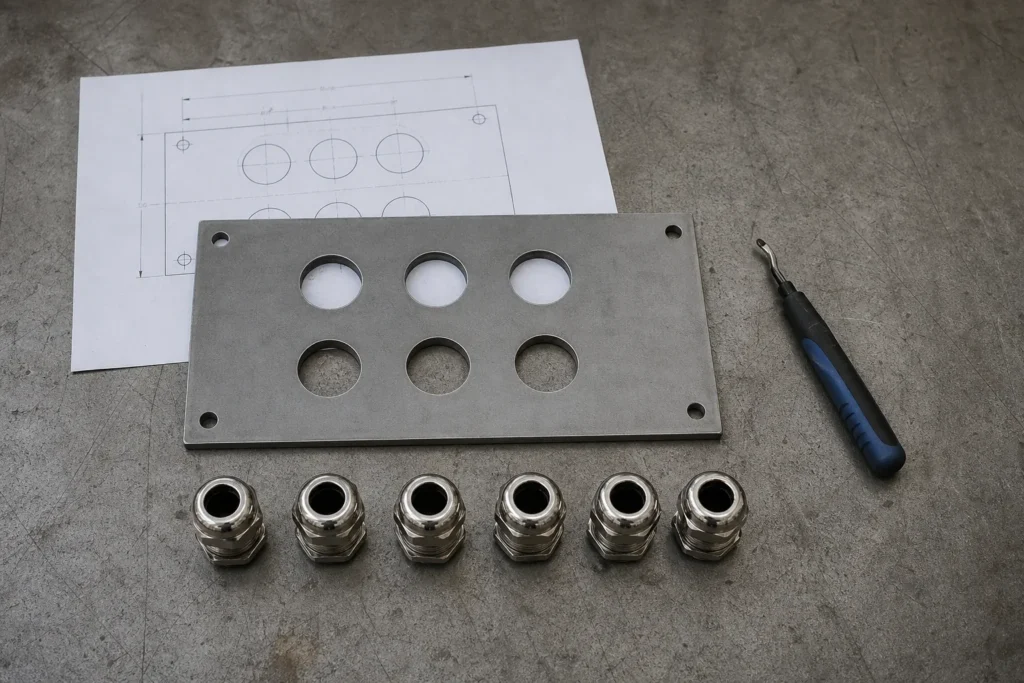
Typical changes include cutouts, gland plates, studs, mounting plates, labels, and fitted accessories.
The value comes from one approved file. The drawing should name the exact part, hole direction, datum, key tolerance, and revision. If those details are missing, factory drilling is just field drilling in another building.
Use modular when change is part of the plan
Choose modular when the equipment will grow, move, or change later. Removable panels, repeatable bays, standard bases, and common accessories make later work easier.
Check the limits first. Frame load, joints, cable routes between bays, gasket joints, lifting, and spare parts can become new problems. If the site needs an odd footprint or a fixed cable-entry face, full custom may still be the cleaner route.
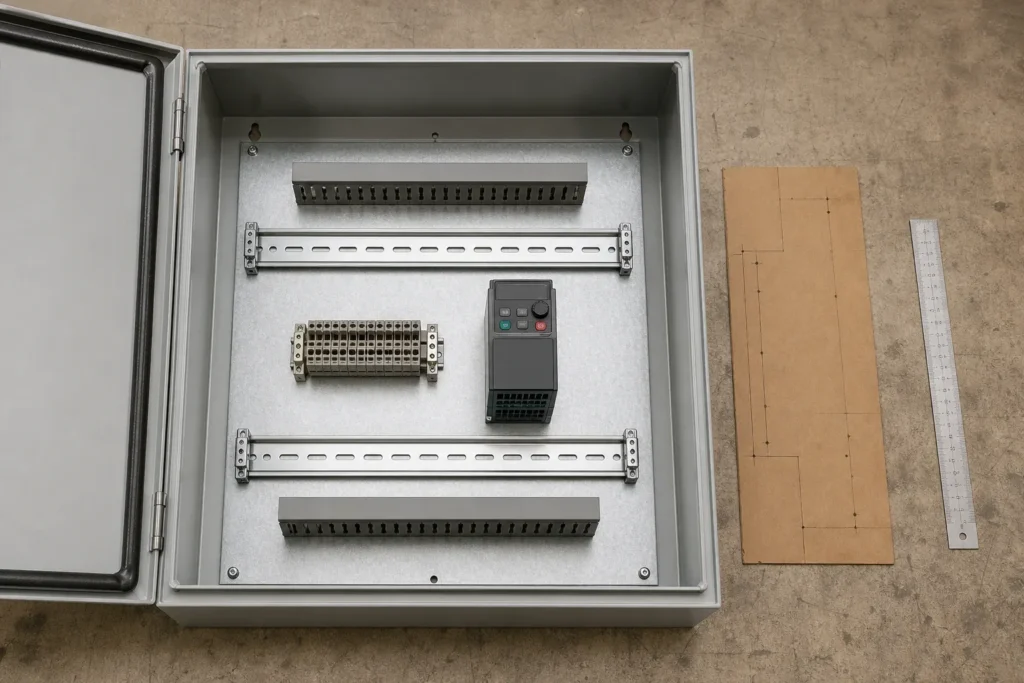
Six Signs You Really Need a Custom Enclosure
One unusual hole is not enough. Full custom makes sense when linked problems will repeat across units.
1. The box fits by volume, but not by shape
A deep plug can hit the backplate when the door shuts. A door switch can land on a stiffener. A hole pattern can match the drawing but miss the site frame after normal tolerance builds up.
Use custom geometry when the outer size, mounting pattern, door parts, and site structure must line up. Mark only the tolerances that control fit. Tight limits on every bend and hole add cost without helping the installation.
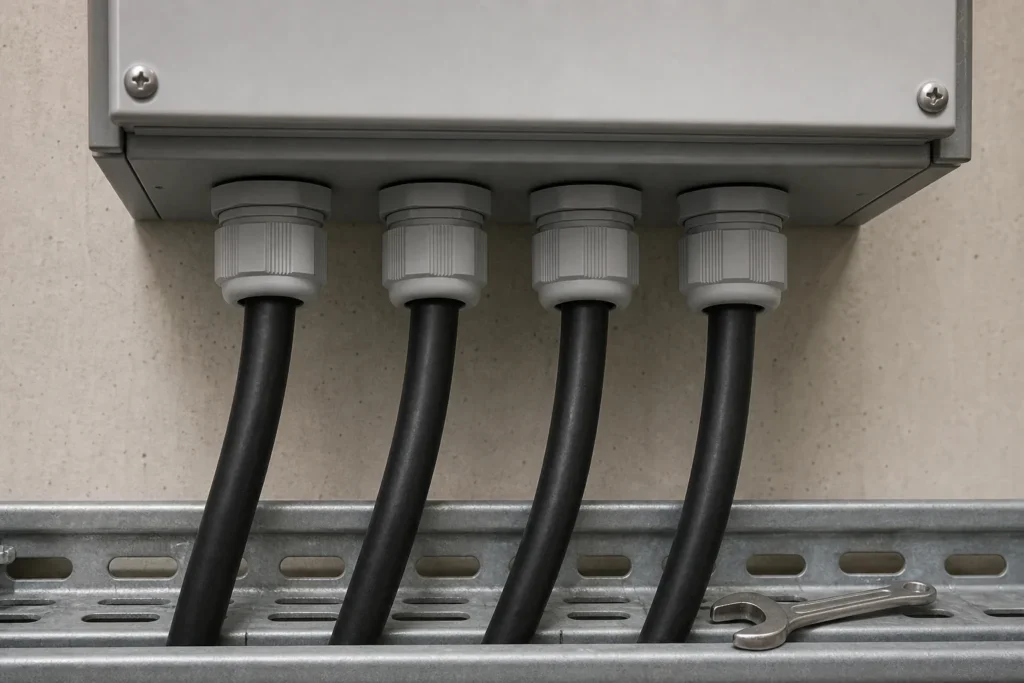
2. Cable entry controls the whole installation
Cable entry affects gland position, bend space, tool access, sealing, and the order of installation.
A rear gland plate does not help if the box sits against a wall. A bottom entry still fails if a base rail blocks the installer’s hand. Cables from a trench can also rise outside the space shown on the enclosure drawing.
A custom entry plate moves repeated cutting into the factory and can be replaced later. Freeze it against the real cable and gland list, not circles on a rough layout. Use the cable-entry and gland-plate design guide before releasing the holes.
3. Air cannot move through the equipment
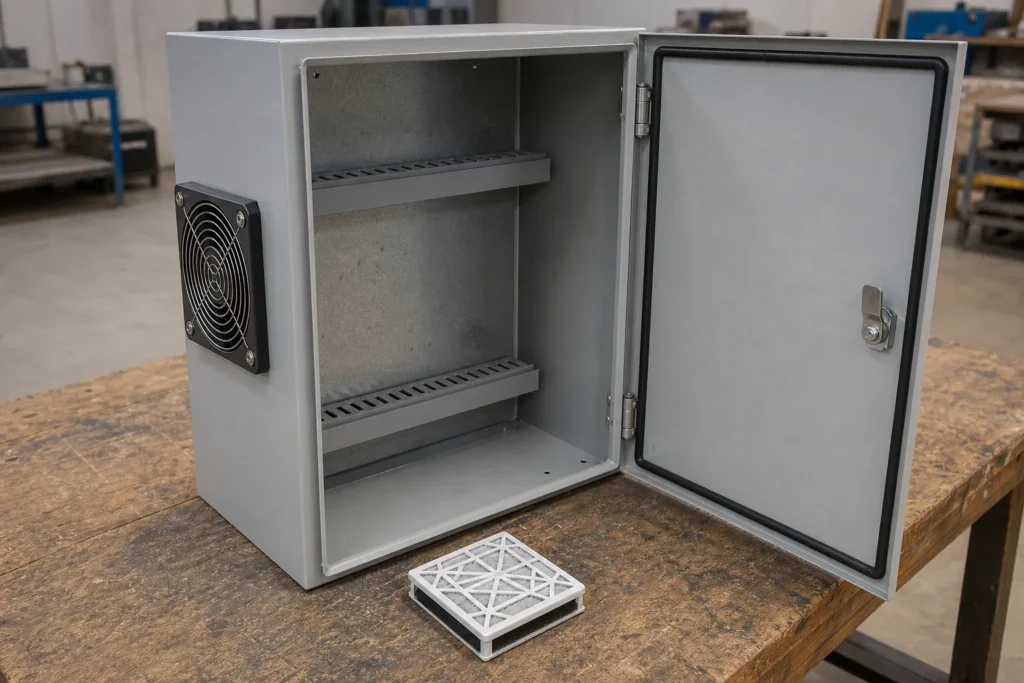
A fan cannot fix a blocked air path. An intake behind a wire duct misses the hot parts. An outlet beside the intake can pull warm air straight back in.
Custom work helps when fans, filters, heat exchangers, air conditioners, heaters, dividers, or sun shields must match the part layout.
Start with heat loss, outside temperature, sun, duty cycle, dust, and filter service. Then choose the electrical enclosure thermal management method. A bigger box is not proof of a safe inside temperature.
4. One opening can break the sealing path
The sealing path includes seams, gasket lands, hinges, latches, gland plates, vents, drains, screws, and field-fitted parts. A hole through the gasket land can break the seal. A thin plate can bend under tightened glands. A field cut can expose bare steel.
Custom work is useful when standard seams or openings sit in the wrong place. It does not give the enclosure an IP or NEMA rating by itself. The two systems have different scopes and are not direct matches. Use the IP65 versus IP66 enclosure guide for design questions and the official NEMA enclosure type document for the NEMA definitions.
Material matters too. Salt, wash chemicals, damaged coating, welds, and edges can matter more than the word “stainless.” See the 304 versus 316 stainless steel enclosure guide for that choice.
5. The box reaches the site but cannot be installed
A cabinet can match the site drawing and still be hard to place. Anchor holes may sit behind a base rail. A forklift pocket may face the wall. A lifting point may be clear in the shop and blocked after the next cabinet is installed.
Treat the base, brackets, anchor holes, transport direction, lifting points, weight, and center of gravity as project inputs. Name who checks the site support. An eyebolt does not prove the box can be lifted in any direction or at any load.
6. The same service problem will happen again
Service problems often appear after the build. A filter may need the next panel removed. A visible terminal may still be out of reach. A drive may clear the door but hit the wire duct during removal.
Full custom becomes easier to justify when the same problem will repeat across many machines or sites.
Freeze the door swing, removal path, tool space, filter access, and part replacement method. Repeated service trouble is a design problem, not a technician problem.
When Custom Makes the Project Riskier
Do not release a full custom enclosure while the key details are moving, even when the site date is close.
Stop and review the project if you see any of these signs:
- The bill of materials changes every week.
- Cable or connector data is missing.
- Door cutouts come from screenshots instead of controlled drawings.
- Heat loss has not been agreed.
- No one has split the work between the enclosure supplier, panel builder, installer, and approver.
- Different teams use different drawing revisions.
- Production will start before a first-unit fit check.
- Someone assumes that any field change will keep the old rating or listing.
A late part move inside a roomy standard box may only need a new mounting plate. The same move inside a tight custom box can change the door, stiffener, cable zone, gasket path, coating, and site connection.
That is the real danger of early custom work: one small change reaches more parts.
If a listing or certification matters, confirm the final build with the people responsible for compliance. Do not assume that drilling, welding, or changing an accessory keeps the old approval. UL explains field evaluations as one possible way to review installed equipment, but the right route depends on the project and local rules.
Compare Total Installed Cost, Not the Box Price
The purchase price tells you what the enclosure costs to buy, not what it costs to use.
Use the same boundary for every option. Keep every cost in view. Keep site labor visible too. Do not hide field work outside the comparison:
Total installed cost = enclosure + design work + adapters + field cutting + installation + handling + checks + scrap + rework + delay + future service work
| Cost item | Standard stock | Factory-modified | Modular | Full custom |
|---|---|---|---|---|
| Up-front design work | Low | Low to medium | Medium | Highest |
| Field work | Can be high when parts do not fit | Lower when changes follow one drawing | Lower inside the system limits | Lower only after details are fixed |
| Room for late changes | High | Medium | High inside the system | Low after release |
| Best use | Low quantity, common details | Simple repeated changes | Planned growth | Stable, repeated, high-fit work |
Here is a simple example. If 20 standard boxes each need three hours of cutting and fit-up on site, start the comparison with 60 field hours. Then add adapter parts, checks, travel, and delay risk.
Compare that with the design hours, factory work, and first-unit check for a custom box. Use your own labor rates and site costs. Do not turn a rough example into a promised saving.
Freeze the Key Details Before You Release the Drawing
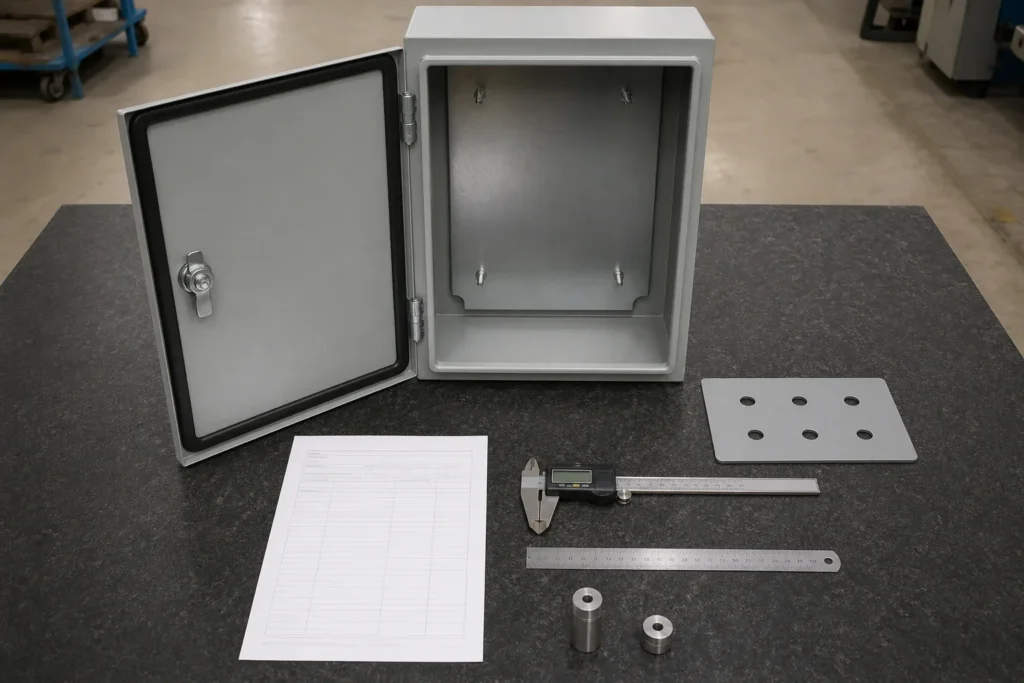
A drawing can look complete and still hide open questions. Use this custom enclosure design review checklist before production.
- Collect the inputs. Get the layout, part data, mounting details, door devices, cable list, heat data, environment, material, target protection, quantity, and transport limits.
- Mark the fixed details. Show which sizes, holes, entry zones, door swings, mounting points, clearances, and service spaces cannot change without review.
- Review the build. Check bends, seams, weld access, gasket paths, screws, coating, part insertion, cable work, lifting, and tolerance build-up.
- Check the first unit. Compare it with the approved drawing and the parts it must meet. Decide what the team will measure, fit, or inspect.
- Release production. Record the drawing revision, parts list, checks, packing method, and accepted changes.
- Control later changes. Check drawings, work in progress, finished stock, site parts, and compliance duties before approving a revision.
Keep the record short enough that people will use it:
| Interface | Owner | Source and revision | Fixed? | How to check it | Open risk |
|---|---|---|---|---|---|
| Outer size | Mechanical lead | General layout | Yes/No | Drawing or fit check | Space beside the box |
| Door parts | Controls engineer | Device data | Yes/No | Template or first-unit fit | Part depth behind the door |
| Cable entry | Installer | Cable and gland list | Yes/No | Plate drawing review | Bend and wrench space |
| Mounting and lifting | Site or structural lead | Base and lifting plan | Yes/No | Site interface review | Anchors and center of gravity |
| Sealing boundary | Project authority | Protection basis | Yes/No | Build review or required test | Parts added in the field |
Have a released layout and cable or interface list? Send them through the FN enclosure project contact form before you ask for full custom production.
Real Case: Recovering Three Outdoor IoT Enclosure Specifications Before Production
Remember this: A legacy enclosure is evidence, not release data. Before you copy it, decide which drawing, sample, part list, and revision define the new product.
Project and device identifiers are anonymized in the supplied case images. Dimensions and interface details are kept where they support the engineering lesson.
A customer representing a U.S. company needed to continue an outdoor IoT box line after the former Chinese supplier was no longer available. Only a few old units remained.
The handover included finished boxes, photos, a short size table, PDF drawings, packing notes, internal equipment images, and old accessory information. That sounds complete. It was not.
The sources described three related products, but sizes and details did not line up. Copying the nearest photo could have produced a box that looked right while missing the old equipment, cable entries, accessories, or packing.
The first size table was not the release drawing
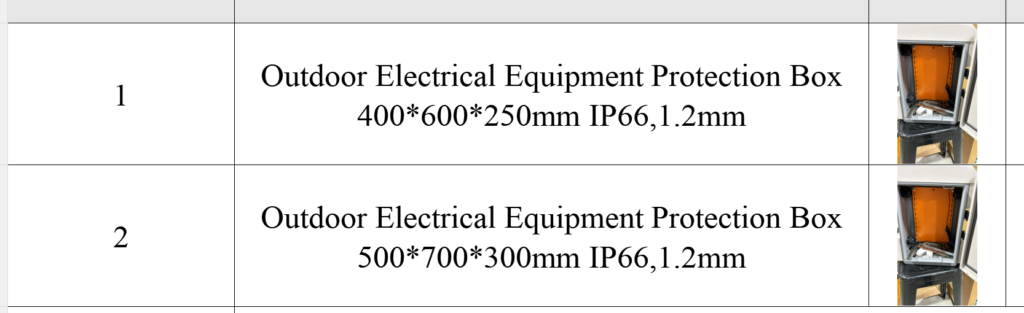
The early reference table listed two outdoor electrical equipment protection boxes:
- 400 x 600 x 250 mm, with 1.2 mm thickness
- 500 x 700 x 300 mm, with 1.2 mm thickness
The same table marked IP66. In this article, that is treated as a project requirement recorded in the supplied document. It is not presented as proof of an independent test, certification, or rating for every finished configuration.
Later drawing and packing reviews showed different outer dimensions:
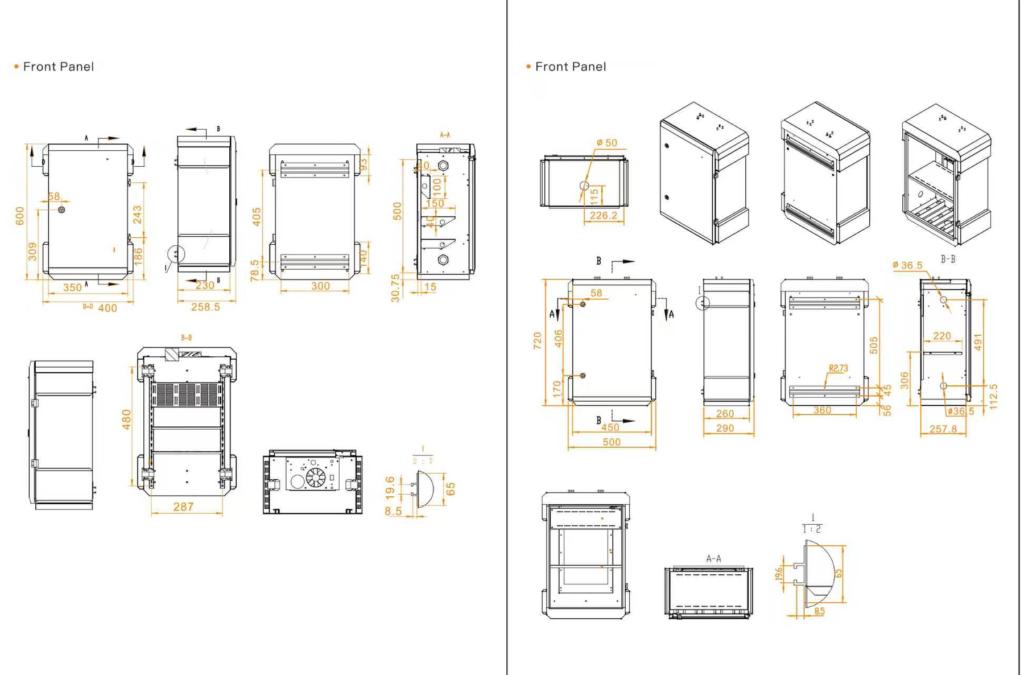
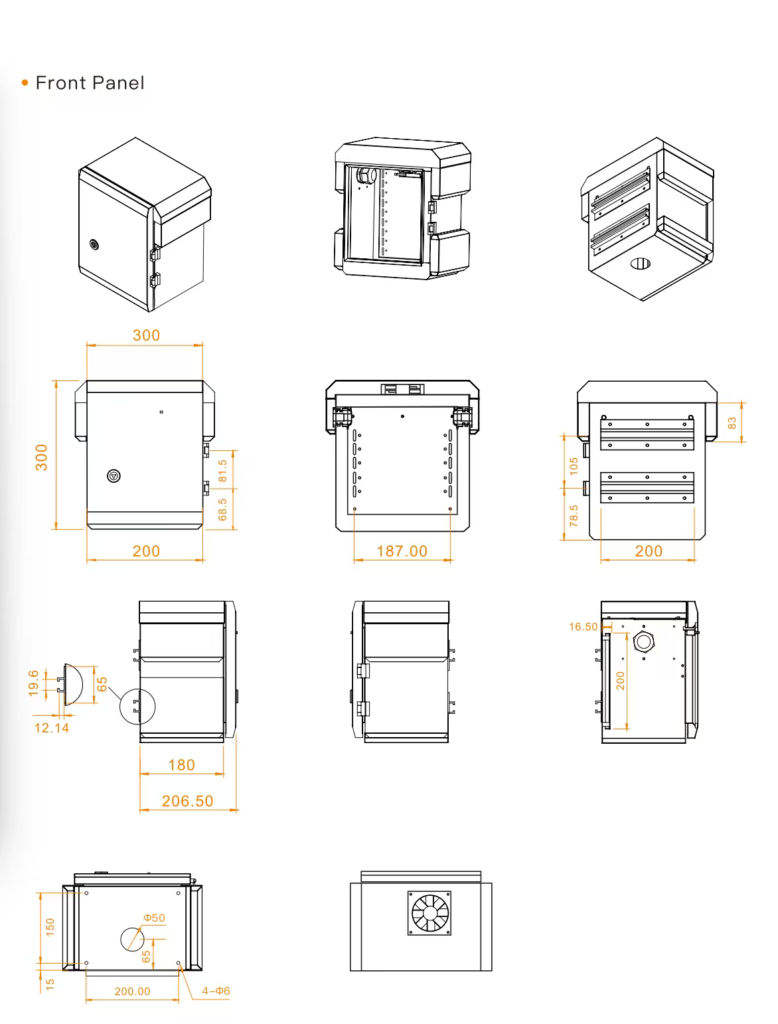
| Model | Early reference | Later drawing or review | Main issue to resolve |
|---|---|---|---|
| Compact variant | Not part of the old two-size table | 300 x 300 x 206.5 mm | A new third variant needed its own drawing and parts list |
| Larger variant A | 400 x 600 x 250 mm | 400 x 600 x 256.5 mm | The depth did not match |
| Larger variant B | 500 x 700 x 300 mm | 500 x 720 x 286.5 mm | The height and depth did not match |
The mismatch is the point. A catalog name or simple size table was not enough. The team had to choose which values controlled the sample, the internal space, and the carton. That is the job of approved custom electrical enclosure drawings.
The interface list controlled the rebuild
The customer wanted the material, 1.2 mm thickness, and powder-coat color to stay aligned with the earlier boxes. Other details needed to change or be confirmed.
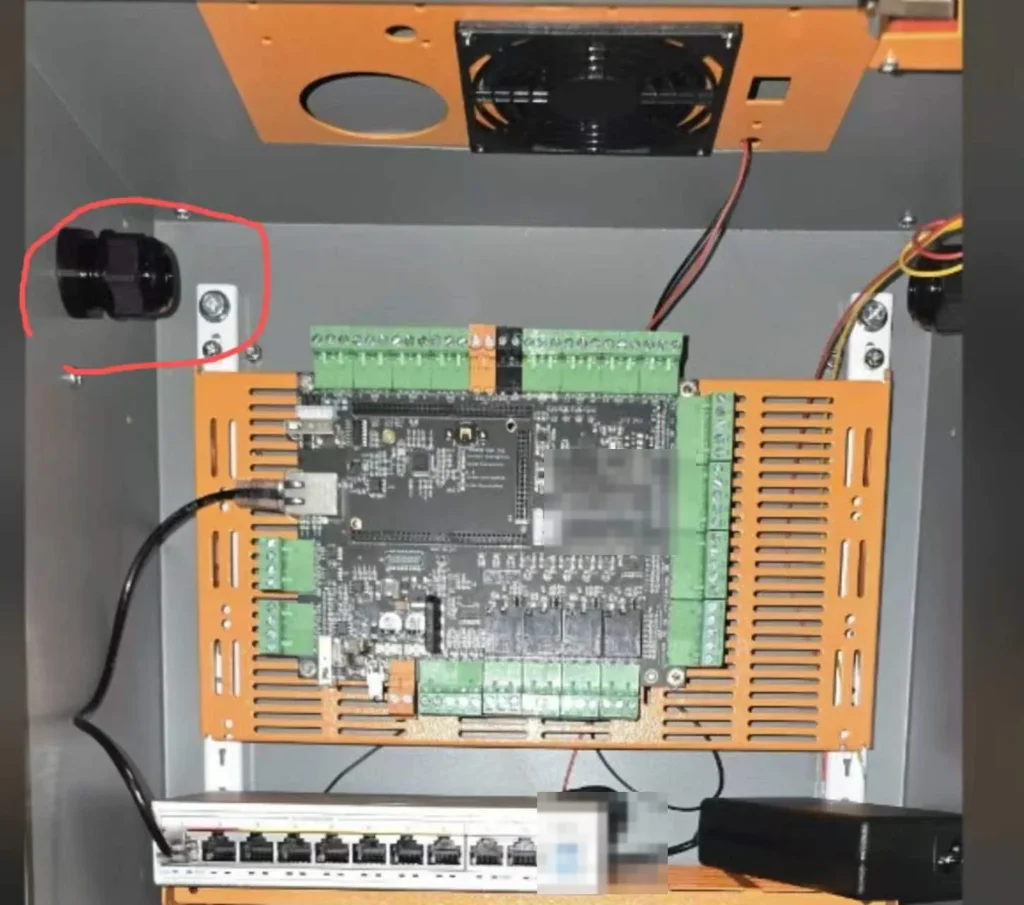
The old cable heads were too large for the new plan. The cable-entry review changed the connection to M32 and called for matching holes across all three models.
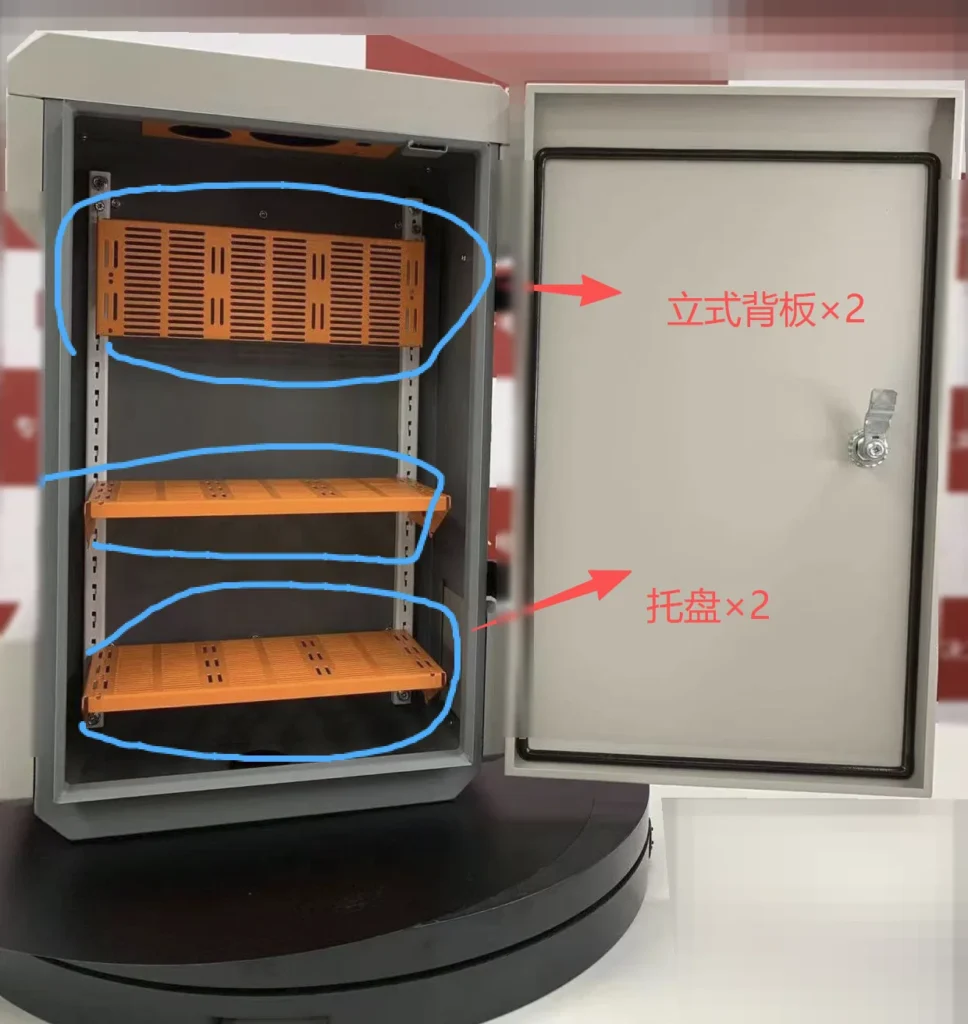
Each model also needed two vertical backplates and two equipment trays. The drawings and photos had to show where these parts sat, how the electronics would mount, and what space remained for wiring and service.
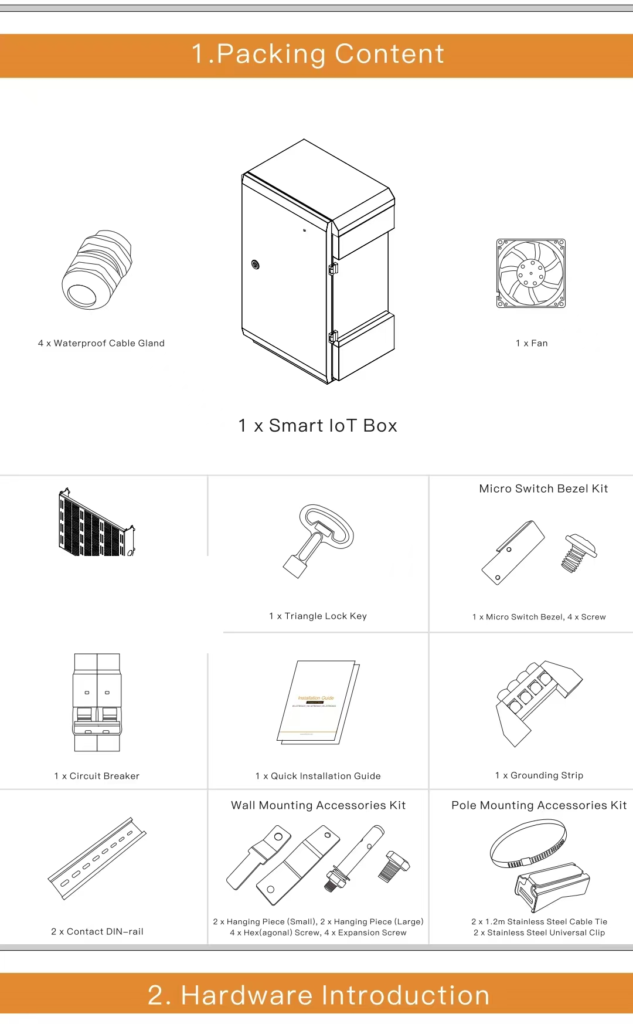
The packing list also went beyond the empty metal box. It called out model-specific items such as the fan, cable glands, grounding strip, DIN rails, lock key, breaker, installation guide, and wall or pole mounting hardware. Some parts changed by model, so one generic accessory list would create errors.
Samples and packing held the release
The customer asked for one sample of each model so the three sizes could be checked before a larger purchase. The review covered the metal shell, inside space, M32 entries, internal plates and trays, accessories, and packing.
Packing was reviewed by model as part of the outdoor enclosure design check. The plan used a five-ply carton and foam support, with carton size checked against each enclosure instead of copied from an older box.
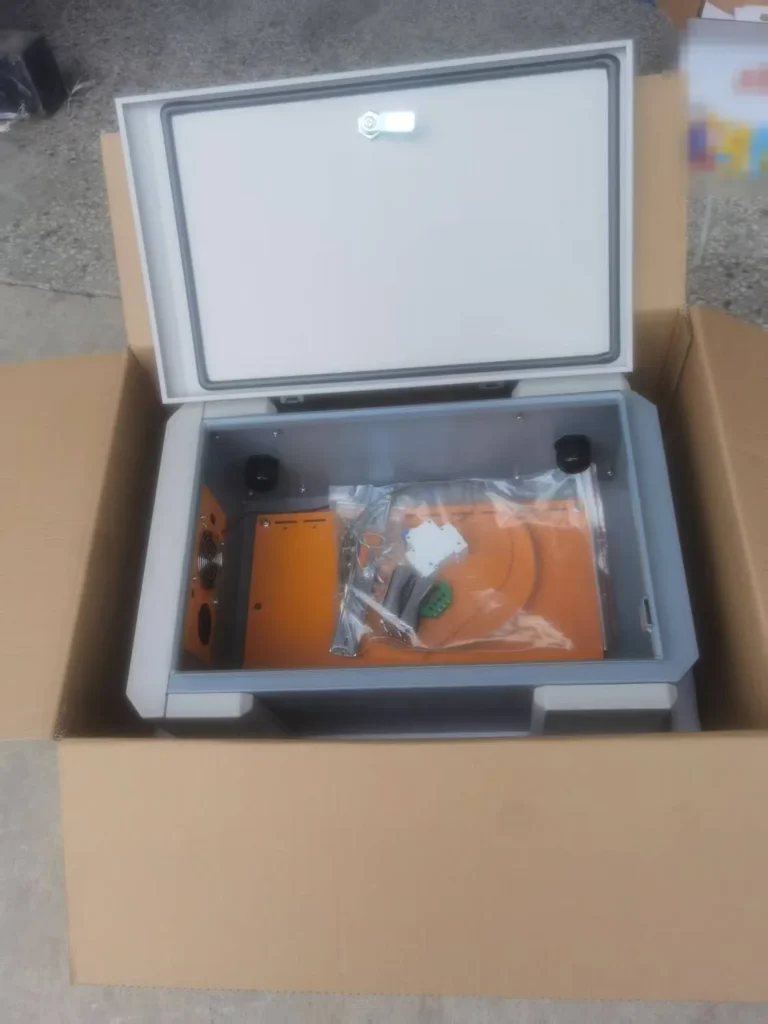
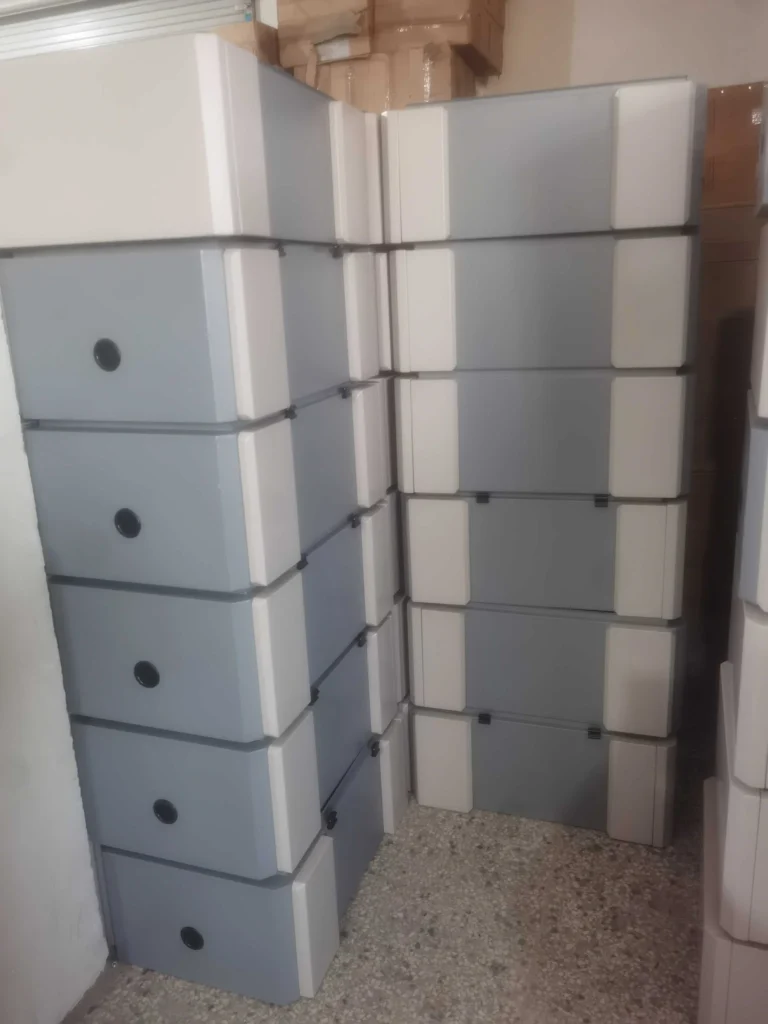
What reduced risk? FN did not treat the closest old box as the answer. The team separated three models, recorded the size conflicts, reset the cable entry to M32, confirmed the internal hardware and accessory list, and used one sample per model as the next decision gate.
The supplied record supports specification recovery, drawing review, accessory confirmation, sample planning, and packing review. It does not by itself prove an IP66 test, a third-party listing, a completed production batch, or a reorder.
The useful lesson is simple: custom fabrication reduces risk only after mixed legacy information becomes one approved specification for each model.
Custom Enclosure RFQ Checklist
A good RFQ gives the supplier enough facts to recommend standard, modified, modular, or full custom. Do not decide on full custom before the review starts.
Size and access
- Outer size limits and preferred size
- Part layout with maximum height and depth
- Mounting plates, rails, studs, brackets, and dividers
- Number of doors, hinge side, opening angle, and door parts
- Installation, tool, and service space
- Key tolerances and mating points
Cable, heat, and environment
- Cable and gland list, entry direction, and bend limits
- Heat loss, outside temperature, sun, and duty cycle
- Water, dust, washdown, chemicals, salt, impact, and condensation
- Drainage, pressure balance, filters, cooling, and heating
- Material and finish
- Required IP, NEMA, listing, or other target, plus who checks the final build
Project control
- Prototype, first-unit, and production quantities
- Delivery order and site dates
- Drawing format, revision, and approval owner
- Inspection and acceptance records
- Packing, transport, lifting, and storage limits
- Work split between supplier, panel builder, installer, site, and approver
- Rules for part changes and drawing changes
Send the layout, interface drawings, environment, quantity, and target date through the FN enclosure project contact form. Ask the supplier to recommend the path before asking for a full custom price.
Common Questions
Is custom always the safer choice?
No. Custom is safer only after the main details are fixed and the design removes repeated cutting, fitting, sealing, lifting, or access work.
If the layout, cable entry, heat data, or site details are moving, custom adds revision risk.
Is custom always more expensive?
Custom needs more design and approval work. Standard stock may need more adapters, field hours, rework, travel, or service time.
Compare both at the installed boundary. Use your project data, not a general saving claim.
When is factory modification enough?
Use factory modification when the catalog size, door, material, and basic build already fit.
It works well for controlled holes, gland plates, studs, labels, mounting plates, and common accessories. Move to full custom only when the main shell or several linked details must change.
Does drilling keep the old rating or listing?
Do not assume it does.
The answer depends on the box, hole, installed part, seal, work quality, final build, and the rules that apply to the project. Confirm the full assembly with the people responsible for engineering and compliance.
What drawings do I need for an RFQ?
Start with the general layout, part positions, cutout data, mounting points, door parts, cable-entry plan, heat data, environment, material, quantity, and revision.
Mark the key sizes. Label any unfinished information as preliminary.
How much time should I allow for a custom enclosure?
There is no useful standard answer.
The schedule depends on how complete the inputs are, how many review rounds are needed, material, finish, sample checks, inspection, and quantity. Ask for a schedule after the supplier reviews the files. Include drawing approval and change time in your plan.
Final Answer: Do Not Customize Before the Inputs Stop Moving
My position is clear: do not choose full custom while the design is still moving.
Use standard stock when common sizes and parts work. Use factory modification when the shell fits but a few repeated details need control. Use modular when future changes are part of the plan.
Move to full custom only when standard geometry creates the same fit problem again and again, and the team can approve the sizes, holes, cable routes, mounting, heat path, sealing, lifting, and service space.
The IoT case shows the rule in detail: three variants, conflicting size sources, a new compact enclosure, M32 cable entries, two backplates and two trays per model, and a separate accessory and packing list. The box was not safer because it was custom. The project became safer when those details moved into controlled files and sample checks.
Standardization reduces unknowns. Customization removes known fit problems. Choose the one that controls the bigger risk.
At the quote stage, ask three questions:
- Which site jobs will disappear?
- Which details must be fixed first?
- What will we check on the first unit?
If the answers are vague, the project is not ready for full custom.
For standard vs custom electrical enclosures, choose custom electrical enclosure fabrication only when the inputs are fixed and repeated field work is the bigger risk. Before that, it is too early.