
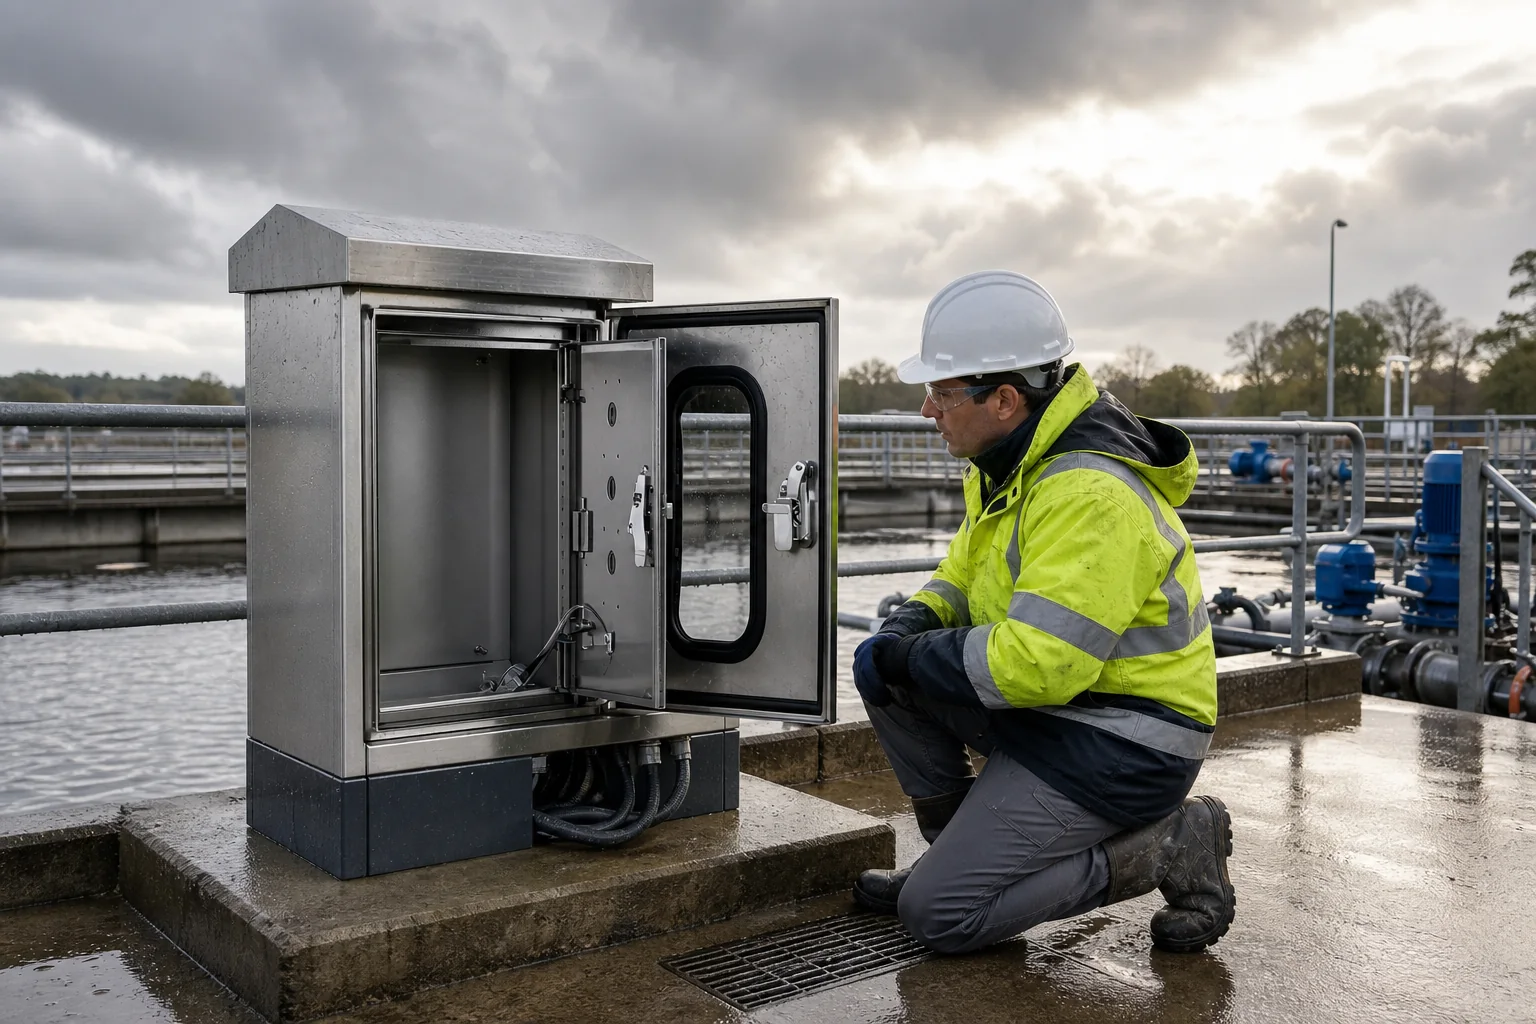

Do not approve an outdoor enclosure from its rating target alone. Trace rain, heat, moisture, drainage, and cable paths before fabrication.
For the rating definitions used in this review, compare the official IEC 60529 publication page and NEMA enclosure type definitions. These references define protection classifications; they do not replace a project-specific review of rain paths, condensation, cable entry, or installed workmanship.
Water path
Heat path
Moisture path
Drainage path
Cable path
Rain is not the only way water ends up inside an outdoor electrical enclosure.
Even when a box resists direct rain, moisture still develops after solar heating, night cooling, pressure cycling, shutdown, or poorly planned cable entry. That is why choosing a higher IP or NEMA target is not enough. You have to review the installed enclosure as a complete system.
This outdoor electrical enclosure design checklist is for OEMs, panel builders, system integrators, and project buyers who need to make the right decisions before quotation, drawing approval, fabrication, installation, or energization.
Start with the real environment. Then trace five paths: water, heat, moisture, drainage, and cable. If one path is still unclear, the design is not ready for fabrication.
Quick Answer: Check These Five Paths Before Fabrication
Start with the installed condition—not the catalog rating.
- Water path: Where will direct rain, wind-driven rain, splash, roof runoff, or washdown water travel after installation?
- Heat path: Which surfaces face the sun, how much heat comes from internal devices, and where can that heat go?
- Moisture path: How can humid air enter, and which internal surface is most likely to become the coldest?
- Drainage path: Where is the true low point after the enclosure is mounted, loaded, wired, and fitted with cable-entry hardware?
- Cable path: How will cables enter, shed water, bend, remain supported, and stay accessible for installation and maintenance?
You also need the environmental baseline: installation location, rain exposure, sun exposure, humidity, dust, corrosion risk, washdown condition, operating cycle, and expected field modifications.
A higher IP or NEMA target addresses external ingress protection. It does not solve internal condensation, poor cable-entry layout, blocked drains, heat buildup, incorrect installation, or uncontrolled field openings.
Use this checklist for outdoor control cabinets, utility and telecom enclosures, machine-side cabinets, pad-mounted enclosures, and other projects where rain, heat, humidity, drainage, and cable-entry conditions must be resolved before production.
Outdoor Enclosure Design Review Matrix
| Review area | What you must confirm | What happens if you miss it | What to send before RFQ |
|---|---|---|---|
| Rain exposure | Installation orientation, splash, wind-driven rain, runoff, and washdown | Water reaches seams, openings, or cable entries | Actual outdoor exposure profile |
| Solar heat | Sun-facing surfaces, finish color, internal heat load, and heat-release path | Excess heat, stronger day-night swings, and faster material aging | Climate, orientation, shade, and internal heat sources |
| Condensation | Humidity, duty cycle, shutdown behavior, and likely cold surfaces | Corrosion, insulation problems, nuisance faults, or moisture marks | Temperature swing, humidity, and powered-versus-idle condition |
| Drainage | True low point, drain access, blockage risk, and installed tilt | Water remains trapped inside the enclosure | Drain logic, service access, and contamination environment |
| Pressure equalization | Whether a breather or vent is justified, plus splash and dust exposure | Pressure cycling pulls moisture through weak paths | Whether openings are allowed and how they will be maintained |
| Cable entry | Top, side, or bottom entry; gland spacing; drip loops; and spare openings | Water follows cable jackets or reaches a weak entry zone | Cable direction, quantity, size range, and future expansion |
| Materials and hardware | Material, finish, gasket, fasteners, and interface compatibility | Corrosion, sealing degradation, coating damage, or mixed-metal problems | Material preference, corrosion environment, and service-life expectations |
1) Start With the Environmental Profile, Not the Rating Alone
Start here: define the real exposure before you choose the enclosure configuration.
One of the most common quotation-stage mistakes is to send only a protection target such as IP65, IP66, or NEMA 3R. Those targets matter, but they do not describe the full outdoor duty.
Before you approve the layout or request fabrication, answer these questions:
- Is the enclosure exposed to direct rain, wind-driven rain, roof runoff, splash, or washdown?
- Will it face strong sun for long periods?
- Does the site see large day-night or seasonal temperature swings?
- Is the environment humid, dusty, coastal, corrosive, or washdown-prone?
- Will the enclosure operate continuously, intermittently, or with long idle periods?
- Will field drilling, future cable additions, or frequent maintenance be likely?
These conditions determine the design strategy. They tell you whether the project needs only an external ingress target or also needs deliberate decisions for condensation, drainage, heat control, pressure equalization, material compatibility, and cable entry.
Environmental Input Template
Use this template before you send the RFQ:
- Installation: exposed outdoor / sheltered outdoor
- Rain: light / wind-driven / roof runoff / washdown
- Sun: full sun / partial shade / sheltered
- Operation: continuous / intermittent / long idle periods
- Environment: humid / coastal / dusty / corrosive
- Temperature: expected daytime, nighttime, seasonal, and shutdown ranges
- Field changes: planned drilling / future cables / frequent opening / unknown
Buyer Takeaway
Do not send only dimensions and a target rating. Send the actual outdoor exposure profile. Without it, the buyer and enclosure supplier are making different assumptions about the same box.
Run the Review Again When the Project Changes
Do not treat the first review as permanent. Run the Five-Path Outdoor Enclosure Review again when any of these changes:
- mounting position or enclosure orientation;
- rain, roof runoff, splash, washdown, shade, or sun exposure;
- cable-entry direction, quantity, cable diameter, or conduit route;
- internal heat load, operating cycle, or shutdown condition;
- field cutouts, vents, drains, glands, spare openings, or accessories.
A small installation change alters the water path, the coldest internal surface, or the true drainage point.

2) Trace Rain Ingress the Way Water Actually Moves
Do not start with the door gasket alone. Start with the water path.
Water does not follow a drawing outline. It follows gravity, splash direction, cable jackets, horizontal ledges, installation posture, and the lowest-resistance path created during installation or field modification.
Commonly missed rain-ingress paths include:
- top surfaces that hold standing water;
- horizontal cover seams that do not shed water cleanly;
- mounting surfaces against uneven walls or frames;
- door-edge compression variation around hinges and latches;
- field-added openings or poorly closed spare holes;
- cable jackets that guide water toward the entry point;
- conduit transitions that trap or redirect water.
Ask two questions before you approve the detail:
- Where will water sit, run, collect, or splash after installation?
- What opening, seam, cable, or hardware interface will it reach next?
Common Mistake
A design with acceptable sealing components still performs poorly when the installed geometry directs water toward an entry point or leaves standing water around a seam.
A gasket cannot correct a bad water path. Trace the path from the sky to the enclosure surface, then from the surface to every seam, opening, and cable interface.
Before You Approve the Rain Detail, Answer These Questions
- Will the enclosure top stay wet after rain?
- Can water sit around hinges, handles, cover joints, or horizontal ledges?
- Are there surfaces that create splash-back or direct runoff into the entry zone?
- Are maintenance openings likely to be reopened or modified in the field?
- Will cables approach from above and carry water toward the enclosure?
- Does the installed mounting surface change door alignment or gasket compression?
If the route is uncontrolled, redesign the detail before fabrication.
3) Treat Solar Heating and Night Cooling as One Cycle
Do not review the hot day and the cool night as separate conditions. They are one thermal and moisture cycle.
Outdoor enclosure temperature is driven by both external solar load and internal electrical heat. Dark finishes, sun-facing orientation, poor airflow, limited shade, and heat-producing components raise enclosure temperature during the day.
The important question is not only, “How hot will it get?” Ask, “What happens when it cools quickly afterward?”
A typical outdoor cycle looks like this:
- the enclosure heats up from sun exposure or internal devices;
- the air and surfaces inside the enclosure warm, increasing internal pressure;
- the ambient temperature drops at night, during rain, or after shutdown;
- internal surfaces cool, pressure falls, and humid air enters through weak paths;
- if a surface falls below the adjacent air’s dew point, moisture forms on metal surfaces, wiring areas, terminals, or hardware.
That is why thermal review and condensation review belong in the same design discussion.
Thermal Review Checklist
Confirm:
- enclosure orientation relative to the sun path;
- local climate and seasonal temperature range;
- expected temperature change after rain or shutdown;
- internal heat load from power devices or control components;
- finish color and solar-absorption concern;
- spacing from walls or nearby structures;
- roof geometry, overhang, shade, or double-roof options;
- natural airflow versus an assisted climate-control strategy;
- whether vents or filters would change the intended protection target.
If the review only estimates maximum temperature and ignores rapid cooling, it is incomplete.

4) Why a Sealed Outdoor Enclosure Still Develops Condensation
A sealed enclosure is not the same as a dry enclosure. Treat external ingress and internal condensation as two different problems.
Sources of internal moisture include:
- humid air trapped during assembly, wiring, or maintenance;
- air exchange through cable entries, gasket interfaces, vents, or pressure cycling;
- thermal swings between daytime heating and night cooling;
- intermittent operation that repeatedly warms and cools the enclosure;
- conduit condensation, wicking, wet cables, packaging moisture, or maintenance exposure;
- internal surfaces that fall below the dew point of the adjacent air.
The Condensation Rule
Condensation needs three things: moisture in the enclosure, a surface at or below the adjacent air’s dew point, and enough time for droplets or a moisture film to form.
Do not compare only inside-air temperature with outside-air temperature. Identify the coldest internal surface and compare that surface temperature with the dew point.
What Internal Moisture Does to the Enclosure
Internal moisture can contribute to:
- corrosion on hardware, terminals, or internal metal parts;
- reduced insulation performance or insulation degradation;
- nuisance trips, leakage, or intermittent control and communication faults;
- water marks or moisture films inside the cabinet;
- premature aging of sensitive electrical or electronic components.
Do not jump from condensation to unsupported claims about catastrophic failure. Diagnose the moisture path and document the actual effect.
Before You Release the Drawing, Answer These Questions
- Will the enclosure be energized continuously or only sometimes?
- Will internal devices generate enough heat to change the moisture cycle?
- What are the expected temperature and humidity ranges?
- Is the site humid, coastal, dusty, chemically aggressive, or washdown-prone?
- Will shutdown, cold rain, or night cooling create rapid temperature change?
- Is maintenance infrequent, making passive moisture problems harder to detect?
- Where are the likely cold surfaces?
- Is there a true low point where condensed water can collect?
- Can moisture enter through conduit, cables, unused openings, gaskets, or field work?
If these questions remain unanswered, choosing a higher rating does not close the design gap.

5) Choose Drainage and Pressure Equalization Deliberately
Do not default to “fully sealed,” and do not assume a drilled drain hole solves condensation.
Choose the moisture-control strategy from the real environment, contamination risk, maintenance access, pressure cycling, heat load, and installed geometry.
Drainage Review Points
If liquid water forms or enters, give it a controlled path out. Start by identifying the true low point in the installed orientation, not the low point in a flat drawing view.
Confirm:
- actual installed tilt and orientation;
- whether internal geometry, backplates, trays, rails, or hardware block the low point;
- whether the drain location will collect dirt, insects, salt, fibers, or debris;
- whether the drain can be inspected, cleaned, or replaced later;
- whether the chosen location still works after glands, conduit, or cable-entry hardware are installed;
- whether the drainage component and its installation are compatible with the project’s protection target.
A drain in the wrong location is not a drainage strategy.
Pressure-Equalization Review Points
If pressure cycling is pulling humid air or water through weak paths, evaluate a rated pressure-equalization element. Do not add one automatically.
Check it against:
- direct splash or washdown exposure;
- dust, salt, oil mist, insects, fibers, or chemical contamination;
- the temperature and humidity of the surrounding air;
- installation orientation and protected mounting location;
- inspection and replacement access;
- the effect of the complete installed device on the intended enclosure configuration.
A pressure-equalization vent does not dehumidify the enclosure. In hot, humid, salty, dusty, or chemically aggressive environments, open ventilation often makes the moisture or contamination problem worse.
Condensation-Control Strategy Matrix
| Strategy | Use it when | Main benefit | Main caution |
|---|---|---|---|
| Drain only | Condensed-water removal is the main issue and contamination risk is manageable | Removes collected water from the true low point | Wrong placement or clogging makes it ineffective |
| Breather only | Pressure cycling is the main issue and liquid accumulation is limited | Helps equalize pressure and reduce uncontrolled inward pull | Must be reviewed for splash, dust, contamination, and maintenance |
| Drain + breather | Both liquid accumulation and pressure equalization matter | Creates a more balanced moisture-management approach | Requires correct placement, compatible components, and service planning |
| Sealed design + heater or assisted climate control | The environment is severe or passive measures do not keep surfaces above dew point | Provides stronger control of the internal moisture cycle | Adds power, cost, sizing, control, and maintenance requirements |
Choose from the operating condition, not from habit. Then verify the completed enclosure through the relevant weather, operating, and maintenance conditions.

6) Treat Cable Entry as a Reliability Decision
Do not choose a cable gland from thread size and cable diameter alone.
Entry direction, drip loops, gland spacing, gland-plate layout, cable support, spare openings, and service access all change the water path and the sealing result.
Before you approve the cable-entry layout, answer four questions:
- Where will the cables enter: top, side, or bottom?
- How will rain, splash, runoff, and condensation behave around that cable path?
- Does the sealing method match the cable range, jacket, movement, and installation condition?
- Can installers assemble, tighten, inspect, and maintain the entry zone correctly?
Cable-Entry Direction Comparison
| Entry direction | Main advantage | Main risk | What you must review |
|---|---|---|---|
| Top entry | Simplifies some routing layouts | Highest direct rain-management risk | Drip loop, shielding, gland placement, support, and water-shedding geometry |
| Side entry | Reduces some direct vertical-water exposure | Splash, cable sag, and sideways water-path risk | Cable support, splash exposure, gland spacing, and service access |
| Bottom entry | Often improves rain management | Not automatically correct for every layout | Bend radius, pulling access, debris, true low point, and drain interaction |
Choose the entry direction from the actual water path, pulling route, bend radius, installed orientation, and service condition—not from habit.
Cable-Entry Details You Must Review Explicitly
- drip-loop presence, size, and location;
- gland position relative to water paths and low points;
- gland spacing for tool access and torque control;
- gland-plate stiffness and flatness;
- unused-opening closure method;
- conduit-to-box transition details;
- cable-jacket compatibility with the gland or seal;
- cable movement, vibration, support, or strain risk;
- future cable additions that could change the sealing plan;
- inspection access after internal equipment is installed.
Outdoor performance depends on the complete entry interface: cable, gland or conduit, gland plate or enclosure wall, installation quality, support, environmental exposure, and the surrounding water path.
Need a fabrication-focused review for an outdoor enclosure? Send the enclosure dimensions, installed environment, water exposure, sun exposure, cable-entry direction, internal heat sources, mounting method, operating cycle, and target protection level. If one input is still open, mark it clearly before fabrication.

7) Choose the Finished Enclosure System, Not the Sheet-Metal Name Alone
Outdoor reliability does not come from the enclosure body alone. It comes from the finished system: material, pretreatment, coating, cut edges, welds, gaskets, fasteners, hinges, latches, cable-entry hardware, accessories, and field modifications.
Material Review Points
Common material directions include:
- stainless steel where its corrosion behavior matches the actual environment and fabrication details;
- aluminum where weight, corrosion behavior, conductivity, and project requirements make it the right choice;
- coated carbon steel where cost and manufacturing practicality matter, provided pretreatment, finish integrity, cut edges, and field damage are controlled.
Do not choose from a material name alone. Review the finished structure and every interface exposed to the environment.
What Buyers Often Miss
Even with a suitable enclosure-body material, problems still arise through:
- mixed-metal contact points and galvanic interfaces;
- poor fastener compatibility;
- coating damage at cut edges, holes, welds, or rework points;
- gasket aging, compression set, chemical exposure, or UV exposure;
- field modifications that expose base material or interrupt the sealing path.
Gasket Review Points
Confirm:
- long-term compression behavior;
- door and flange stiffness around the sealing path;
- UV, temperature, chemical, and moisture exposure;
- sealing continuity around corners and hardware interruptions;
- latch position and compression consistency;
- service interval and replacement access;
- whether repeated opening will reduce sealing consistency.
A good gasket cannot compensate for poor flange geometry, weak door stiffness, uneven compression, or uncontrolled field modifications.
Project Example: From a Capacity Problem to a Repeatable Outdoor Charging Cabinet
A charging-equipment manufacturer contacted FN after its previous supplier could not keep pace with the required production schedule. The customer supplied drawings for an outdoor charging cabinet body measuring 900 mm W × 600 mm D × 1700 mm H. The plan was clear: build and approve a first article before releasing the cabinet for batch production.
| Project item | Confirmed specification |
|---|---|
| Product scope | Empty outdoor charging cabinet body for a charging-equipment manufacturer |
| Overall size | 900 mm W × 600 mm D × 1700 mm H |
| Material and finish | Powder-coated carbon steel |
| Main body and original door | 1.2 mm sheet |
| Revised door | Increased from 1.2 mm to 1.5 mm |
| Mounting plate | 1.2 mm |
| Base | 2.0 mm |
| Production path | One first article followed by a 100-unit production batch |
| Gasket direction | Continuous premium closed-cell, weather-resistant foam gasket |
The destination environment had strong year-round sun exposure and frequent rainfall. That meant repeated heating, cooling, and humidity changes had to be considered. These conditions do not prove that condensation will occur, but they make the door, gasket, water paths, internal humidity sources, and dew-point conditions important review items.
During the drawing review, FN recommended two practical changes:
- Use a continuous premium closed-cell, weather-resistant foam gasket instead of relying on conventional applied sealant. The material direction prioritized resistance to UV, ozone, rain exposure, and repeated compression, together with low water absorption and reliable recovery after the door was opened and closed.
- Increase the door thickness from 1.2 mm to 1.5 mm. The thicker door improved rigidity, reduced the risk of distortion, and helped the gasket maintain more uniform compression around the door perimeter.
The wording matters here: a thicker door does not prevent condensation by itself. It supports door geometry and gasket compression. Condensation control still requires a separate review of humidity sources, surface temperature versus dew point, cable and conduit moisture paths, drainage, pressure equalization, heating, or dehumidification where the operating conditions require them.
FN produced one first article so the customer could confirm the enclosure dimensions, door operation, mounting-plate and base arrangement, powder-coated finish, and sealing relationship before batch release. The sample passed customer acceptance, the agreed delivery schedule was maintained, and the project moved into a 100-unit production batch. At the six-month follow-up, the customer reported that the revised cabinet performed noticeably better than the previous version. The successful sample-to-batch project then developed into a long-term customer relationship.
Project lesson: When a buyer changes suppliers because capacity is falling behind, do not treat the job as a drawing-copy exercise. Use the first article to confirm manufacturability, door stiffness, gasket continuity, sealing compression, and critical interfaces before releasing the batch.
What this project demonstrates: drawing review, a door-and-gasket design change, one-unit first-article acceptance, a 100-unit batch release, delivery continuity, and positive six-month customer feedback. The follow-up was qualitative customer feedback rather than a laboratory test; confirm any project-specific IP/NEMA target and condensation-control validation separately for the final installed configuration.

8) Know What IP and NEMA Ratings Solve—and What They Do Not
A rating defines an external protection target. It does not design the entire outdoor enclosure system.
Treat IP and NEMA targets as project requirements tied to the full configuration, including doors, gaskets, glands, vents, drains, hardware, accessories, openings, and installation details.
Ratings Help Define
- the external ingress-protection goal;
- the design target for enclosure features and interfaces;
- the intended level of outdoor exposure or use condition described by the selected system.
Ratings Do Not Solve by Themselves
- internal condensation caused by trapped humidity or thermal cycling;
- poor cable-entry direction, spacing, support, or installation;
- blocked, misplaced, or inaccessible drains and vents;
- internal heat buildup from electrical load or solar exposure;
- incorrect field installation, drilling, or unused-opening closure;
- galvanic corrosion, coating damage, or material-interface problems;
- maintenance practices that change the sealing path.
Do not equate an IP rating with a NEMA Type, and do not describe an enclosure as condensation-proof or fully airtight without specific evidence and a defined configuration.
If the RFQ says only “IP66 outdoor enclosure,” the design review is not complete. Send the environment, cable-entry plan, thermal condition, operating cycle, drainage logic, accessories, mounting method, and maintenance context.

9) Use the Checklist at Three Project Gates
Use the Five-Path Outdoor Enclosure Review at three points: before fabrication, after installation, and during routine inspection.
Do not leave an unresolved item as a silent assumption. Mark it as open, assign an owner, and close it before the relevant project gate.
Pre-Fabrication Checklist
Before you approve the fabrication package, confirm:
- overall enclosure dimensions and usable internal layout;
- installation orientation and mounting method;
- rain, roof runoff, splash, washdown, sun, dust, corrosion, and humidity exposure;
- cable-entry direction, quantity, and cable-size range;
- gland plate, conduit, cutout, and unused-opening details;
- drainage and pressure-equalization logic;
- internal heat load, duty cycle, and shutdown condition;
- material, pretreatment, and finish selection;
- gasket, hinges, latches, fasteners, and hardware compatibility;
- expected maintenance and service access;
- inspection, packaging, labeling, and first-article requirements.
Installation Acceptance Checklist
Before handover or energization, confirm:
- gaskets are seated correctly and undamaged;
- doors and covers close without distortion or obstruction;
- cable-entry hardware is installed, supported, and tightened correctly;
- unused openings are fully closed with compatible components;
- drip loops are present where required;
- drains, breathers, vents, or climate-control components are in the intended locations;
- no field drilling has created an uncontrolled ingress or corrosion path;
- the installed orientation matches the reviewed water and drainage logic;
- maintenance clearance, shade, wall spacing, and service access match the approved arrangement;
- later-added cables or accessories have not changed the sealing path.
Routine Inspection Checklist
For outdoor installations, inspect:
- gasket aging, damage, or compression set;
- corrosion at fasteners, hinges, cut edges, welds, or mounting interfaces;
- blocked, damaged, or contaminated drain and vent locations;
- water marks, droplets, corrosion products, or internal condensation signs;
- discoloration or heat-related material changes;
- loose entry hardware, damaged seals, or unsupported cables;
- enclosure tilt, mounting movement, or drainage changes;
- later field modifications that changed the sealing or water path.
If the installation, cable route, internal load, operating cycle, or environment changes, run the Five-Path Review again. Do not rely on the original approval for a changed configuration.
10) Send the Right Information Before You Request a Quote
Do not send only height, width, depth, and a target rating. Those inputs define a box, not the outdoor duty.
Before you request a quotation or design review, prepare:
| RFQ input | Why it matters |
|---|---|
| Overall dimensions | Defines the enclosure envelope and layout limits |
| Installation location | Distinguishes indoor, sheltered-outdoor, and exposed-outdoor duty |
| Rain and sun exposure | Changes sealing, thermal, shading, drainage, and cable-entry priorities |
| Temperature and humidity range | Defines the moisture and thermal-cycle conditions that need review |
| Target protection goal | Sets the external protection objective; it does not replace the environmental description |
| Cable-entry direction and quantity | Changes the water path, gland layout, pulling route, and serviceability |
| Cable-size range and jacket information | Affects gland, conduit, spacing, and sealing selection |
| Internal heat sources and duty cycle | Changes thermal rise, pressure cycling, and condensation behavior |
| Material and finish preference | Affects corrosion strategy, interface review, and manufacturing scope |
| Mounting method and orientation | Changes the water path, true low point, drainage, and access logic |
| Drain, breather, vent, heater, or climate-control needs | Defines the moisture-control concept and accessory interfaces |
| Other accessory needs | Influences layout, cutouts, wiring space, and environmental review |
| Inspection, sample, packaging, or labeling requirements | Defines project handoff, first-article review, and delivery expectations |
Complete information lets the team identify open decisions faster and judge whether the enclosure design matches the field condition.
Copy-and-Send RFQ Input Block
Use this block in your next inquiry:
- Project/application:
- Overall dimensions and usable internal space:
- Installation location and orientation:
- Rain/runoff/splash/washdown exposure:
- Sun/shade and temperature range:
- Humidity, dust, coastal, or corrosive exposure:
- Operating cycle, shutdown condition, and internal heat load:
- Target IP/NEMA or other protection requirement:
- Cable-entry direction, quantity, size range, and spare entries:
- Drainage, pressure equalization, heater, or climate-control concept:
- Material, finish, gasket, and hardware preference:
- Mounting, accessories, inspection, first-article, packaging, and labeling requirements:
- Open questions that still need joint review:

Ready to Check Your Outdoor Enclosure Before Fabrication?
Do not wait for a field problem to expose a design assumption.
Complete the Five-Path Review and send it with your drawings. Include the water exposure, solar and internal heat, humidity and duty cycle, drainage logic, cable-entry requirements, material preference, accessories, mounting method, and inspection expectations.
If one input is still open, mark it clearly. That gives the buyer, enclosure supplier, and installer one decision record instead of three different assumptions.
The point is simple: start with the real environment, trace the five paths, close the open decisions, and only then release the enclosure for fabrication.
Frequently Asked Questions
Does a Higher IP or NEMA Target Prevent Condensation?
No. An ingress target addresses external water and dust protection for a defined configuration. It does not prevent condensation caused by trapped humidity, pressure cycling, shutdown, or a surface falling below dew point. Treat ingress protection and condensation control as separate design tasks.
Is Bottom Cable Entry Always Better for Outdoor Enclosures?
No. Bottom entry often improves rain management, but it is not automatically correct. Confirm bend radius, pulling access, gland spacing, cable support, debris exposure, the true low point, and the drain relationship before you approve it.
When Does an Outdoor Enclosure Need a Breather Drain?
Use a breather-drain concept only when the project needs both pressure equalization and controlled liquid removal. Confirm splash exposure, contamination risk, installation orientation, maintenance access, ambient humidity, and compatibility with the intended enclosure configuration. Do not treat it as a universal fix.
Why Must Sun Exposure Be Reviewed Together With Condensation Risk?
Because daytime heating and nighttime or shutdown cooling are parts of the same moisture cycle. Heating changes internal pressure and moisture behavior. Rapid cooling can pull humid air inward and push a cold internal surface below dew point.
What Must a Buyer Send Before Requesting an Outdoor Enclosure Quote?
Send the dimensions, usable internal space, installation environment, mounting orientation, rain and sun exposure, temperature and humidity range, target protection goal, cable-entry direction and quantity, cable-size range, internal heat sources, duty cycle, material and finish preference, drainage or pressure-equalization concept, accessories, and inspection or packaging requirements.