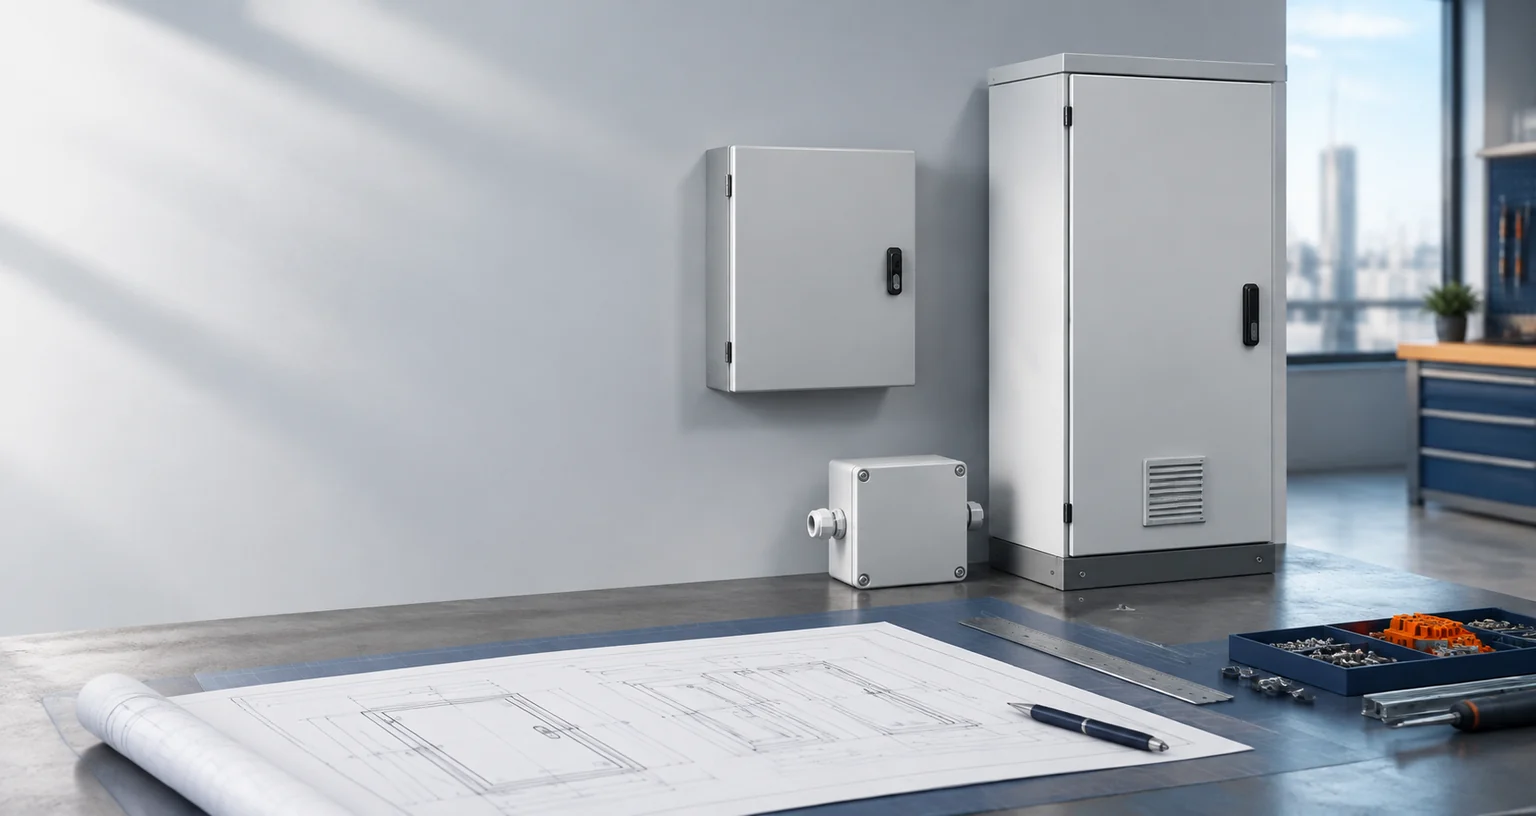
Choose the right industrial electrical enclosure by matching every specification to a defined project risk. Start with the installation environment, the function the enclosure supports, and the operational consequence if protected components fail. Then confirm what goes inside, required size, material, protection target, cable entry, door sealing, heat, accessories, and packaging. If the project includes drawings, cut-outs, mounting plates, or export requirements, treat it as a custom enclosure review rather than a simple box purchase.
Do not ask which enclosure has the highest specification. Ask which specification solves the project’s actual risks.
Key selection principle: Protect the process, not just the component. The enclosure budget should reflect the environment, failure consequence, installation requirements, and maintenance burden, not simply the replacement price of the parts inside.
Fixed trigger question: Before approving an enclosure quote, ask: “What stops if it fails?”
Most enclosure mistakes happen because the buyer starts with the outside size. Size matters, but it does not tell you whether the enclosure will handle rain, dust, heat, condensation, corrosion, cable entry, door compression, component clearance, or transport damage.
Start With This Quick Selection Checklist
If you want the short version, use this order:
- Confirm where the enclosure will be installed.
- Confirm what components and wiring will go inside, what functions they support or control, and answer the fixed trigger question: “What stops if it fails?”
- Choose the enclosure type and mounting method.
- Choose material and surface finish based on the environment.
- Define the protection target before discussing IP or NEMA language.
- Plan cable entry and cut-outs before production.
- Review door, gasket, lock, and hinge together.
- Check heat, ventilation, condensation, and internal clearance.
- Confirm accessories such as mounting plates, DIN rails, gland plates, fans, filters, heaters, or windows.
- Confirm packaging and shipping requirements.
If the buyer can answer these points, the supplier can usually quote more accurately. If the buyer cannot answer them yet, the first job is not quoting. The first job is project review.
For standard categories, start from electrical enclosures (/electrical-enclosures/). For drawings, cut-outs, and project-specific requirements, move to custom electrical enclosures (/custom-electrical-enclosures/).
Why Choosing an Electrical Enclosure Is Not Just About Size
A customer may say, “We need a 600 by 500 by 250 metal enclosure.”
That is useful, but it is not enough.
We still need to know where it will be installed, what goes inside, how much wiring space is needed, where cables enter, whether the door needs a gasket, whether heat builds up, and whether the surface can survive shipping.
Here is the practical problem: two enclosures can have the same size but completely different project fit.
| Same Size, Different Project | What Changes |
|---|---|
| Indoor control box | Usually focuses on component layout, access, and wiring |
| Outdoor junction box | Needs rain, dust, cable entry, gasket, and corrosion review |
| Stainless steel enclosure | Needs material grade, welding, surface finish, cleaning, and packaging review |
| Floor-standing cabinet | Needs base, lifting, frame support, door flatness, and export packaging review |
| Custom enclosure with cut-outs | Needs drawing review, hole tolerance, burr control, coating protection, and accessory layout |
So the right question is not only “what size do you need?”
The better question is: what does this enclosure need to survive, support, and make easy for the installer?
Use Risk-Matched Specification, Not Maximum Specification
Risk-Matched Specification means that every upgrade must answer a defined site condition, failure mode, customer specification, or compliance need. A higher specification can look like the safest purchase, but if it does not address one of those requirements, it may add cost without reducing a meaningful risk.
For a B2B buyer, over-specification can affect more than the unit price. It may increase material cost, enclosure weight, freight, fabrication difficulty, accessory cost, and lead time. It can also distract the team from details that matter more, such as cable entry, internal clearance, gasket compression, heat management, and service access.
Turn that principle into a review step: record the site condition, failure mode, customer specification, or compliance need behind every upgraded material, protection target, thickness, lock, cooling accessory, or documentation requirement.
The goal is not to choose the cheapest enclosure. It is to choose the least complex specification that fully protects the equipment, meets the project requirements, and supports installation and maintenance. That is usually a better definition of value than buying the highest available specification.
Set the Budget by Failure Consequence, Not Component Price
An inexpensive component can create an expensive failure. First-principles rule: an enclosure protects the function performed by the components inside, not merely the replacement value of those components.
A low-cost relay, sensor circuit, terminal connection, or 24 VDC control power supply can sit in a critical interlock or shared control-power path. It may not control the line by itself, but its failure can remove a run-permissive signal or control voltage, stop a bottleneck machine, and force the wider line to pause. The loss comes from downtime, scrap, troubleshooting, missed delivery, and restart—not the part price.
Before reducing the enclosure budget because the internal components are inexpensive, use the fixed trigger question: “What stops if it fails?” Then ask: How long will detection, access, repair, and restart take? What will that interruption cost the operation? A modest enclosure upgrade can be justified when it materially reduces a large, defined downtime risk.
This does not mean buying the most expensive enclosure. It means comparing enclosure cost with operational consequence, then spending only where the specification reduces a real failure mode.
Illustrative Story: The Inexpensive Relay and the Expensive Stop
Illustrative composite based on common RFQ review conditions.
A project buyer was reviewing a compact machine-side control enclosure with an interface relay, terminal connections, and a small 24 VDC power supply. Because the components were inexpensive relative to the process they supported, the initial instinct was to reduce the enclosure budget.
Before the quote was approved, the team used one fixed trigger question: “What stops if it fails?”
The PLC managed the sequence; the relay only carried a run-permissive signal for a bottleneck machine. It did not control the whole line, but failure could remove permission to run. The real consequence was not merely replacing the relay. It was fault-finding, opening the enclosure, repairing and testing the circuit, restarting production, and—if other stations depended on that machine—pausing the wider line.
The inquiry was then reviewed using the FN Enclosure Risk-Matched Specification method. The team confirmed the actual exposure, cable entry, door and gasket compression, internal heat, component clearance, access, and maintenance needs. Budget was added only where the enclosure specification reduced a defined failure mode.
The result was not maximum specification. It was risk-matched: the enclosure reflected the consequence of losing the control function, not merely the relay’s replacement value, while unnecessary upgrades were left out. The lesson is simple: protect the process, not just the component.
Failure-Consequence Budget Check
| Decision Question | What to Confirm |
|---|---|
| What stops if it fails? | Confirm the component function and whether failure stops a machine, cell, line, utility, or other critical process. |
| How long is recovery? | Estimate detection, safe access, diagnosis, replacement, testing, and restart time. |
| What is the business consequence? | Consider lost output, scrap or rework, missed delivery, maintenance labor, and service disruption. |
| Does the enclosure specification reduce that risk? | Identify the exposure or failure mode reduced by material, sealing, cooling, structure, cable entry, or another feature. |
Risk-to-Specification Decision Matrix
Use this matrix when preparing an RFQ, comparing supplier proposals, or reviewing a specification before approval.
| Proposed upgrade | Risk it should address | Evidence or condition to confirm | Possible cost if unnecessary |
|---|---|---|---|
| Higher material grade | Corrosion from the actual installation environment | Coastal, chemical, washdown, humidity, or other documented exposure | Material cost, weight, and fabrication difficulty |
| Higher protection target | Defined dust or water exposure | Site condition, customer specification, and required test or documentation | Sealing, hardware, testing, and modification complexity |
| Greater material thickness | Load, impact, mounting, or door-stiffness risk | Enclosure size, mounting method, handling, and mechanical requirements | Weight, forming difficulty, freight, and lead time |
| Cooling or condensation accessory | Internal heat or moisture risk | Component heat load, ambient temperature, solar exposure, and temperature change | Accessory cost, maintenance, space, and sealing coordination |
| Special lock or accessory | Access, security, installation, or service requirement | User procedure, maintenance frequency, and customer standard | Parts cost, sourcing time, and assembly complexity |
For each proposed upgrade, ask: “What project risk does this solve, and what changes if we remove it?” If the answer is unclear, review the requirement before adding it to the quote.
Evidence Check Before Approving an Upgrade
A specification upgrade is easier to defend when the team can point to a condition, measurement, drawing, customer requirement, or maintenance constraint. Before approving an upgrade, record:
- the site condition or failure mode it addresses;
- the component, process, installation, or maintenance function affected;
- the drawing, calculation, customer standard, test requirement, or field observation supporting it;
- what changes in cost, weight, lead time, installation work, or maintenance;
- who owns the final technical confirmation.
Decision rule: If the risk is real but the evidence is incomplete, hold the item for technical review. Do not quietly remove it, and do not automatically buy the highest specification.
Step 1: Check the Installation Environment
Start here because the environment usually decides the material, protection level, sealing design, and accessories.
Ask these questions first:
- Is it indoor or outdoor?
- Will it face rain, dust, humidity, sunlight, or temperature change?
- Is the site coastal, chemical, industrial, or subject to washdown?
- Will the enclosure be near heat sources or vibration?
- Will technicians open it often?
- Will cables enter from the bottom, side, back, or top?
Why this matters:
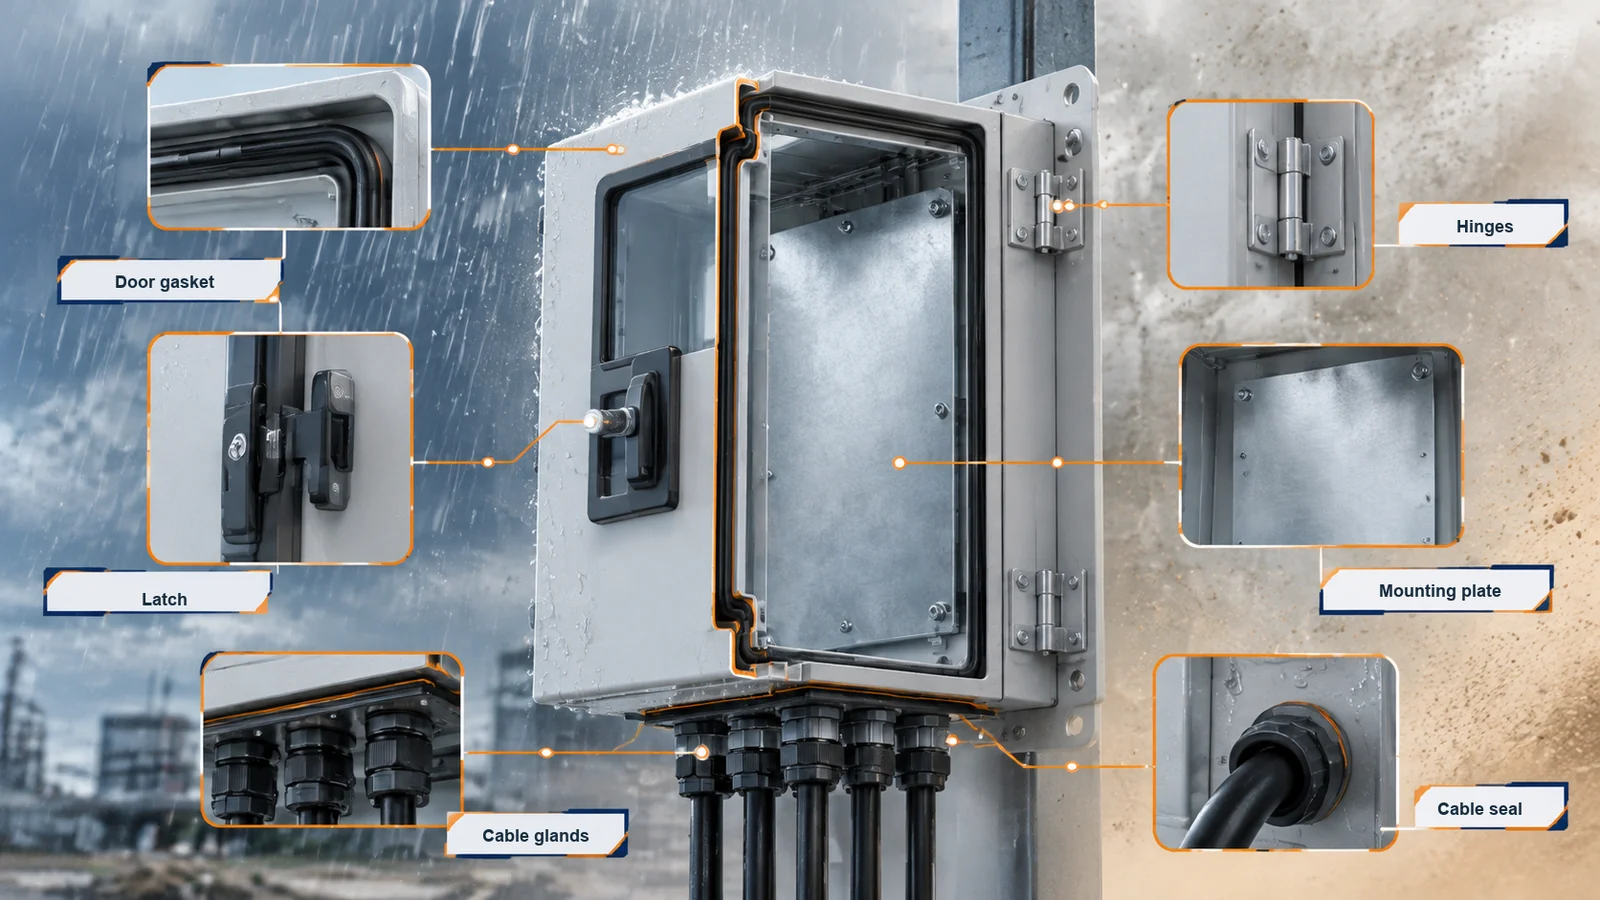
An indoor enclosure can often focus on layout and access. An outdoor electrical enclosure (/outdoor-electrical-enclosures/) needs more review: rain, dust, UV exposure, corrosion, condensation, and cable entry can all affect long-term performance.
Do not reduce the requirement to “waterproof.” Rain, splashing water, hose-directed water, temporary immersion, and condensation are different issues. Use defined protection language and confirm testing requirements if documentation is needed.
Step 2: Confirm What Goes Inside
Next, check the internal components.
Do not choose the enclosure before you know what it needs to hold.
Ask:
- What components go inside?
- For every component that may be a single point of failure, ask: “What stops if it fails?” Then confirm whether a machine, cell, line, utility, or process is affected.
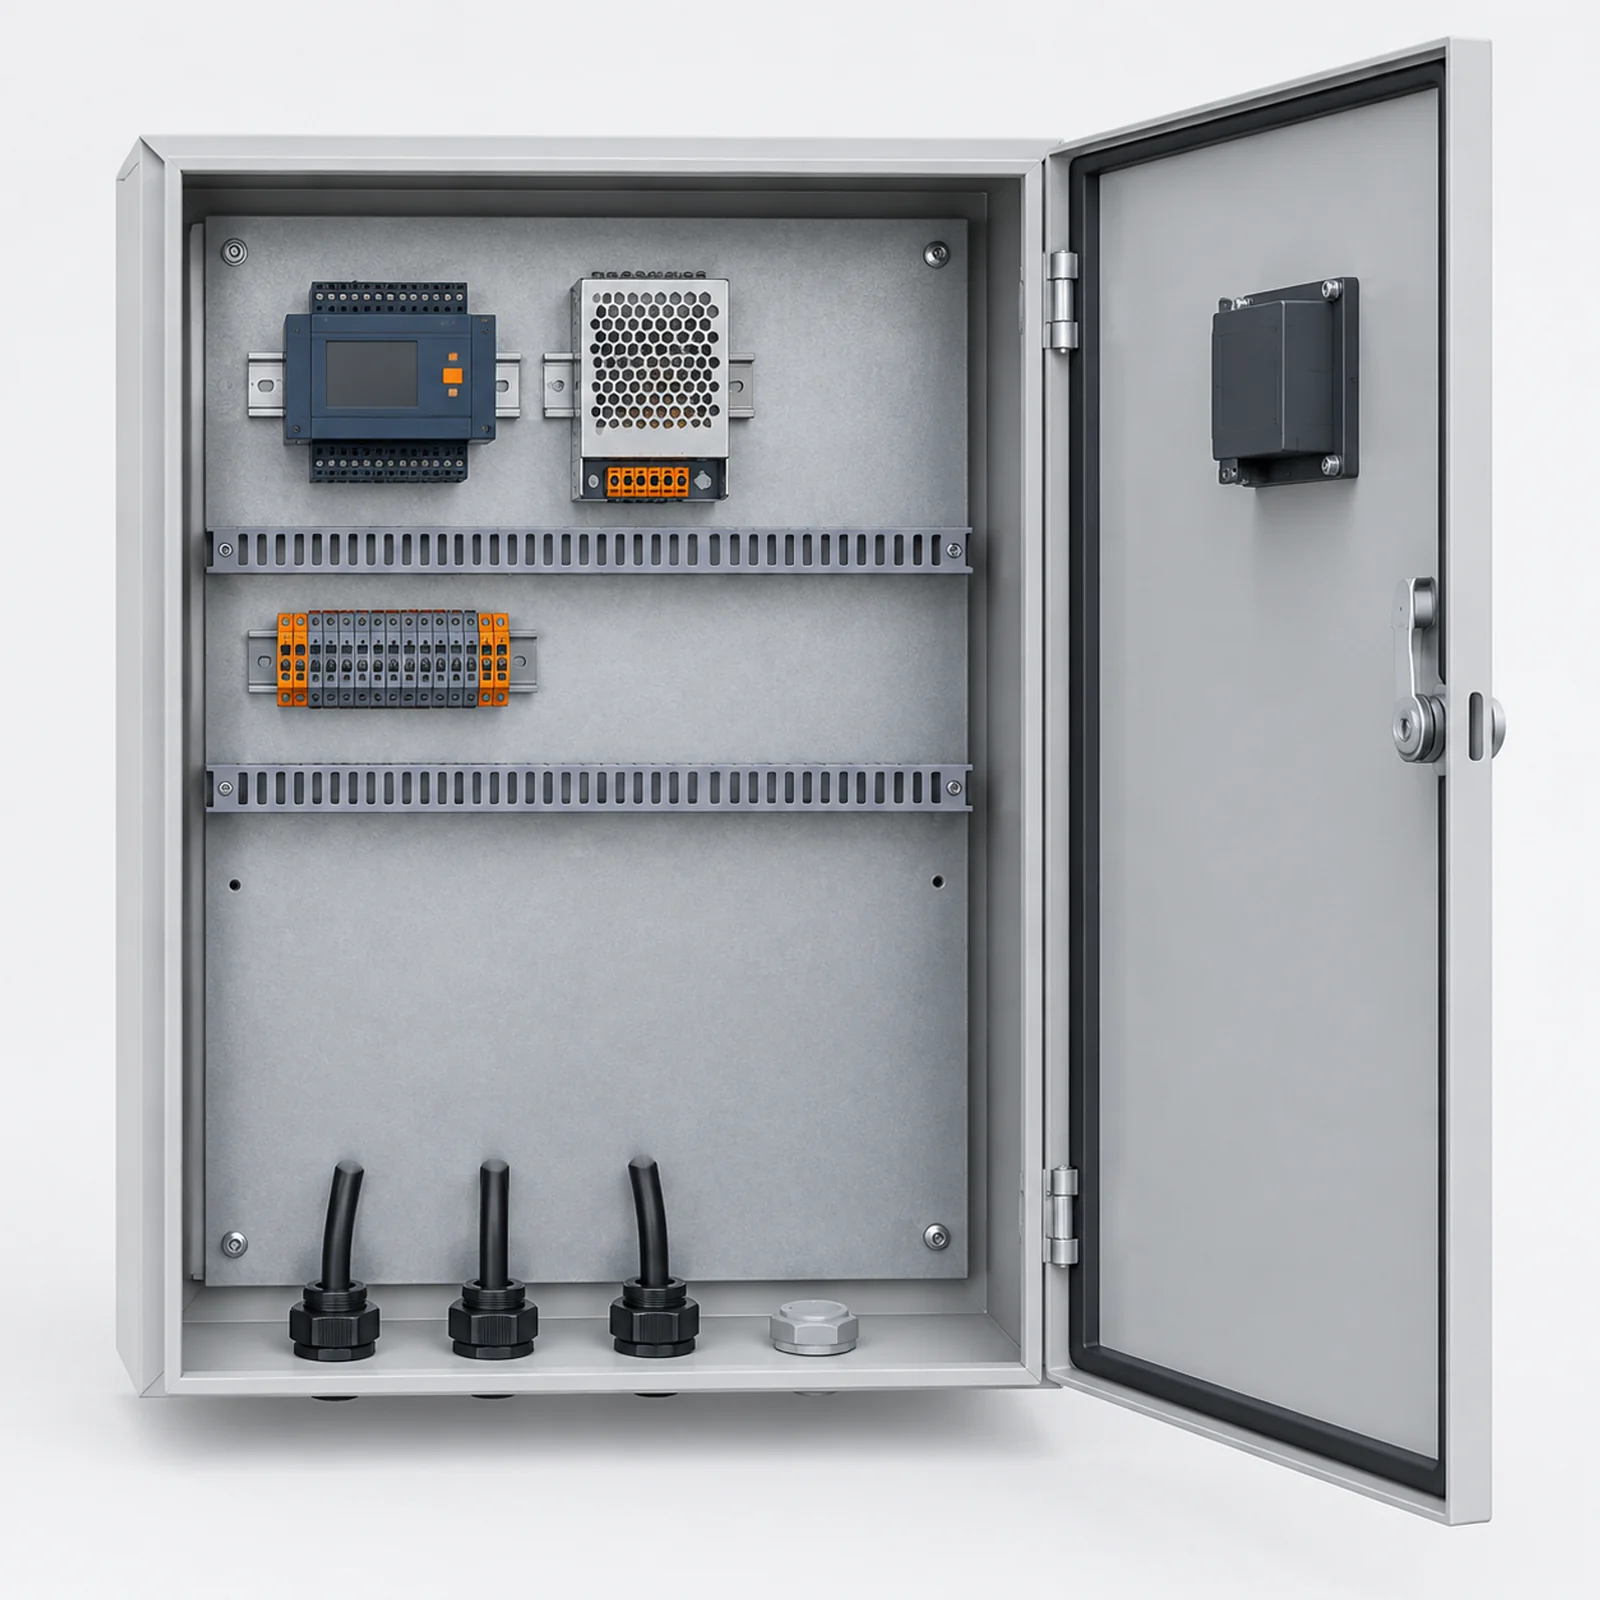
- Are there breakers, terminals, controllers, relays, contactors, switches, or power supplies?
- How much wiring space is needed?
- Is a mounting plate required?
- Are DIN rails required?
- Will the technician need room for service later?
- Are there heat-generating components?
Why this matters:
An enclosure that looks large enough from the outside can still be too tight inside. Wiring bend radius, component clearance, mounting plate position, cable glands, and maintenance access all need space.
If the internal layout is unclear, send a component list or sketch before asking for a final quote.
Identify Critical Control Paths
Do not assume that every low-cost part controls the whole machine. Instead, identify whether a relay, sensor circuit, terminal connection, or 24 VDC control power supply sits in a run-permissive, safety, interlock, or shared control-power path.
Confirm:
- Which controller makes the sequence decision?
- Which signal or control voltage allows the machine to run?
- Is the affected machine a bottleneck for upstream or downstream stations?
- Can the fault be bypassed safely, or must production stop?
- How long will diagnosis, replacement, circuit testing, and restart take?
This distinction keeps the engineering language accurate: the component may not control the entire line, but its failure can still remove permission to run and create line-wide downtime.
Step 3: Choose the Enclosure Type
Choose the enclosure form based on installation method and access needs.
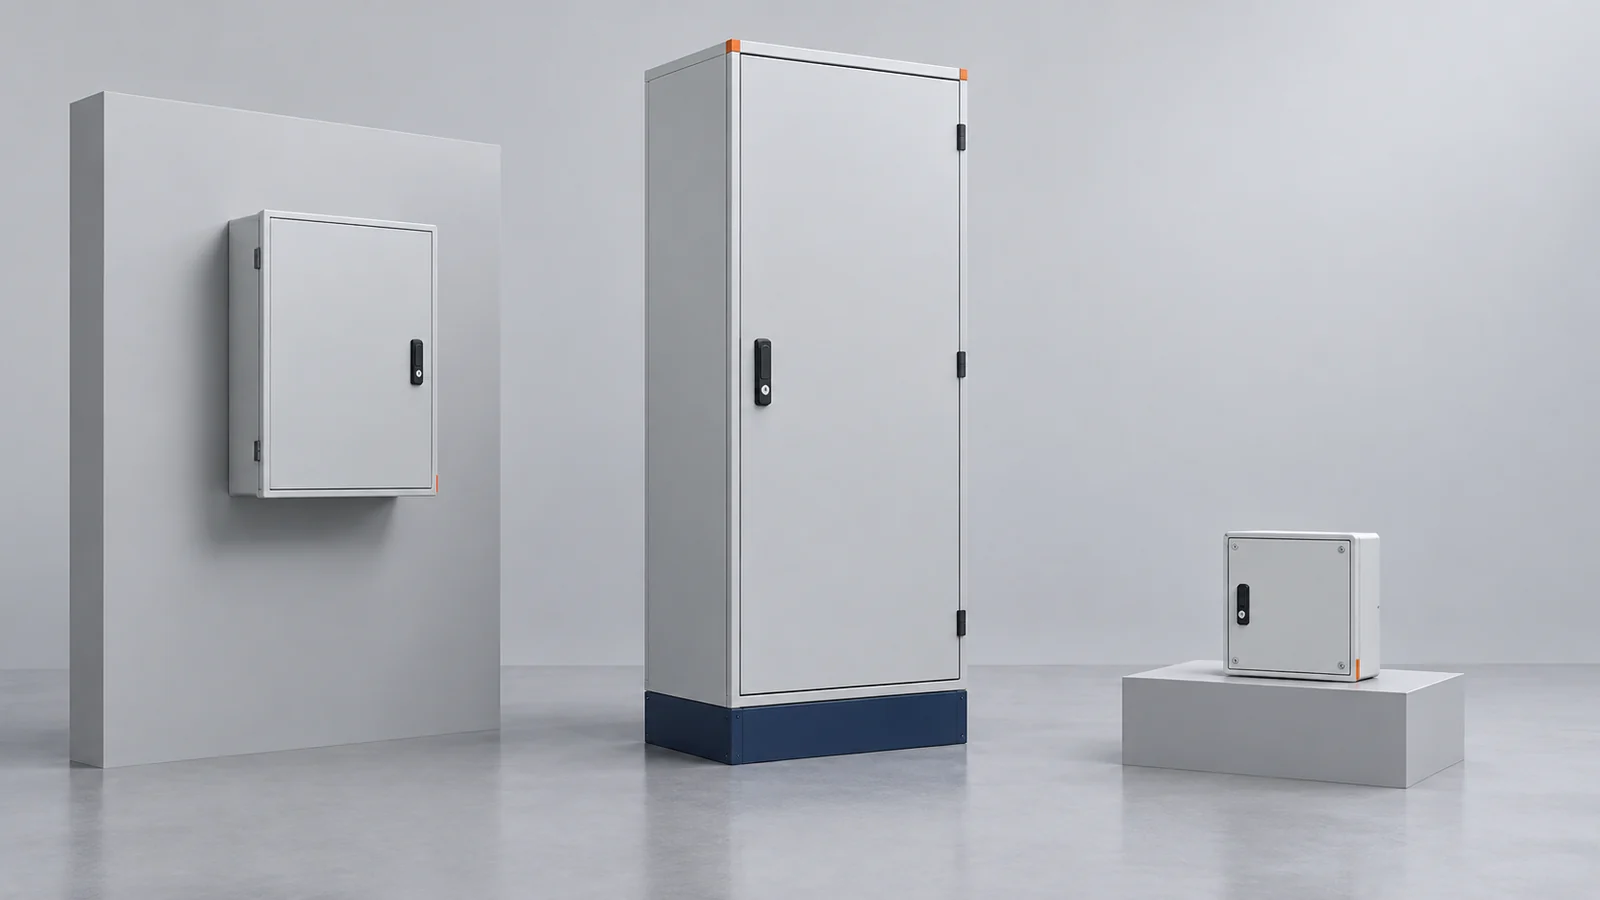
| Enclosure Type | Best For | What to Check |
|---|---|---|
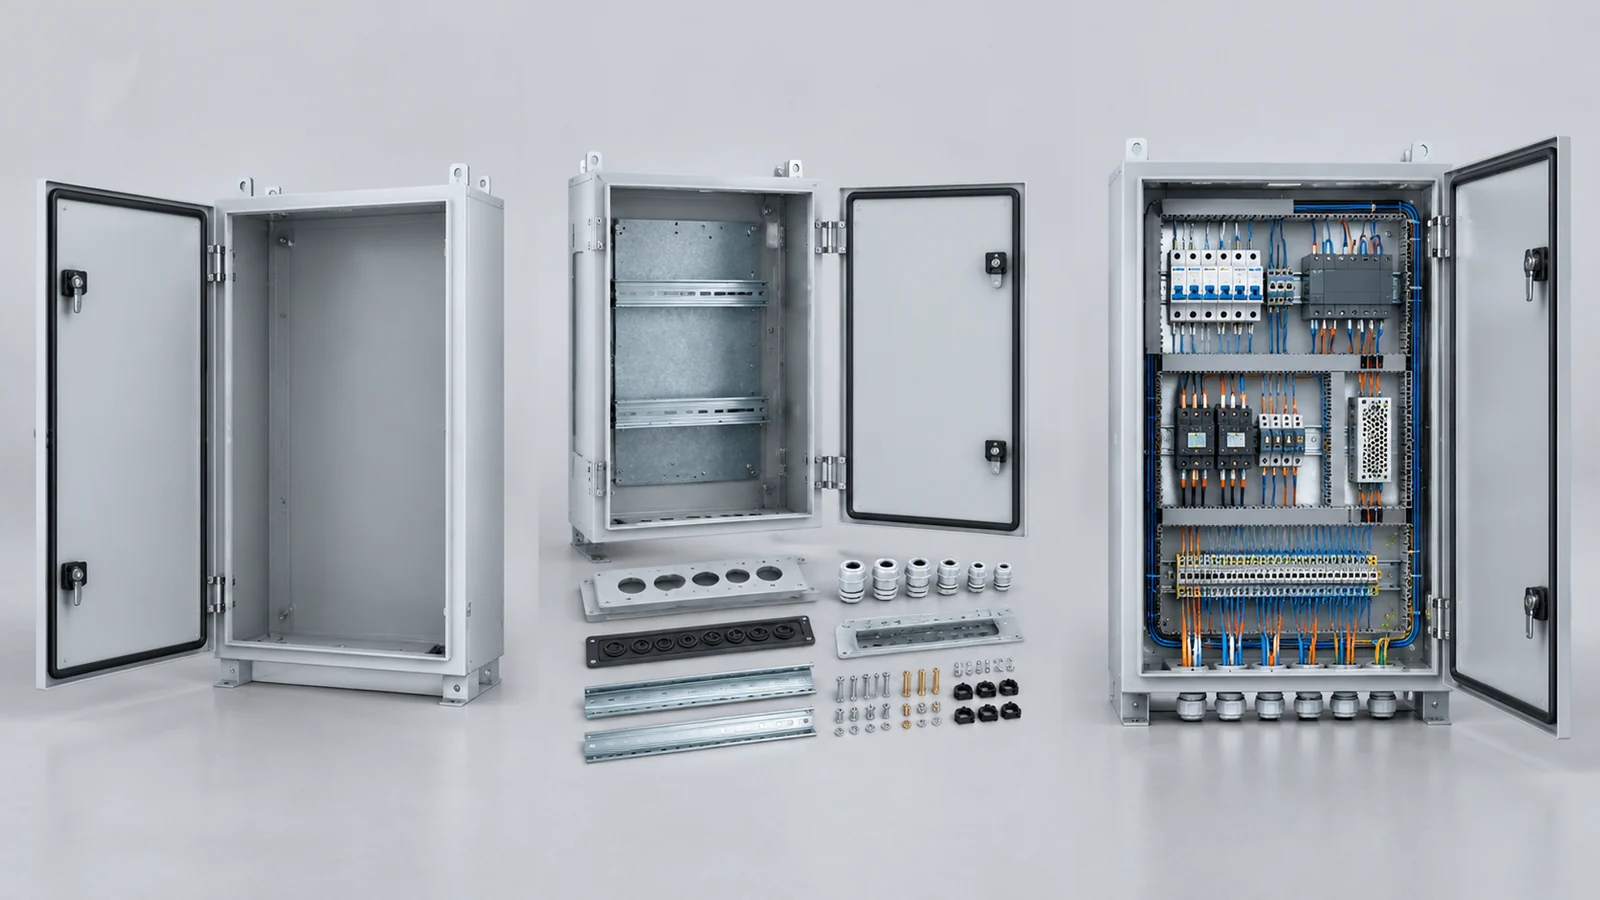
| Wall-mounted enclosure | Compact control, distribution, junction, and machine-side applications | Wall strength, box weight, mounting holes, door swing, cable entry |
| Floor-standing enclosure | Larger control, power distribution, and automation projects | Base, lifting, frame support, door flatness, packaging |
| Junction box | Cable junctions and field wiring | Cable entry, cover access, gasket, grounding, box depth |
| Distribution box enclosure | Distribution components and building or industrial power routing | Layout, access, component clearance, labeling |
| Control enclosure | Control devices, wiring, machine control, pump/HVAC systems | Heat, layout, wiring access, service clearance |
| Custom enclosure | Project-specific size, cut-outs, mounting plate, accessories, packaging | Drawings, tolerance, material, finish, hardware, delivery method |
Why this matters:
The enclosure type affects everything after it: material thickness, mounting, door structure, internal layout, accessories, packaging, and quote accuracy.
If a standard product almost fits but still needs cut-outs, gland plates, or special mounting, treat it as a custom review.
Step 4: Choose Material and Surface Finish
Choose material based on the installation environment, not just unit price.
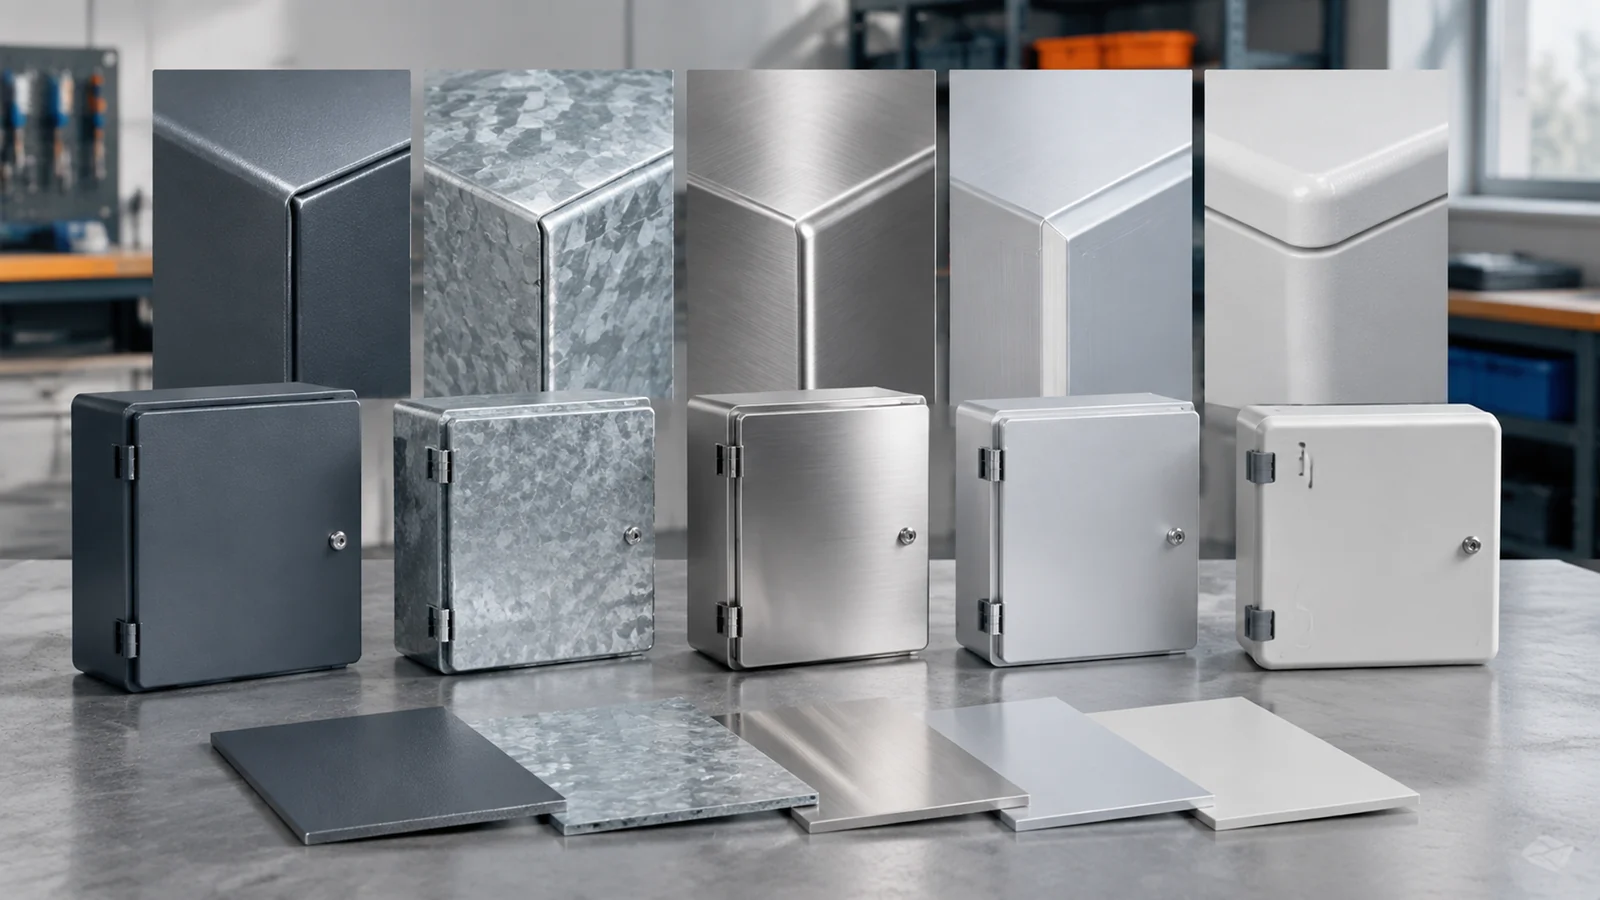
| Material | Good Fit | Watch Out For |
|---|---|---|
| Mild steel | Indoor industrial projects and cost-sensitive enclosures | Needs proper surface treatment |
| Powder-coated steel | Indoor or protected environments needing a clean finish | Pretreatment, scratches, cut edges, coating adhesion |
| Galvanized steel | Some projects needing improved corrosion resistance | Cut edges, welding zones, finish compatibility |
| Stainless steel 304 | General corrosion-resistant applications | Not always enough for coastal or chemical exposure |
| Stainless steel 316 | More demanding corrosion environments | Higher cost, still needs correct fabrication and cleaning |
| Aluminum | Lightweight applications | Strength, galvanic corrosion, and surface finish |
| Plastic or fiberglass | Selected non-metallic uses | UV, impact, fire, and structural limits |
Why this matters:
The cheapest material can become expensive if it corrodes, scratches, deforms, or needs replacement. At the same time, stainless steel is not automatically the best answer for every project.
For stainless projects, review stainless steel electrical enclosures (/stainless-steel-electrical-enclosures/) and confirm whether 304 or 316 is appropriate for the environment.
Step 5: Define the Protection Target Before Talking About Ratings
IP and NEMA language helps with selection, but it should not become loose marketing language.
The IEC explains that IP ratings describe degrees of protection against solid objects and water. The first digit relates to solid objects or dust, and the second digit relates to water ingress protection. Source: IEC IP Ratings (https://www.iec.ch/ip-ratings).
NEMA enclosure types are widely used in North America and describe enclosure type definitions for different indoor, outdoor, dust, oil, water, corrosion, and hazardous-location conditions. Source: NEMA Enclosure Types (https://www.nema.org/docs/default-source/products-document-library/nema-enclosure-types.pdf).
Here is the practical way to think about it:
| Selection Question | What to Confirm |
|---|---|
| Dust risk | Is it light dust, heavy dust, conductive dust, or outdoor windblown dust? |
| Water risk | Rain, splash, hose-directed water, subject to washdown exposure, or condensation? |
| Corrosion risk | Humidity, salt air, chemicals, cleaning agents, or industrial fumes? |
| Access risk | Does the enclosure need locking, tool access, or frequent opening? |
| Documentation | Does the project need test reports, certification proof, or only selection guidance? |
Why this matters:
A rating term alone does not protect the project if later modifications are not reviewed. Cut-outs, cable glands, gasket compression, door hardware, and field drilling can all affect final performance.
Use IP and NEMA terms as specification language. If certified or tested documentation is required, confirm it before production.
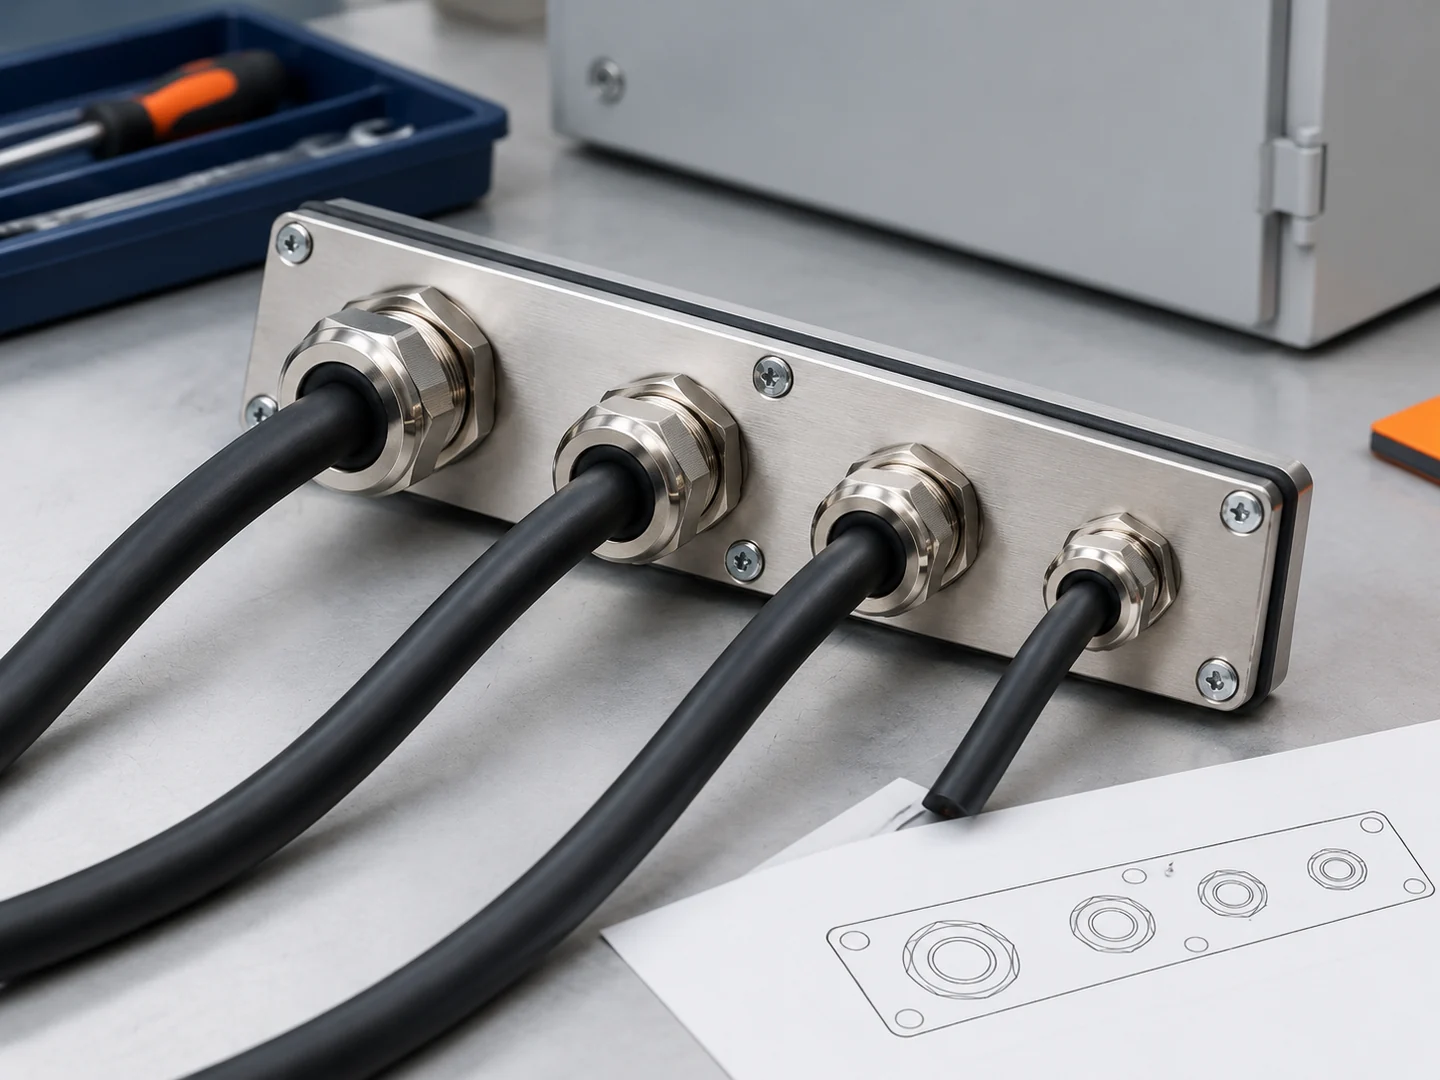
Step 6: Plan Cable Entry and Cut-Outs Early
Cable entry is one of the most common places where enclosure projects go wrong.
Ask:
- Where will cables enter?
- What cable sizes are used?
- Are cable glands required?
- Is a gland plate needed?
- Will holes be cut before coating or drilled on site?
- Is there enough spacing between holes?
- Will cable entry affect gasket, door swing, or mounting plate layout?
Why this matters:
Poorly planned field modifications can compromise ingress protection performance. Burrs, coating damage, weak sealing washers, wrong cable gland size, and poor gland plate position can create water ingress or installation problems.
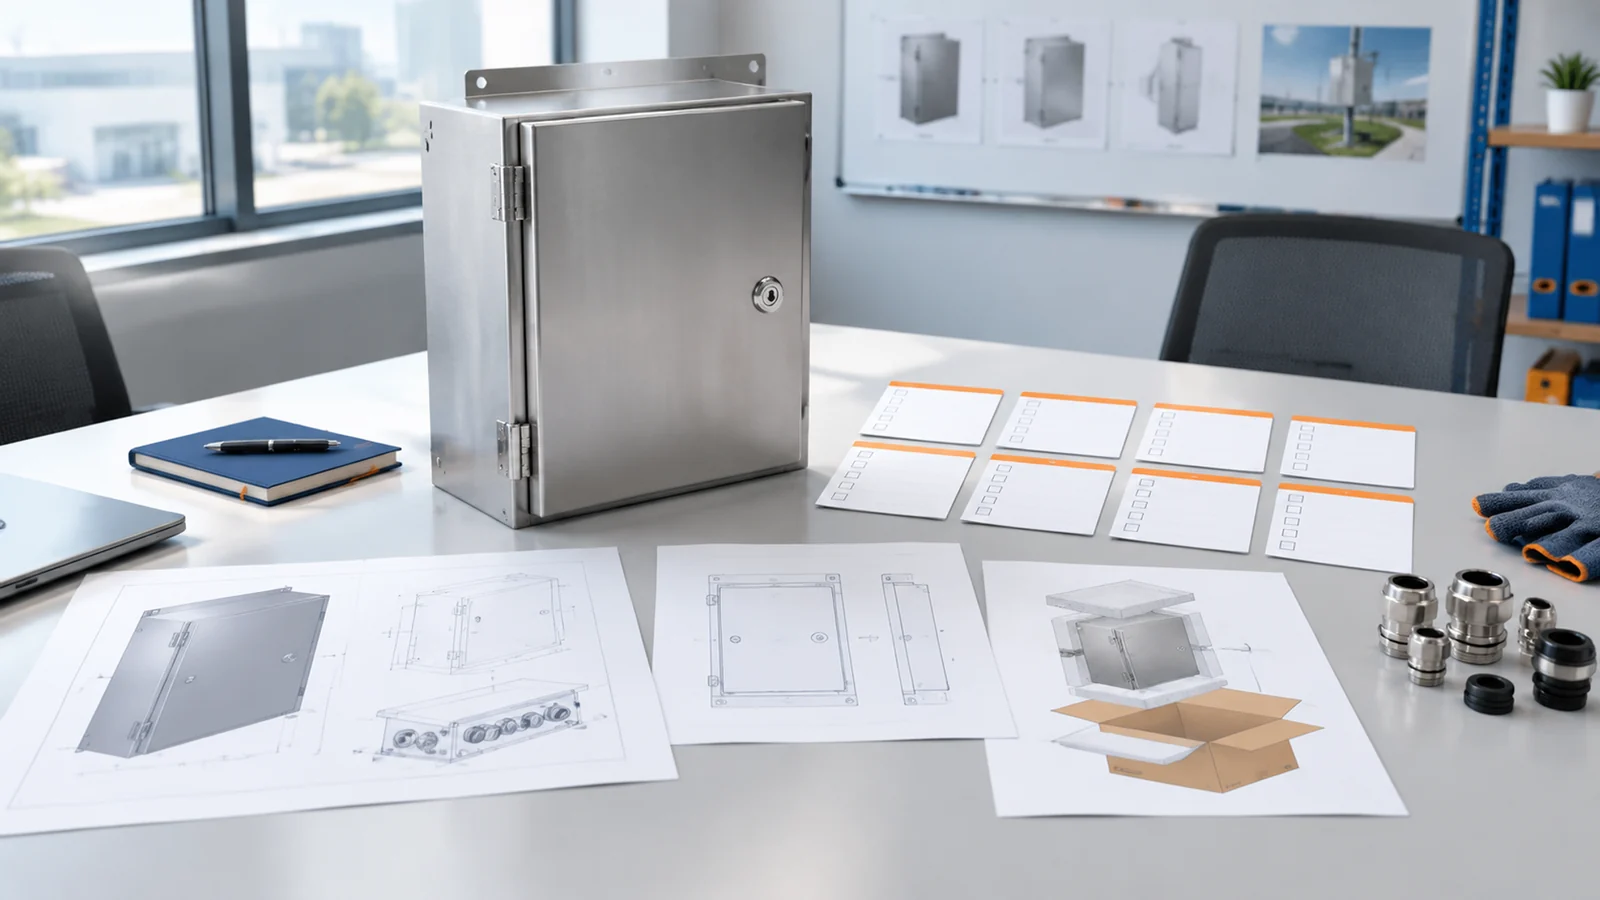
If the project needs cut-outs, send the drawing early. If the drawing is not ready, send a photo, sketch, and cable list.
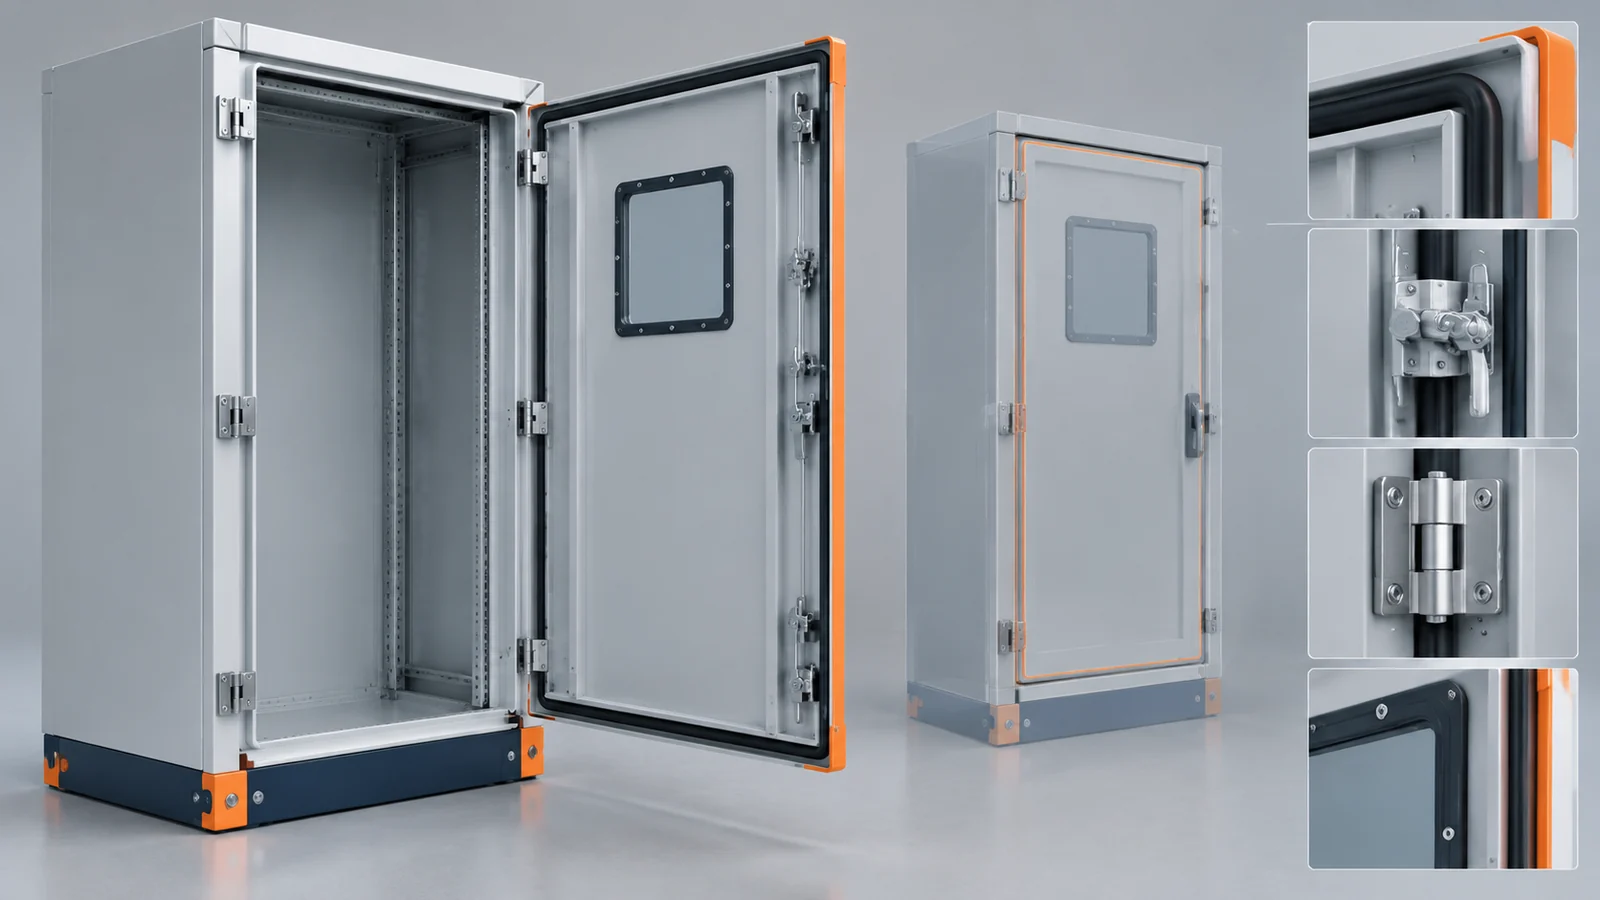
Step 7: Review Door, Gasket, Lock, and Hinge Together
The door system is not decoration.
It affects access, safety, sealing, and maintenance.
Ask:
- How large is the door?
- How often will it be opened?
- Is a gasket required?
- What lock or latch is needed?
- Does the hinge support the door size?
- Does the gasket need even compression?
- Does the door need a window or viewing panel?
Why this matters:
A gasket cannot seal well if the door does not compress it evenly. A large door may need more than one latch point. A weak hinge can affect alignment. A lock can affect how tightly the door closes.
When selecting an enclosure, review door, gasket, lock, hinge, and cable entry together. They are part of one system.
Step 8: Check Heat, Ventilation, and Condensation
Heat is not only a component problem. It is also an enclosure design problem.
Ask:
- What components create heat?
- Will the enclosure be in direct sun?
- Is natural ventilation enough?
- Are fans, filters, heaters, or air conditioners needed?
- Is condensation possible after temperature changes?
- Will added vents affect dust or water protection goals?
Why this matters:
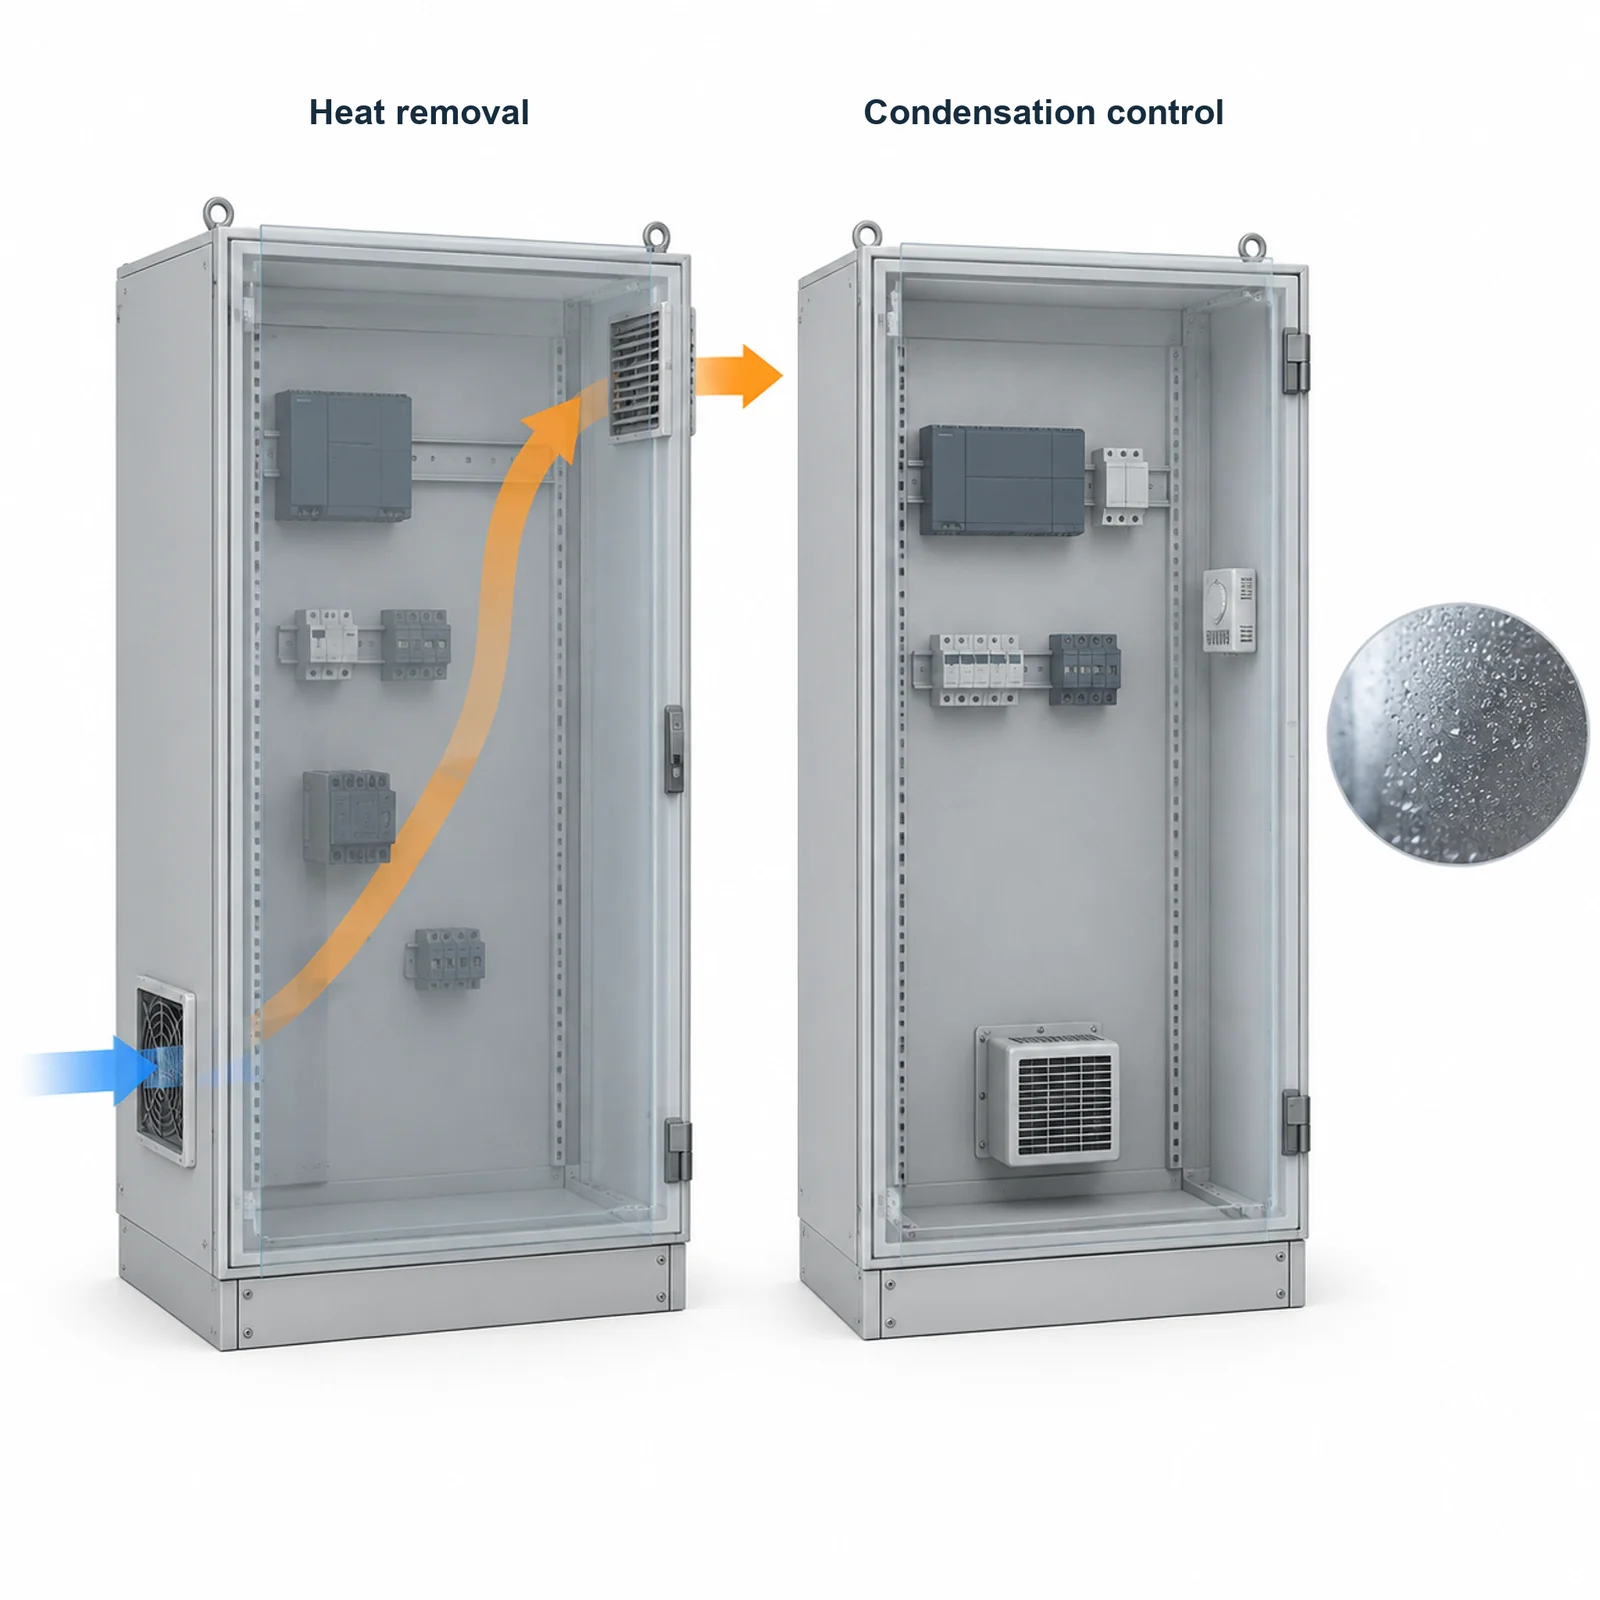
An enclosure can protect against rain but still create trouble if heat builds up inside. Outdoor cabinets may also face condensation when temperature changes quickly. Adding ventilation can help heat but may affect dust or water protection, so accessories need to be reviewed with the protection target.
If thermal issues are important, do not leave fan, filter, heater, or air conditioner planning until the last step.
Step 9: Confirm Accessories and Internal Layout
Accessories decide how easy the enclosure is to install and service.
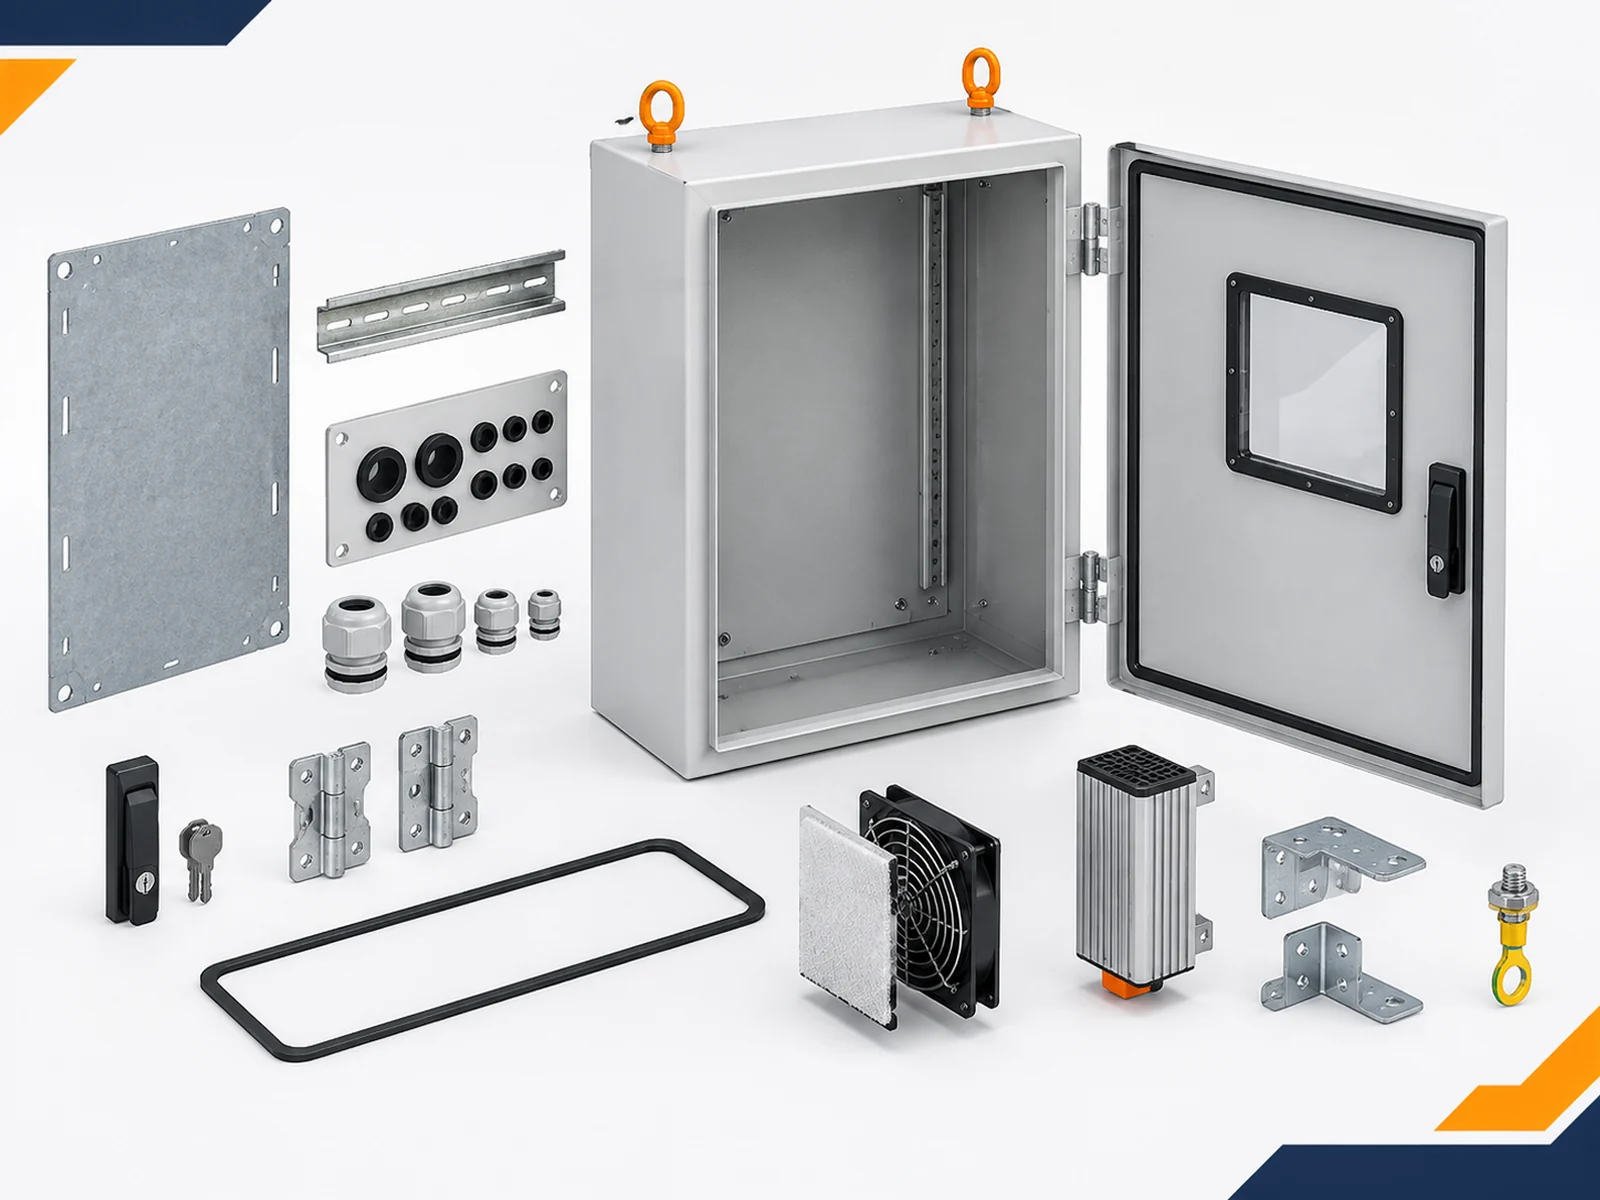
Common accessories include:
- mounting plate
- DIN rail
- gland plate
- cable glands
- lock or latch
- hinge
- gasket
- fan and filter
- heater
- air conditioner
- window
- brackets
- lifting points
- grounding points
Why this matters:
Accessories are often small in cost but large in project impact. A missing mounting plate delays installation. Wrong DIN rail spacing creates wiring problems. Poor cable gland planning creates field rework. Weak packaging causes surface scratches or door deformation.
If accessories are part of the project, include them in the first quote request, not after the price is confirmed.
Step 10: Check Packaging and Shipping
This is easy to ignore, but it matters for export projects.
Ask:
- Is the enclosure powder-coated or stainless steel?
- Is the door large or heavy?
- Are accessories packed separately?
- Is pallet, crate, or reinforced packaging needed?
- Will the enclosure travel by sea, air, or local delivery?
- Are surface protection and corner protection needed?
Why this matters:
A well-made enclosure can still arrive with a bent door, scratched finish, or missing accessories. Packaging is part of project quality, especially for stainless steel, powder-coated surfaces, large cabinets, and export shipments.
What Should You Send for a Faster Quote?
Send enough information for the supplier to review the project, not just the box size.
Quote checklist:
- overall size or drawing
- installation environment
- indoor or outdoor use
- material and finish preference
- required protection target
- component list or internal layout
- critical functions affected if a protected component fails
- mounting plate and DIN rail requirements
- cable entry position and cable size
- cut-out drawing
- door, gasket, lock, hinge, window, or accessory requirements
- heat or condensation concerns
- packaging and shipping requirements
- quantity
- required inspection, test, or documentation needs
Use This One-Sentence RFQ Summary
Before attaching drawings and detailed specifications, summarize the project in one sentence:
RFQ template: We need a [type, material, and size] enclosure for [installation environment], housing [components and protected function], with [cut-outs, cable entry, and accessories], because failure would affect [machine, cell, line, utility, or process]. Required quantity, date, packaging, inspection, and documents are [details].
This sentence does not replace drawings or specifications. It exposes missing assumptions before the supplier begins quoting and gives every buyer role the same project summary.
Who Should Confirm What Before the RFQ?
A complete enclosure RFQ usually requires input from more than one role. Use this ownership check before the inquiry is released.
| Buyer Role | Primary Review | Information to Provide |
|---|---|---|
| Electrical or design engineer | Environment, component function, layout, heat, and protection target | Drawings, component list, heat sources, mounting plate, cable entry, and service clearances |
| Procurement or project buyer | Budget, delivery, documentation, and consequence of failure | Quantity, required date, packaging, required documents, and what the interruption affects |
| Installer or system integrator | Site fit, wiring, cut-outs, and installation work | Cable sizes, gland requirements, mounting method, door swing, entry direction, and site access |
| Maintenance or operations | Reliability, service access, and recovery time | Opening frequency, critical components, replacement access, maintenance constraints, and restart needs |
Why this matters:
The more clearly you describe the project, the fewer assumptions the supplier has to make. Good enclosure quoting is not only about price. It is also about reducing avoidable rework before production.
RFQ release rule: If engineering, procurement, installation, and maintenance are working from different assumptions, do not release the inquiry as final. Resolve the conflict or mark it as an open item that the supplier must confirm before production.
For project-specific work, send the details through custom electrical enclosures (/custom-electrical-enclosures/) first. Use contact FN Enclosure (/contact/) when you are ready for the final handoff.
Use the RFQ Tool in the Page Footer
Use the RFQ tool in the page footer to collect the project environment, protected function, drawings, cable entry, heat, accessories, packaging, quantity, and documentation requirements in one place. Include the answer to the fixed trigger question, “What stops if it fails?”, so the supplier can match the enclosure specification to the consequence of failure.
Factory Note: What We Check First
When we review an enclosure project, the first question is not “what box size do you want?”
We ask: where will this enclosure work, what goes inside, and what can go wrong after installation?
A drawing can show length, width, and height, but it may not show cable entry direction, gasket compression, heat from components, condensation risk, packaging damage, or whether the buyer expects only an empty shell or a deeper hardware preparation scope.
One inquiry for an enclosure intended for outdoor use appeared ready to quote: the buyer had provided the enclosure size and requested stainless steel. But a size and material request did not answer five questions that could still affect installation, sealing, operation, and delivery.
Five Hidden Issues Behind a Complete-Looking RFQ
- Bottom cable entry. Without a confirmed hole layout, cable sizes, gland requirements, and entry direction, the project could require field drilling or create sealing and clearance problems. Before quoting, confirm the cable list, hole sizes, spacing, and gland plate position.
- Door and gasket compression. A gasket cannot compensate for an uneven door or unsuitable lock-point distribution. Before quoting, review door size, flatness, gasket type, hinge position, and the number and location of latches as one sealing system.
- Mounting plate and internal clearance. An enclosure can match the outside dimensions and still leave too little room for components, wiring bends, cable glands, or maintenance access. Before quoting, check the component layout, mounting plate, DIN rails, wireways, and service clearances.
- Internal heat and condensation. Stainless steel and a high protection target do not prevent overheating or condensation. Before quoting, review component heat load, ambient temperature, solar exposure, temperature change, and whether any cooling or condensation-control accessory must be coordinated with the protection target.
- Export packaging. A finished enclosure can still arrive with a distorted door, scratched surface, or missing accessories. Before quoting, confirm transport method, enclosure weight, door restraint, surface protection, pallet or crate support, lifting points, and accessory packing.
Any one of these open issues could turn a complete-looking quotation into field drilling, weak sealing, installation delay, overheating, or transport damage. A higher material grade alone would not resolve them.
Before the quote was finalized, the inquiry was reframed around five confirmations: cable-entry drawing, door-sealing system, internal layout, thermal conditions, and packing method. The lesson was not to add more specifications. It was to remove the assumptions that could otherwise enter production.
Empty Enclosure, Hardware Preparation, and Full Electrical Assembly Are Different
This is important when choosing a supplier.
An empty enclosure is a fabricated shell or cabinet prepared to hold electrical components.
Hardware preparation may include cut-outs, mounting plates, DIN rails, gland plates, locks, hinges, gaskets, windows, brackets, and packaging.
Full electrical assembly may involve electrical components, wiring, testing, documentation, and a different responsibility scope.
If you need only enclosure fabrication and mechanical preparation, say that clearly. If you need full panel assembly or certified electrical work, confirm the required scope and documents separately.
State the Supplier Scope in the RFQ
Scope template: Please quote [empty enclosure / mechanically prepared enclosure / full electrical assembly], including [required fabrication, hardware, cut-outs, accessories, testing, and documents], excluding [items outside the supplier scope], with responsibility for drawings, inspection, and approval confirmed before production.
This prevents one party from pricing an empty shell while the other expects hardware preparation, or pricing a full electrical assembly when the project requires enclosure fabrication only.
FAQ
Should inexpensive components use a cheaper enclosure?
Not automatically. A low-cost component may sit in a critical interlock or control-power path. It may not control the process by itself, but its failure can stop a machine or force the line to pause. Compare enclosure cost with the consequence of failure—downtime, rework, missed delivery, maintenance, and restart—then specify only the protection that reduces a defined risk.
Is the highest-specification enclosure always the best choice?
No. The best choice is the least complex specification that fully addresses the installation risks, customer requirements, and documentation needs. Every upgrade should solve a defined project risk.
What is the first thing to check when choosing an electrical enclosure?
Start with the installation environment. Indoor, outdoor, wet, dusty, humid, coastal, chemical, hot, or vibration-prone sites all require different enclosure decisions.
How do I choose the right enclosure size?
Choose size based on components, wiring space, mounting plate layout, cable entry, heat clearance, and maintenance access. Do not choose only by outside dimensions.
Which material is best for an electrical enclosure?
There is no single best material. Mild steel, powder-coated steel, galvanized steel, stainless steel, aluminum, plastic, and fiberglass all fit different environments and budgets.
Should I choose by IP rating or NEMA type?
Use IP and NEMA language to describe protection goals, but confirm the actual project condition, modifications, and documentation requirements before production.
When do I need a custom electrical enclosure?
You need a custom enclosure when standard size, material, finish, cut-outs, mounting plate, cable entry, accessories, or packaging do not match the project.
Who should review an electrical enclosure specification before ordering?
Engineering should confirm the environment, component function, internal layout, heat, and protection target. Procurement should confirm quantity, delivery, documentation, and failure consequence. Installation should confirm cable entry, cut-outs, mounting, and access, while maintenance should confirm service and recovery needs.
What information should I send to an enclosure manufacturer?
Send drawings, installation environment, component list, critical functions and failure consequences, size, material, finish, protection target, cable entry, cut-outs, accessories, quantity, and packaging requirements.