

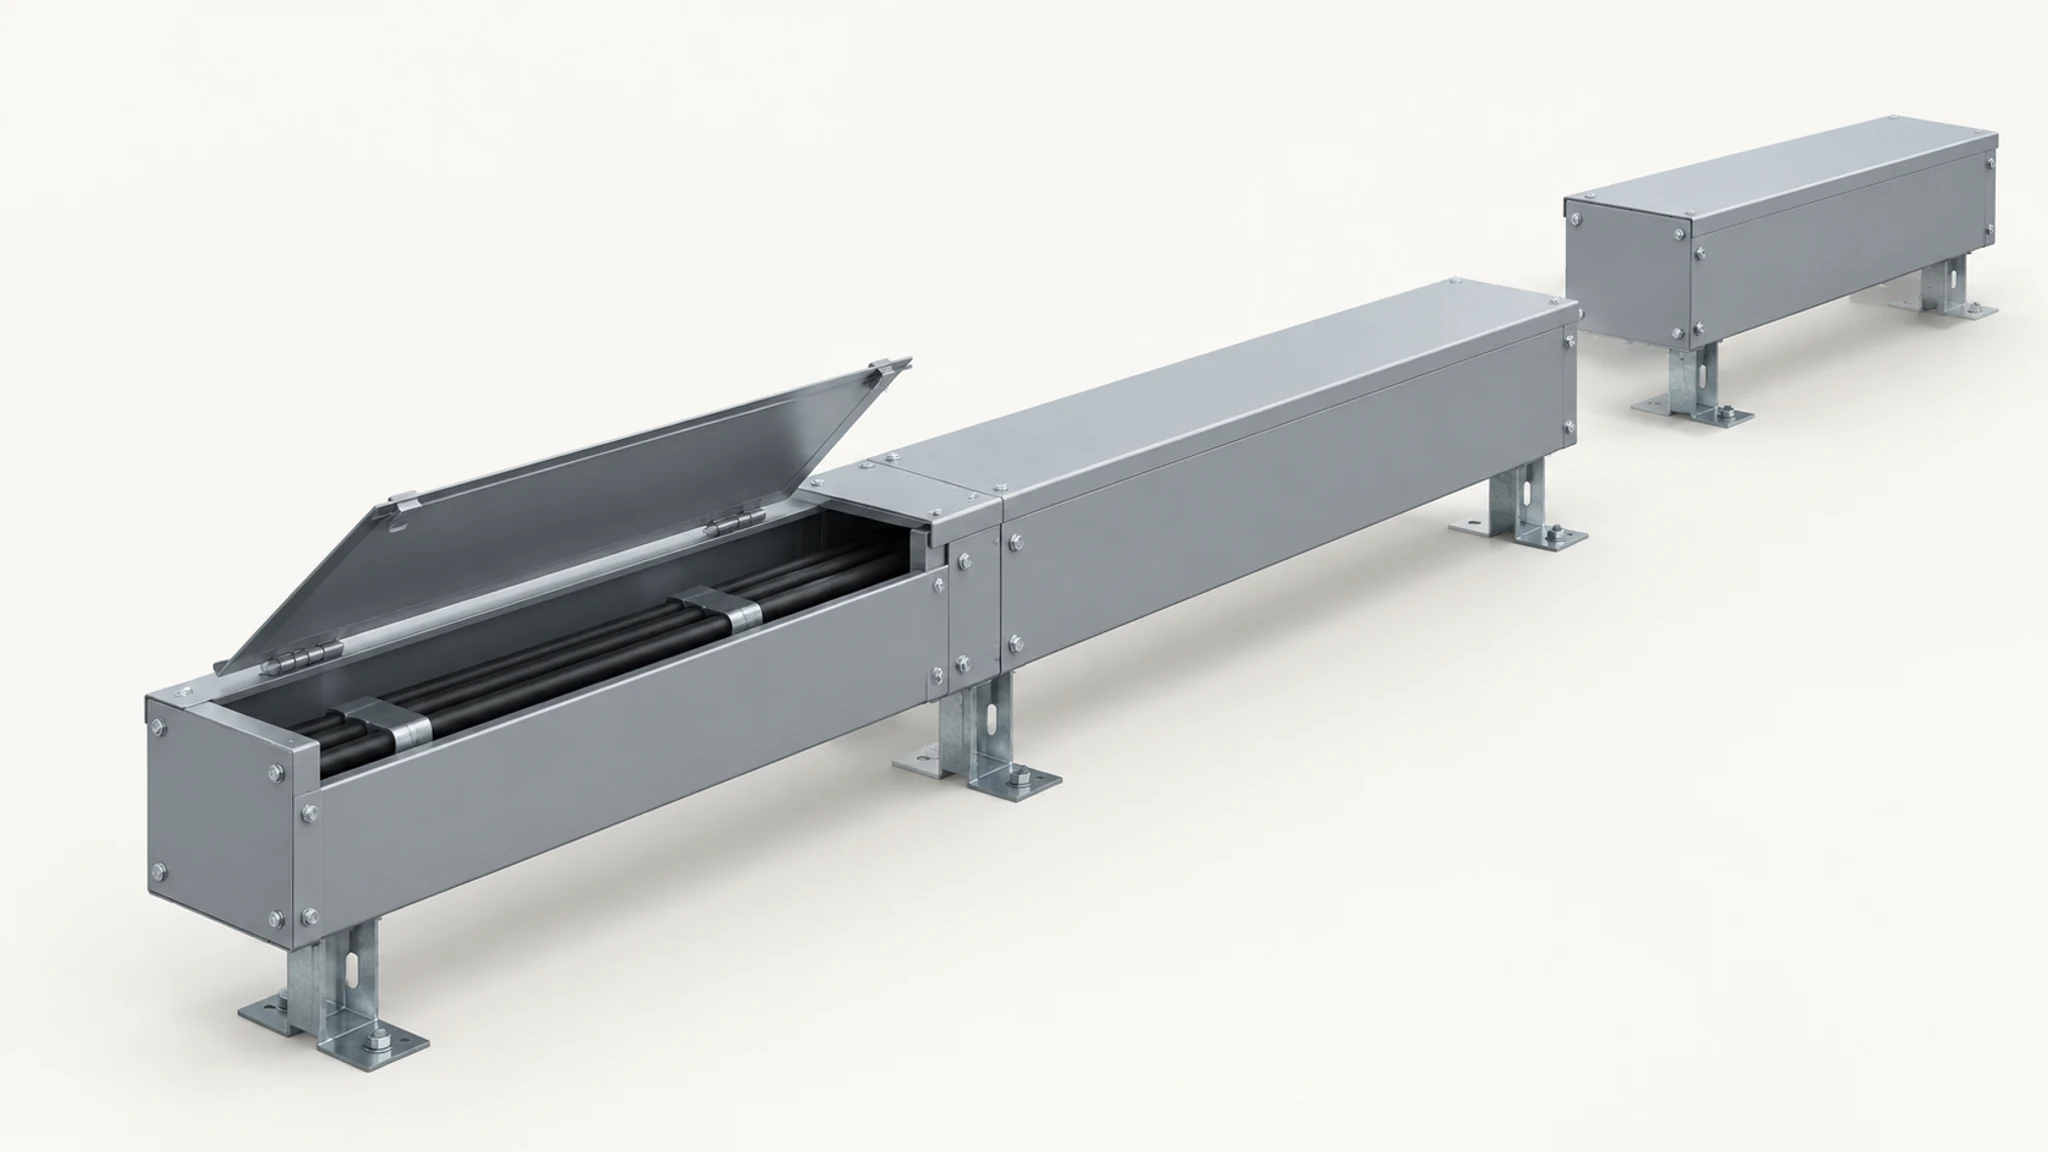
Choose the cable-installation method, cover and environmental protection separately. A hinged lid can appear on both lay-in and pull-through wireways, so an open-cover photograph does not tell you how the cables pass through the joints.
For your shortlist, first exclude products that do not meet the installation environment. Then work through cable installation, usable space, access and the complete parts list. Leave the price comparison until you have defined the same scope for each supplier.
What is the difference between a wireway and a trough?
Manufacturers use several names for these products. Hammond, for example, lists modular wireways, gutter troughs and wiring troughs as distinct families. The catalog name is a starting point, not a complete specification.

Keep the intended classification on the drawing and enquiry. UL 870 covers wireways, auxiliary gutters and associated fittings; that does not make the terms interchangeable for every installation. If your specification calls for an auxiliary gutter, have the proposed product identified against that requirement.
This guide concerns covered, independently installed wiring routes and troughs, rather than open cable trays or slotted duct inside a control panel.
Lay-in or pull-through: choose how you will install the cables
The difference is at the section ends and fittings, not simply at the lid.

| Design | How the cable enters | What to establish before ordering |
|---|---|---|
| Lay-in | Cables are placed through the open side of the sections and compatible fittings. | The planned route, including its joints, provides the required insertion path. |
| Pull-through | Cables pass through the openings in the section ends. | The cable assembly and installation method suit those openings and the route. |
Hammond’s 1485 lay-in system uses open-topped flanges and sealing plates installed after wiring. Its 1487 pull-through system has continuous end flanges, even though the covers are hinged.

If you expect to add pre-terminated cables, put lay-in construction first on your shortlist. Require the fitting drawings as well as the straight-section drawing. A route is only useful for your installation if the cable can enter every part it needs to pass through.
Pull-through remains an option when you can feed the cable through the route. For a pre-fitted connector, use the connector’s envelope in that assessment, not just the cable diameter.

Specify the exposure before the material
Write down what reaches the installation: rain, dust, cleaning water or a particular chemical. Then specify the required enclosure rating and material. The examples below show why the material name alone is insufficient.

Hammond’s C3RWT is a Type 3R outdoor trough with a drip-shield top and a removable, screw-secured front cover. Its 1486SS trough uses 304 stainless steel, a gasketed hinged cover and screw clamps, with Type 4X among its stated ratings. These are different constructions, not simply two finishes on the same product.
For chemical cleaning, include the cleaning agent, concentration, temperature and frequency in the enquiry. Request compatibility information for the gasket and entry components as well as the metal body. A response that names only the steel grade leaves those components unresolved.

Size the entry and the bend, not just the straight run
Start with the conductor schedule. nVent’s wireway selection guide takes conductor quantity, size and type as sizing inputs before moving to environmental requirements and component selection.
For the layout review, prepare three views:
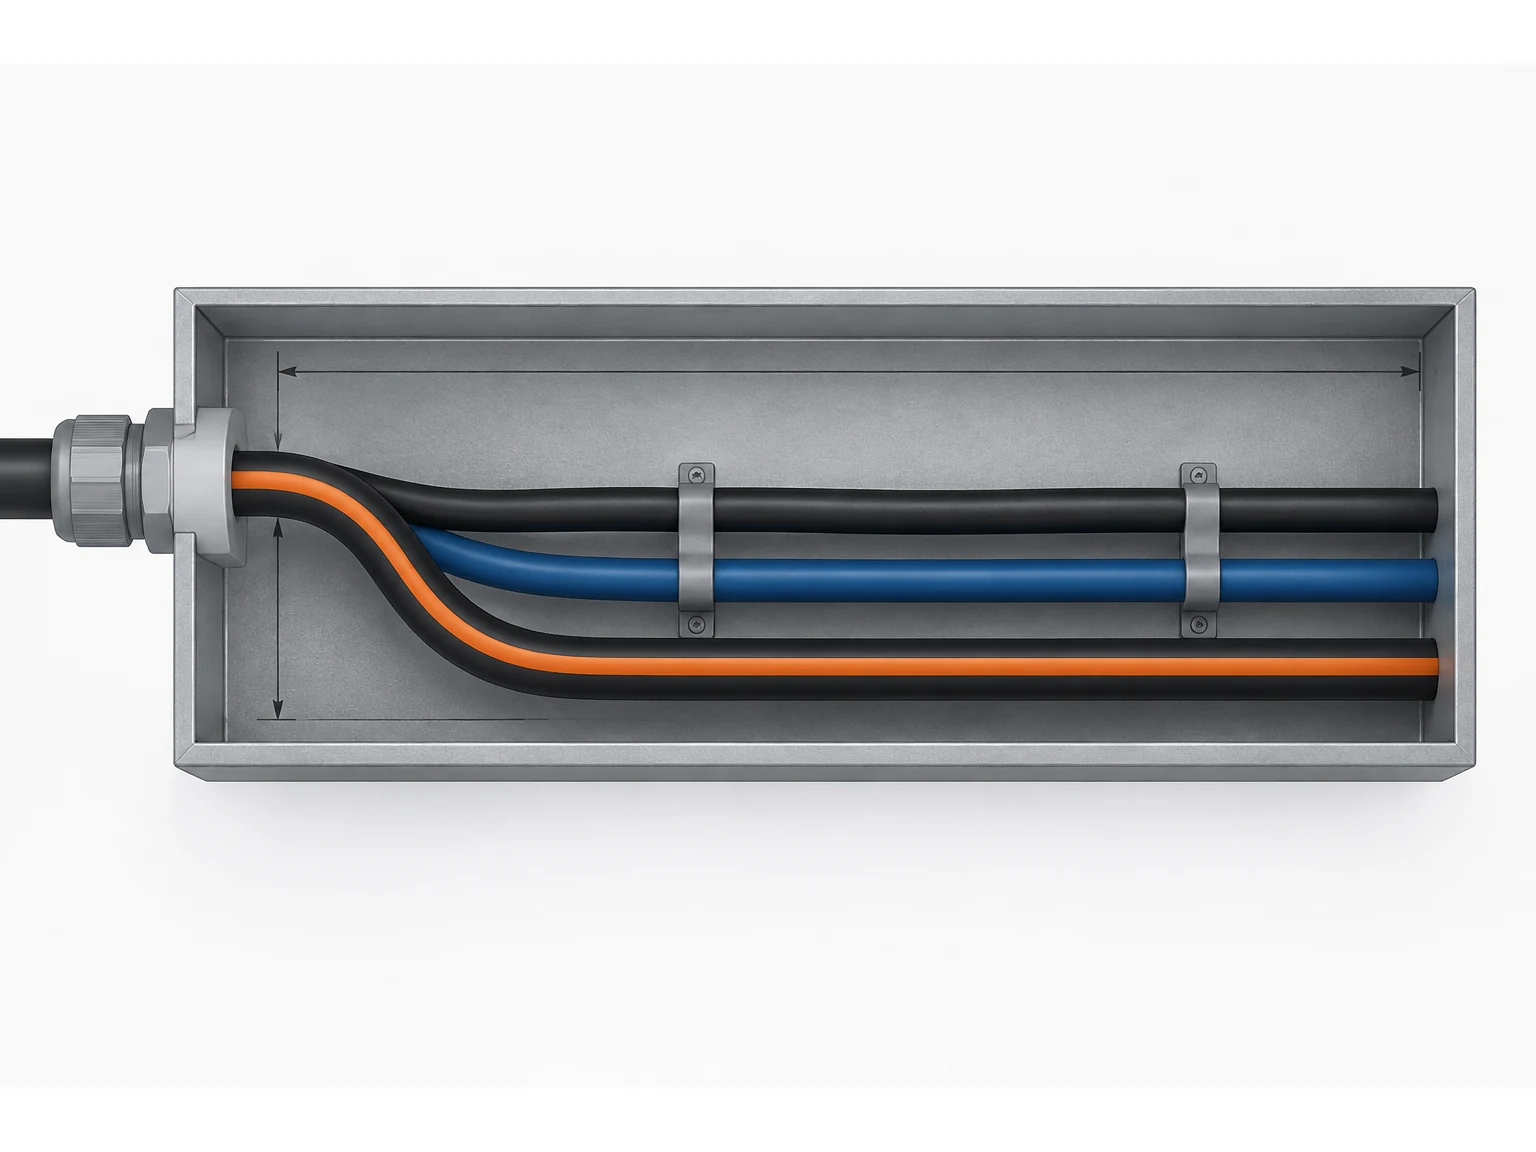
- Route plan: equipment connections, changes of direction and cable-entry locations.
- Cross-section: usable interior space after fittings, partitions and planned connections are included.
- Entry detail: the cable’s turn into the route, including connector hardware and the cable manufacturer’s bending requirement.
The entry detail deserves its own drawing. A cable entering from the side may need space to turn before it can follow the trough. Showing that turn makes the constraint visible instead of leaving it to the installer.
At the equipment connection, also check wiring space in the enclosure layout before finalizing the entry position.
Have the electrical designer record the applicable product classification, code edition, permitted fill, bending-space requirements and any ampacity adjustments. If future circuits are planned, add them to the schedule rather than inserting an unexplained spare-capacity percentage.
Choose a cover for the access you actually have
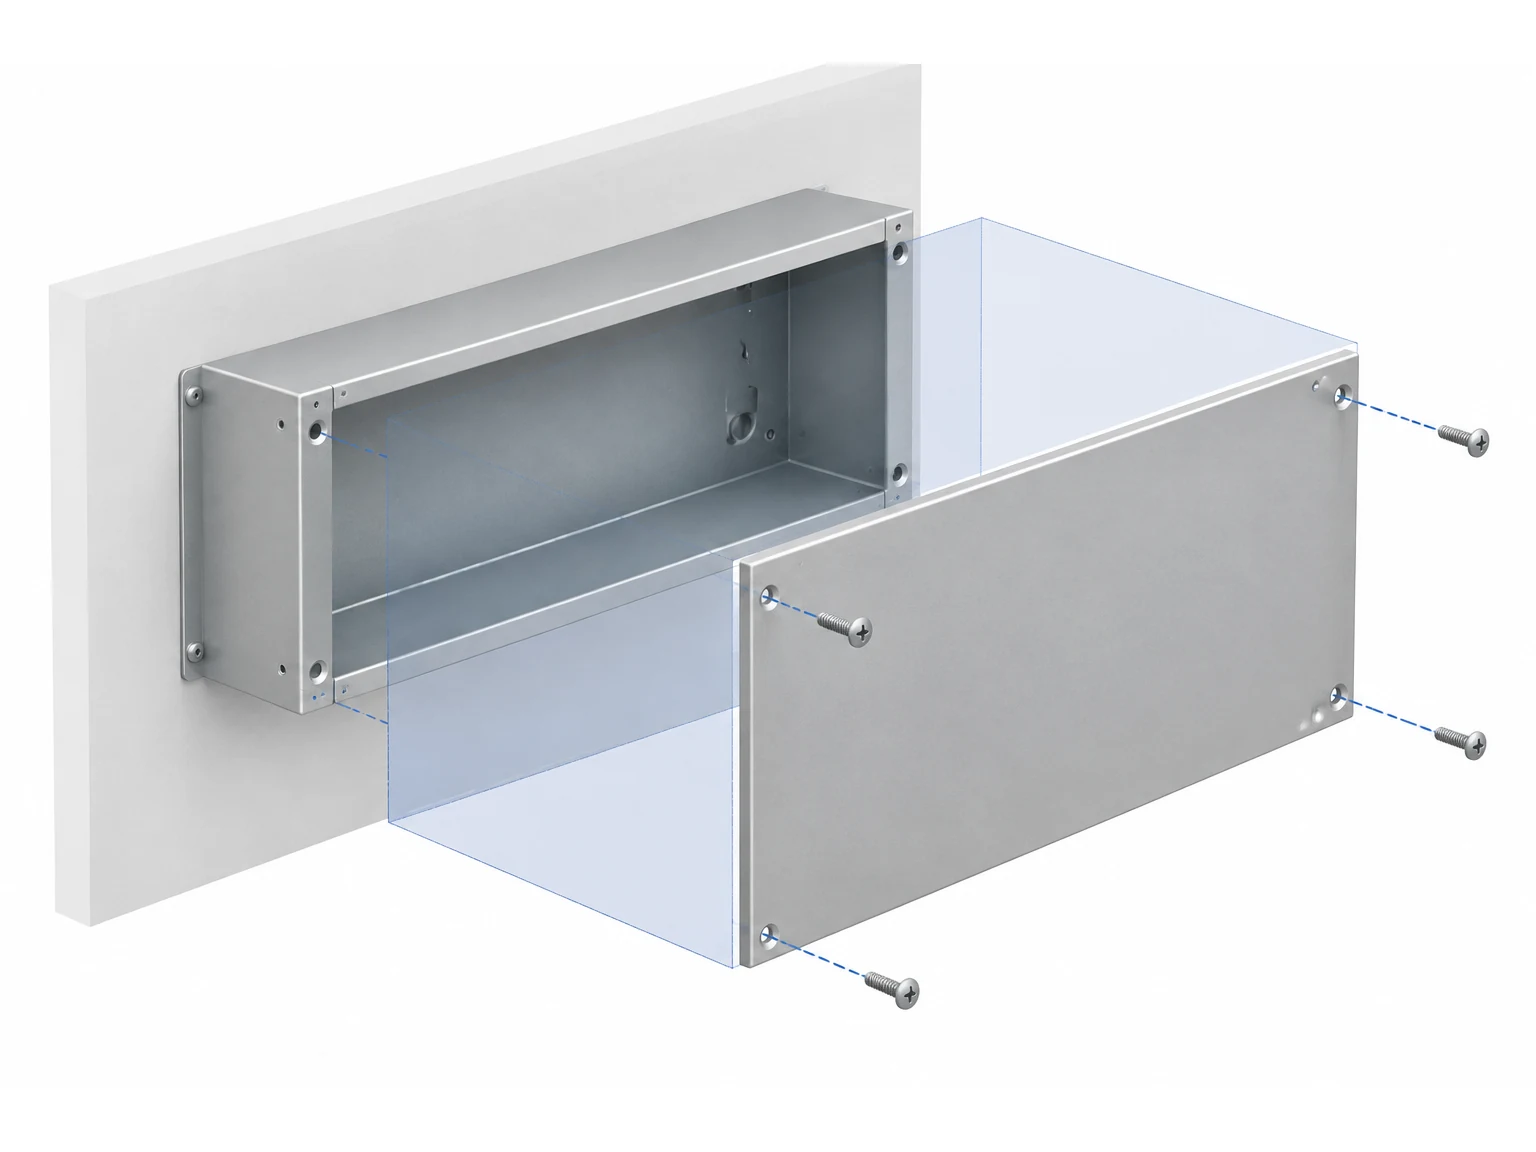
For repeated access, shortlist a hinged cover where the mounting position leaves room to open it. For occasional access, consider a removable screw cover. Compare the fastening details too: Hammond’s 1487 hinged covers use screw clamps, so hinged does not automatically mean tool-free.

On the installation drawing, show the cover in its service position. Include room to operate the fasteners, not just the clearance needed to move the panel. This is a layout review to complete before fixing the mounting position.
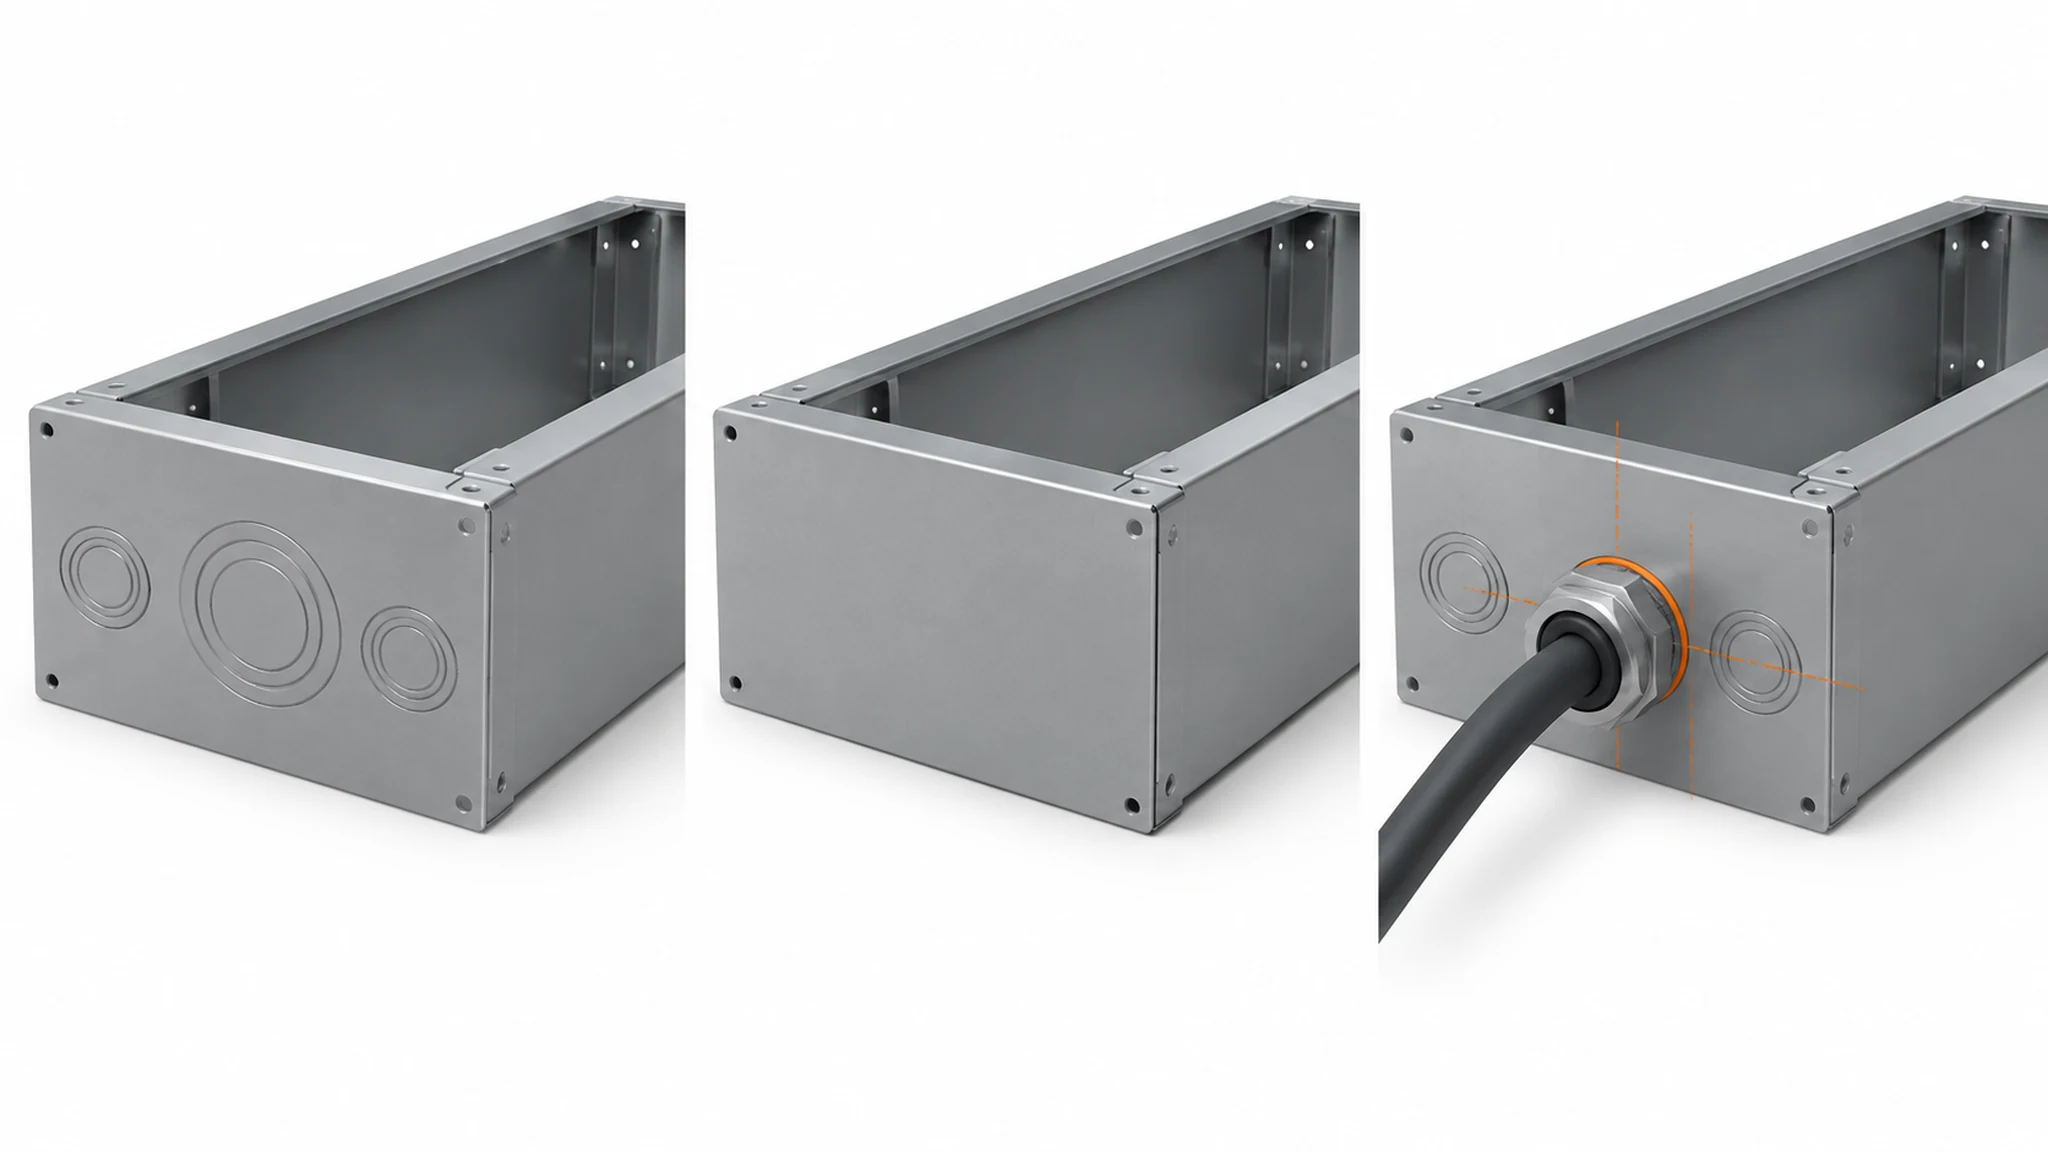
Decide the entry arrangement at the same stage. Hammond’s CW series offers versions with and without knockouts. Use the knockout drawing to establish whether the existing positions suit the connections; specify a plain-wall version when the project needs a separately defined opening layout.
Compare the complete route, not the price of one section
Build the quotation around a bill of materials. nVent’s selection workflow includes straight lengths, fittings and hangers before generating the final parts list.
Use that list to request an explicit supply scope:
- Straight sections and directional fittings.
- Joiners, end closures and equipment connectors.
- Mounting hardware, sealing parts and the specified bonding provisions.
- Factory openings, cut lengths and any assembly work included in the price.
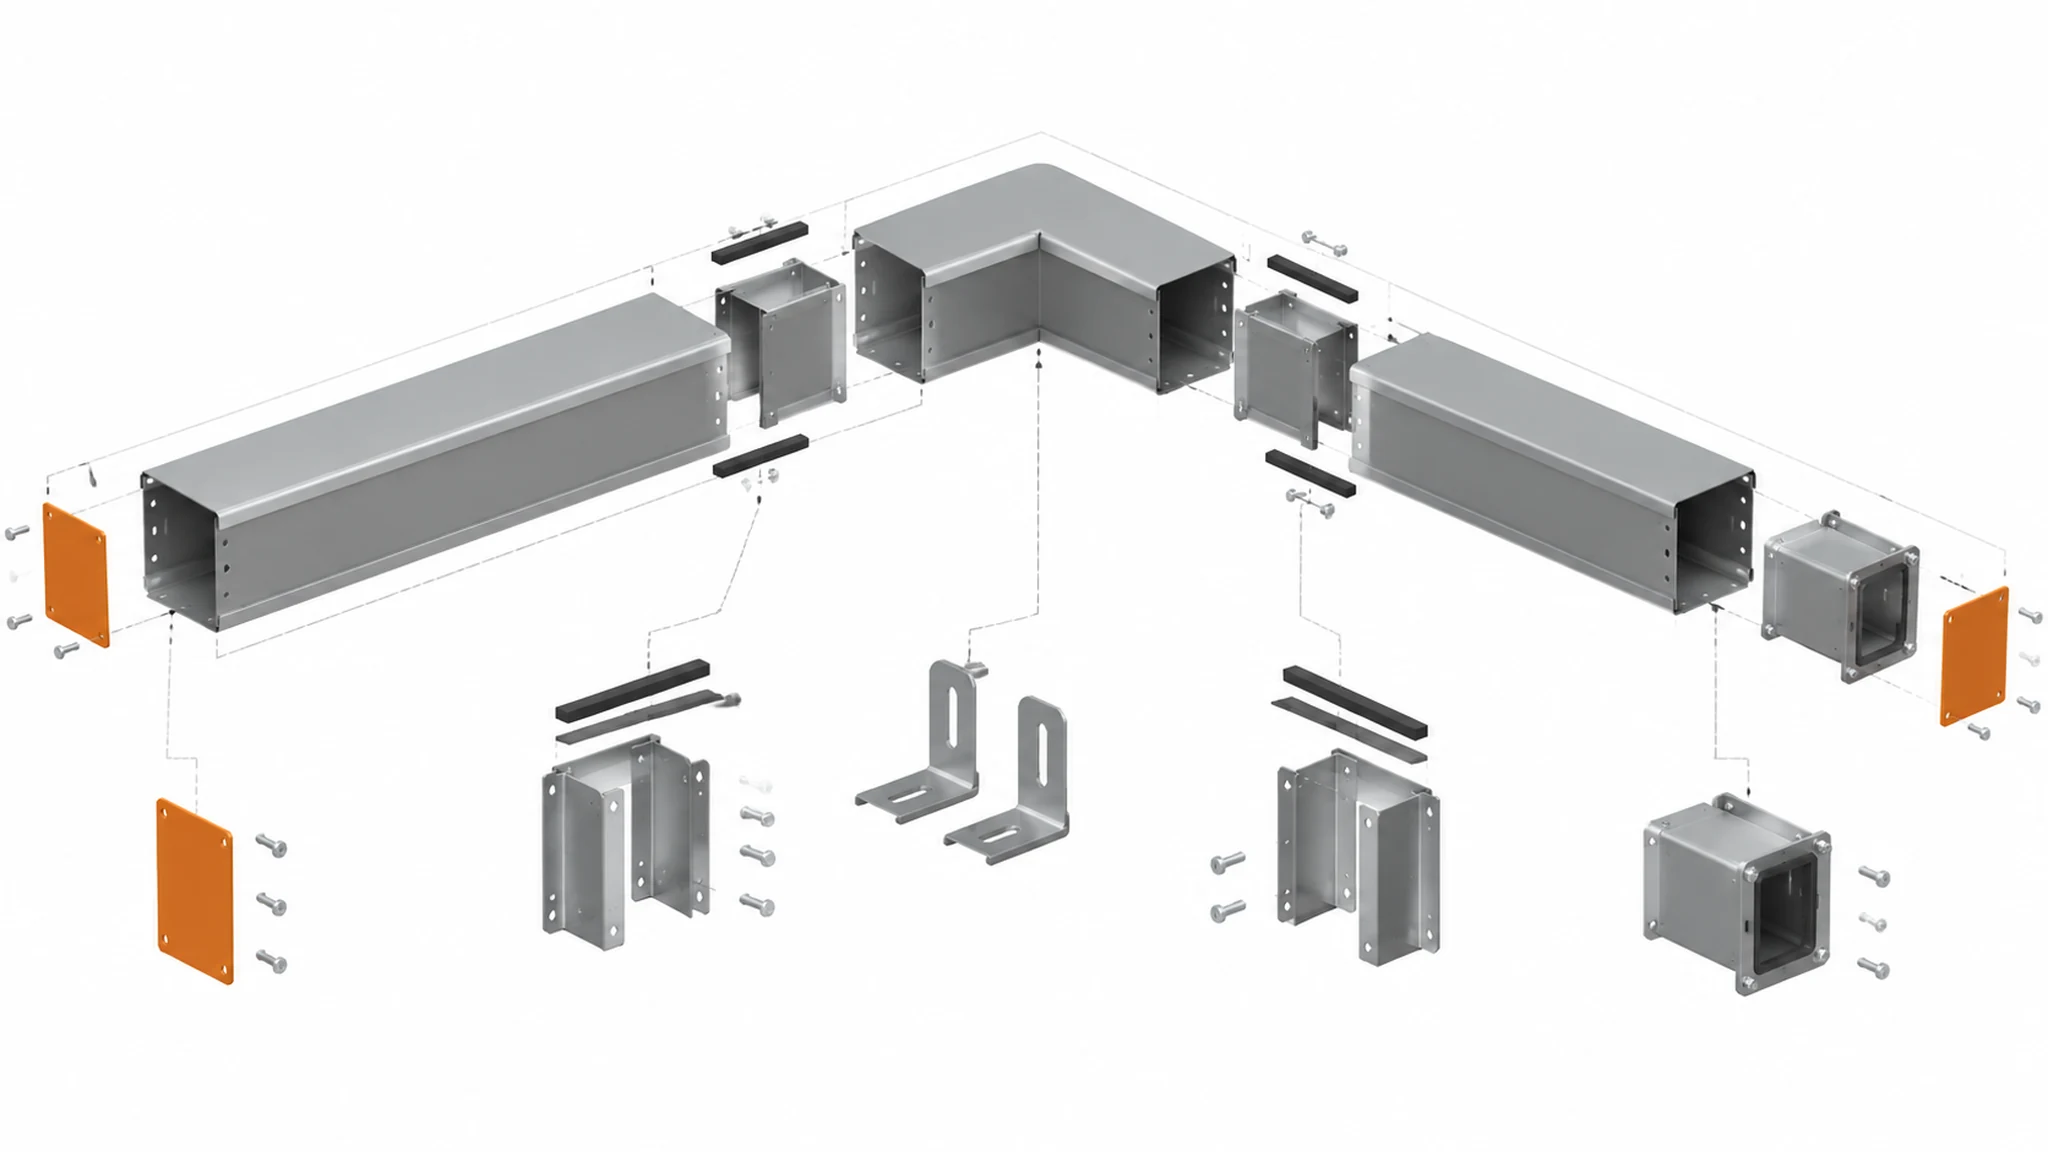
Do not assume connection hardware arrives with the straight sections. Hammond’s CW page states that joiners for hinged-cover straight sections are ordered separately, following its change effective May 4, 2026.
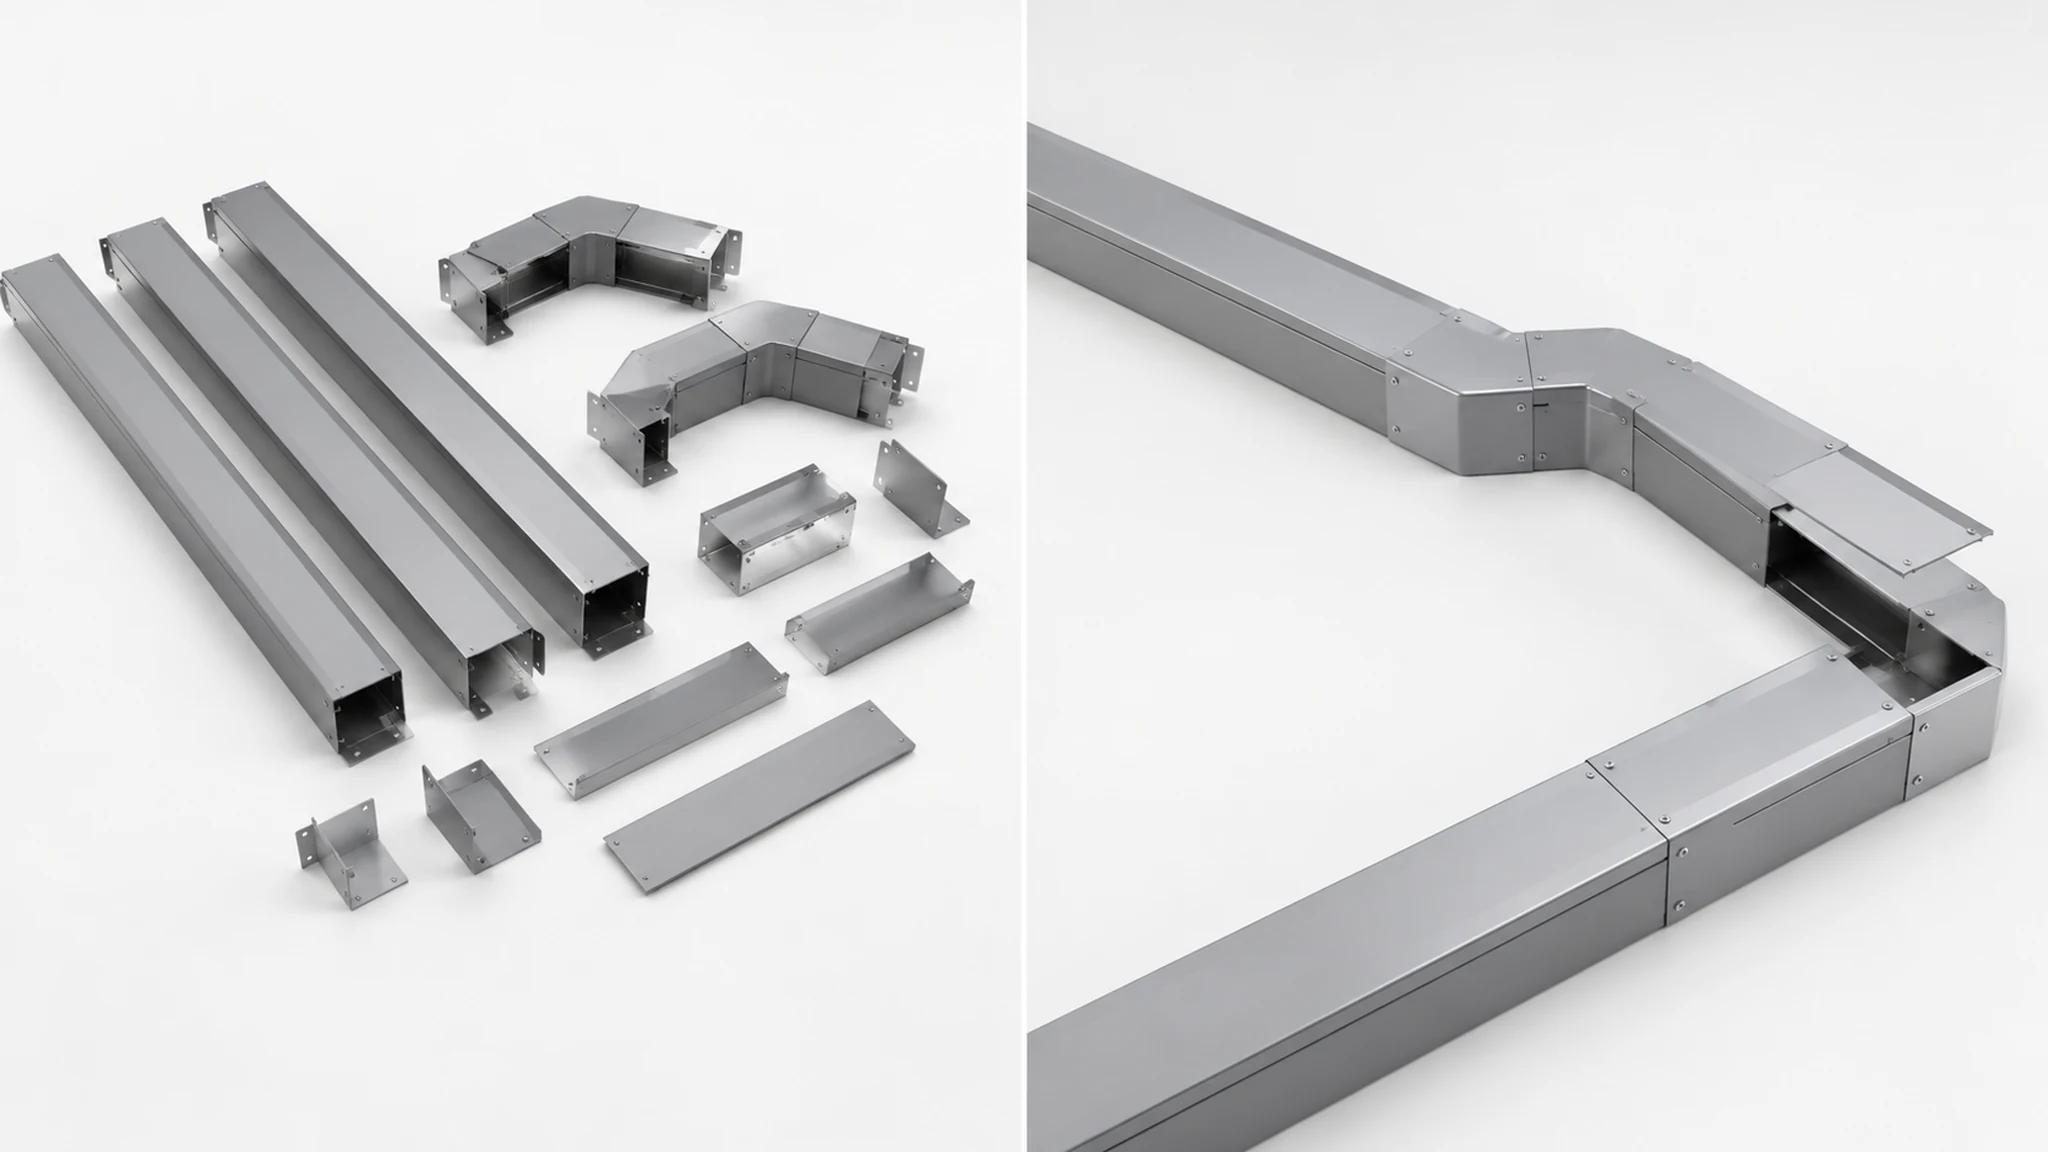
If one offer is for loose components and another includes prepared sections, separate those scopes before choosing. Have each supplier identify the cutting, opening and assembly work left to your team. Compare the quoted package and the work still required to install it.
What to send with your enquiry
Use one enquiry pack for all suppliers:
- A dimensioned layout, including the enclosure interfaces and mounting arrangement.
- The conductor schedule and any pre-fitted connector dimensions.
- The installation exposure, required rating and project documentation requirements.
- The chosen installation method, cover arrangement and opening details.
- Quantity and delivery scope: loose parts, prepared sections or an assembled route.
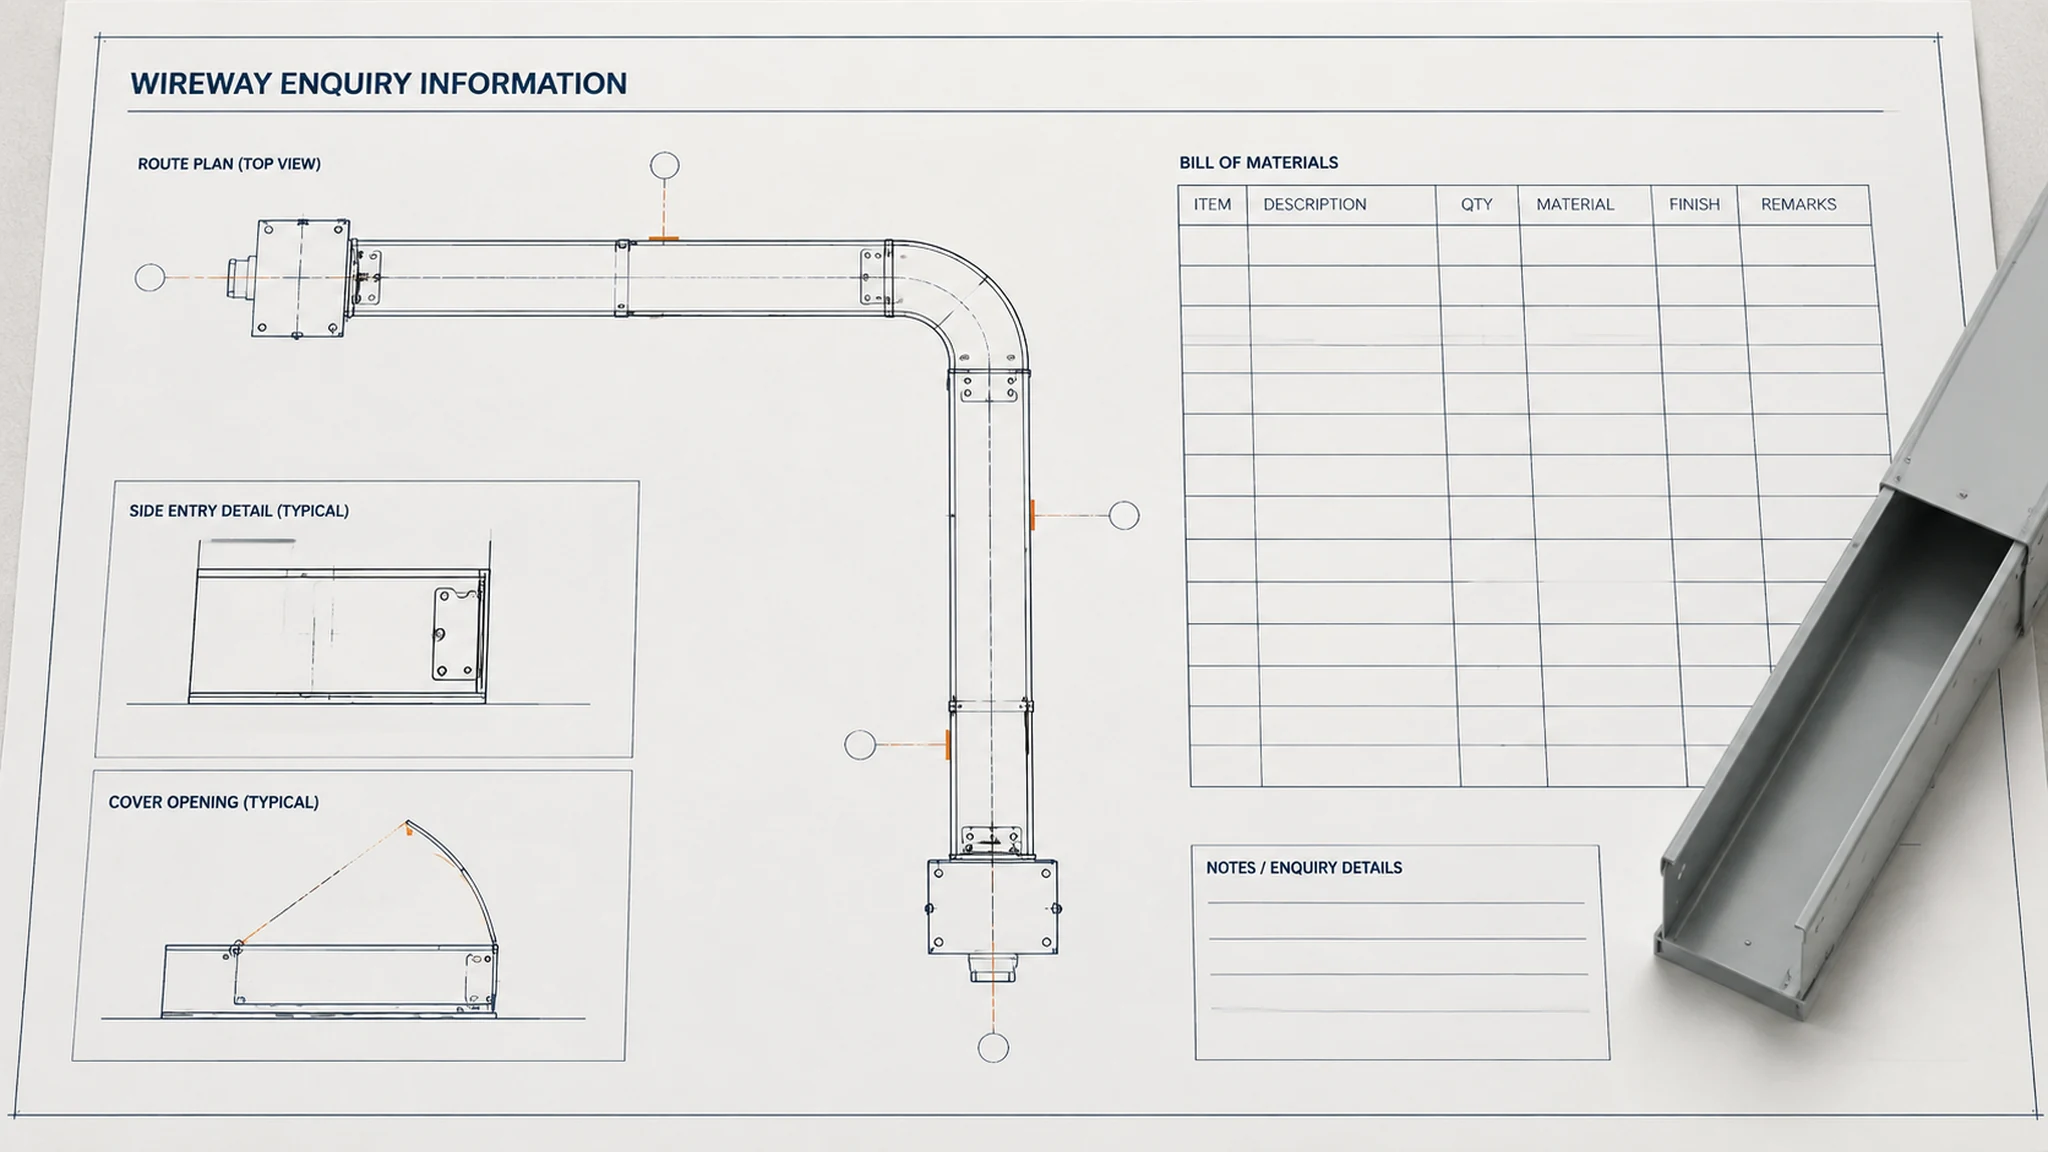
Request a drawing and itemized quotation against that pack. Make substitutions and exclusions visible before you approve the order.
If the project also needs a custom enclosure at the equipment connection, review FN’s custom electrical enclosure options and send the enclosure dimensions, entry drawing, environment and quantity with your enquiry. Resolve the interface before the enclosure openings are finalized.